

What is Picture Style?
On most Canon cameras there is a setting called picture style, which I introduced in my Photography Challenge: Manual Mastery as one of the settings you can change in manual mode.
But what does picture style actually do?
There are several different options and each option has a different effect on your images. Moreover you have the option of creating your own picture styles by adjusting the different values.
So with this article I was just going to give a summary of each setting and what they do to your images.
Though remember that picture styles are not imported with RAW files, they are only applicable to JPEG files and on the screen on the back of the camera.
The different picture style profiles affect 4 different settings: Sharpness, Contrast, Saturation and Picture Tone.
Each profile has these different settings at different values giving a different look and feel to each image. If you are shooting in RAW you will need to adjust settings when editing anyway.
So let’s look at each setting that is currently available to canon cameras and how that changes the pictures.
The Set Profiles
All of the set picture style profiles mainly affect one setting, which is the Sharpening.
If you look at the values you will notice that Sharpening is the only setting that goes from 0 to 7 as the maximum. Whereas the other settings of contrast saturation and colour tone have a value range of -4 to 0 to +4.
The different profiles mainly change the setting of Sharpening increasing it to show the definition of your image, which is really useful in the field!
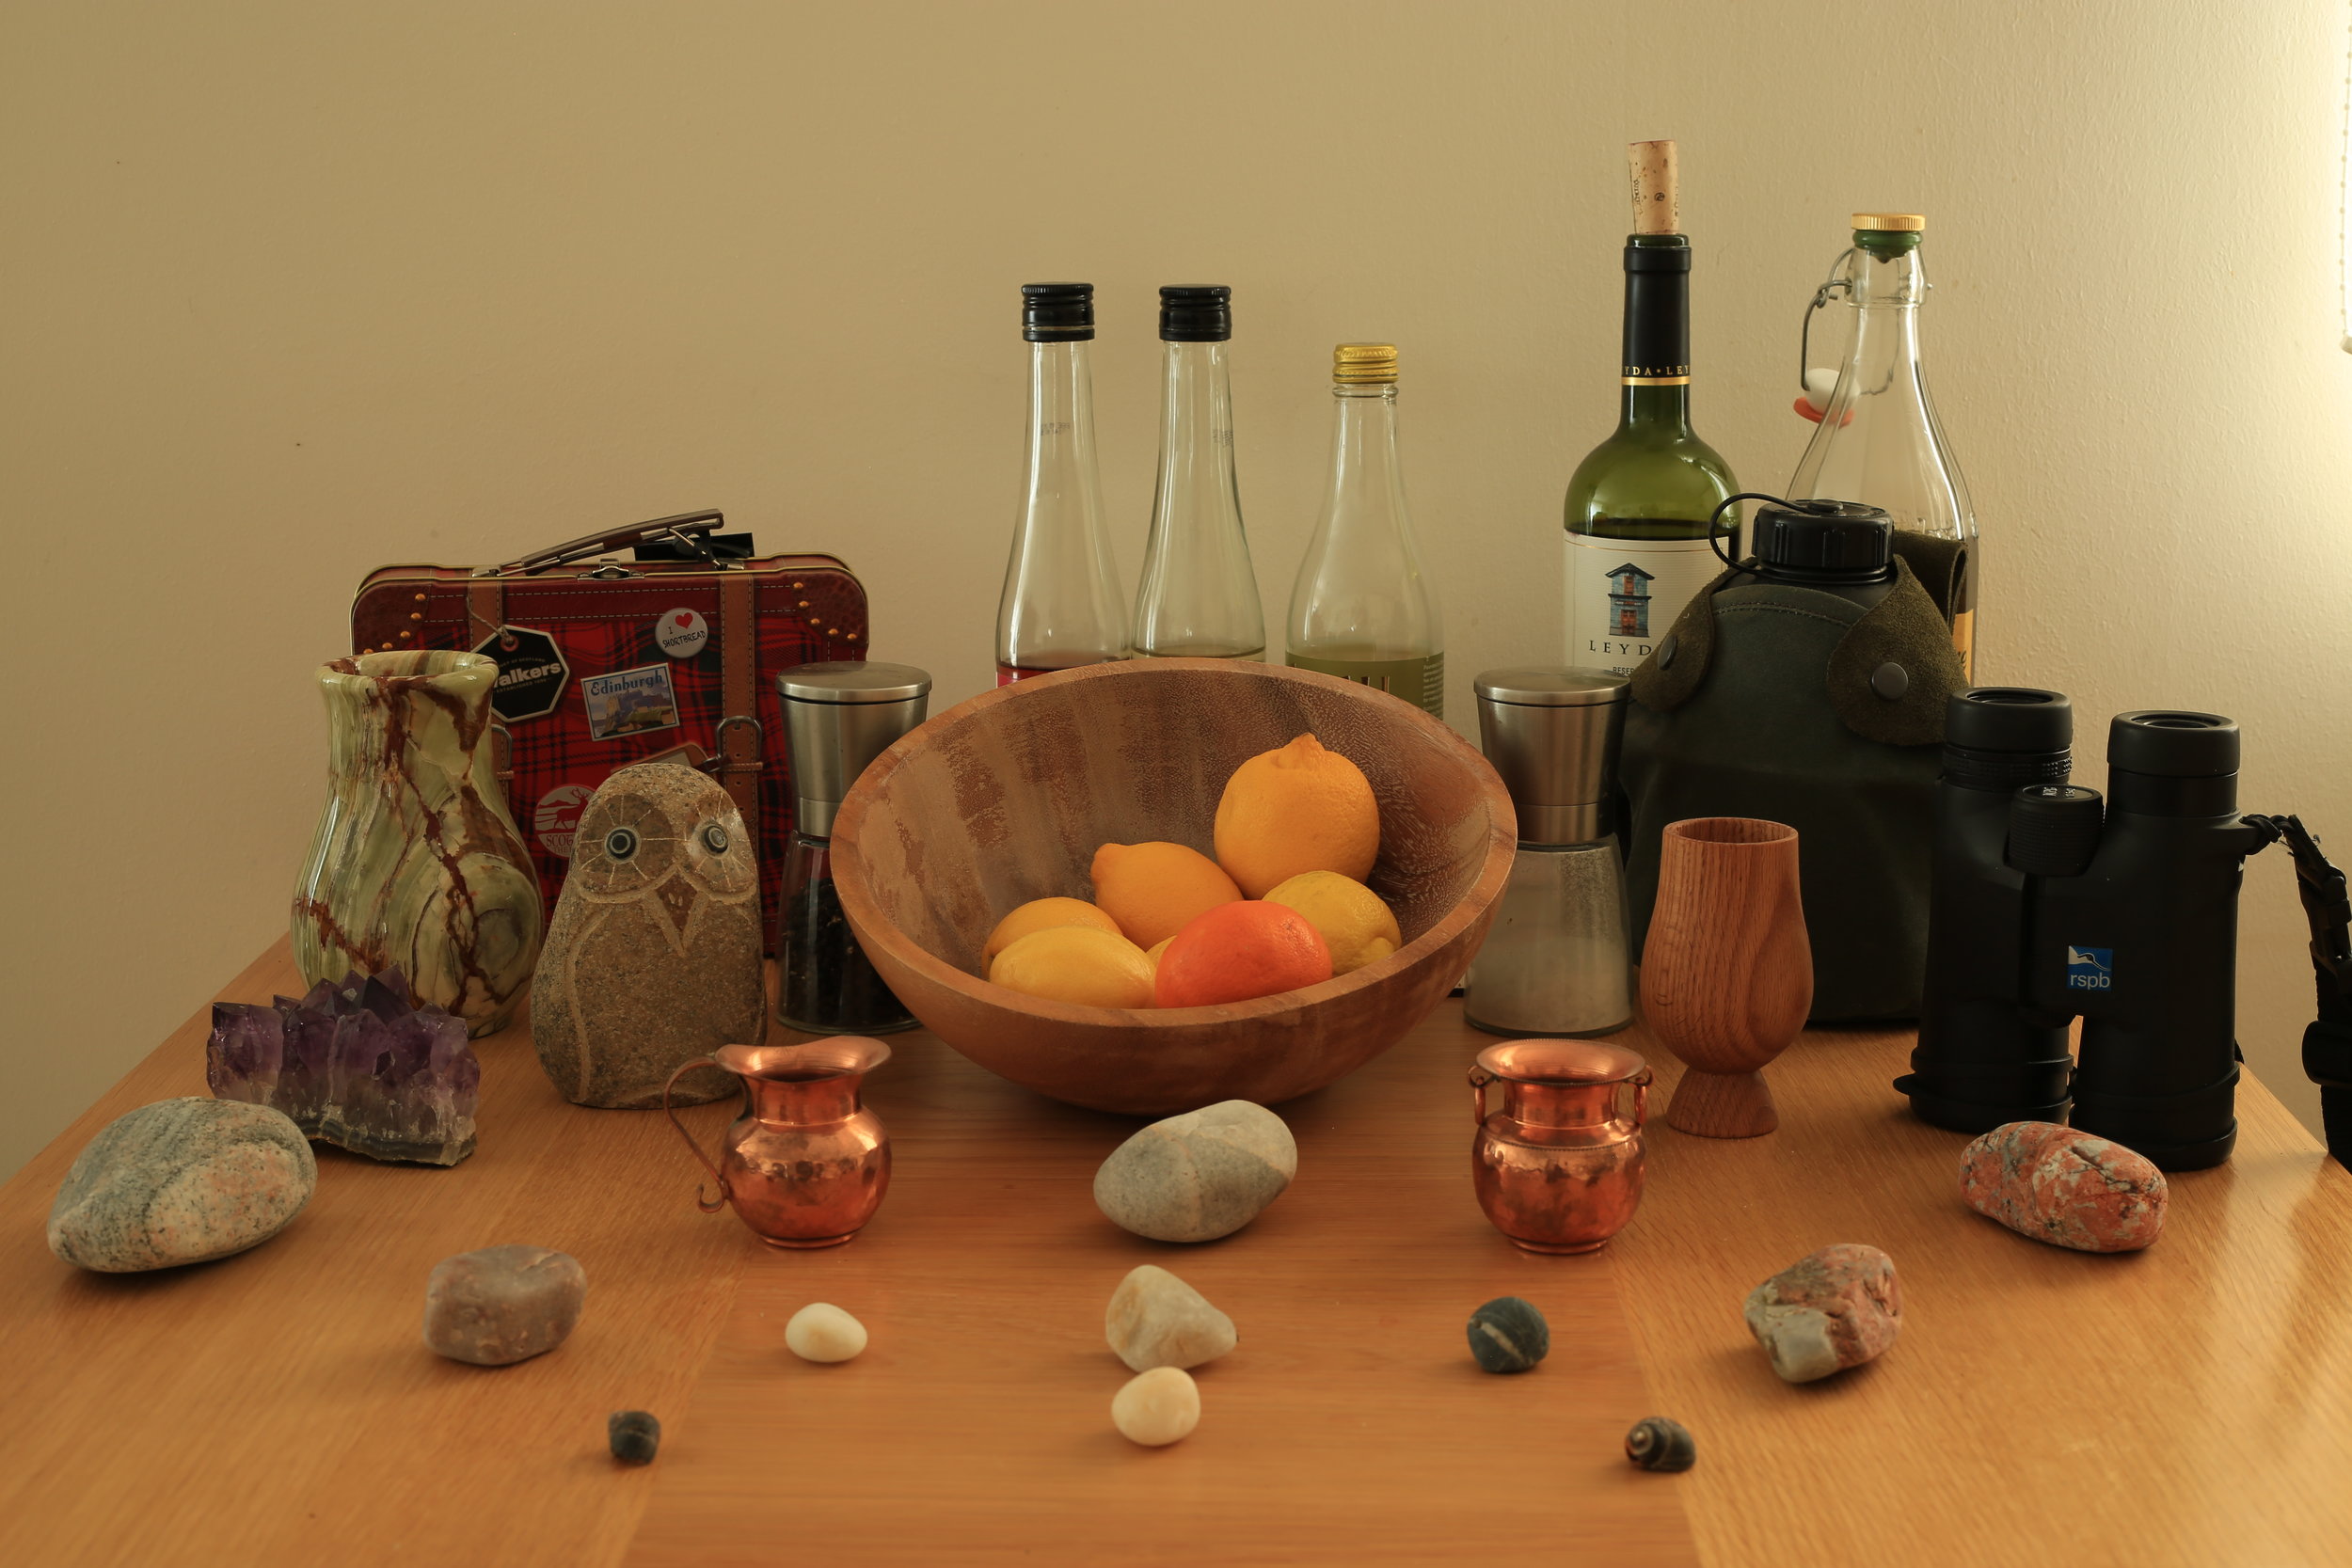
The Standard picture style applies a small amount of sharpening to your image, increasing the value from 0 to 3, which means that in Standard the setting has increased about half way and you can see how ‘sharp’ or clean or defined your images are a lot easier than if it was set to 0 While the other settings of contrast, saturation and colour tone stay at 0.
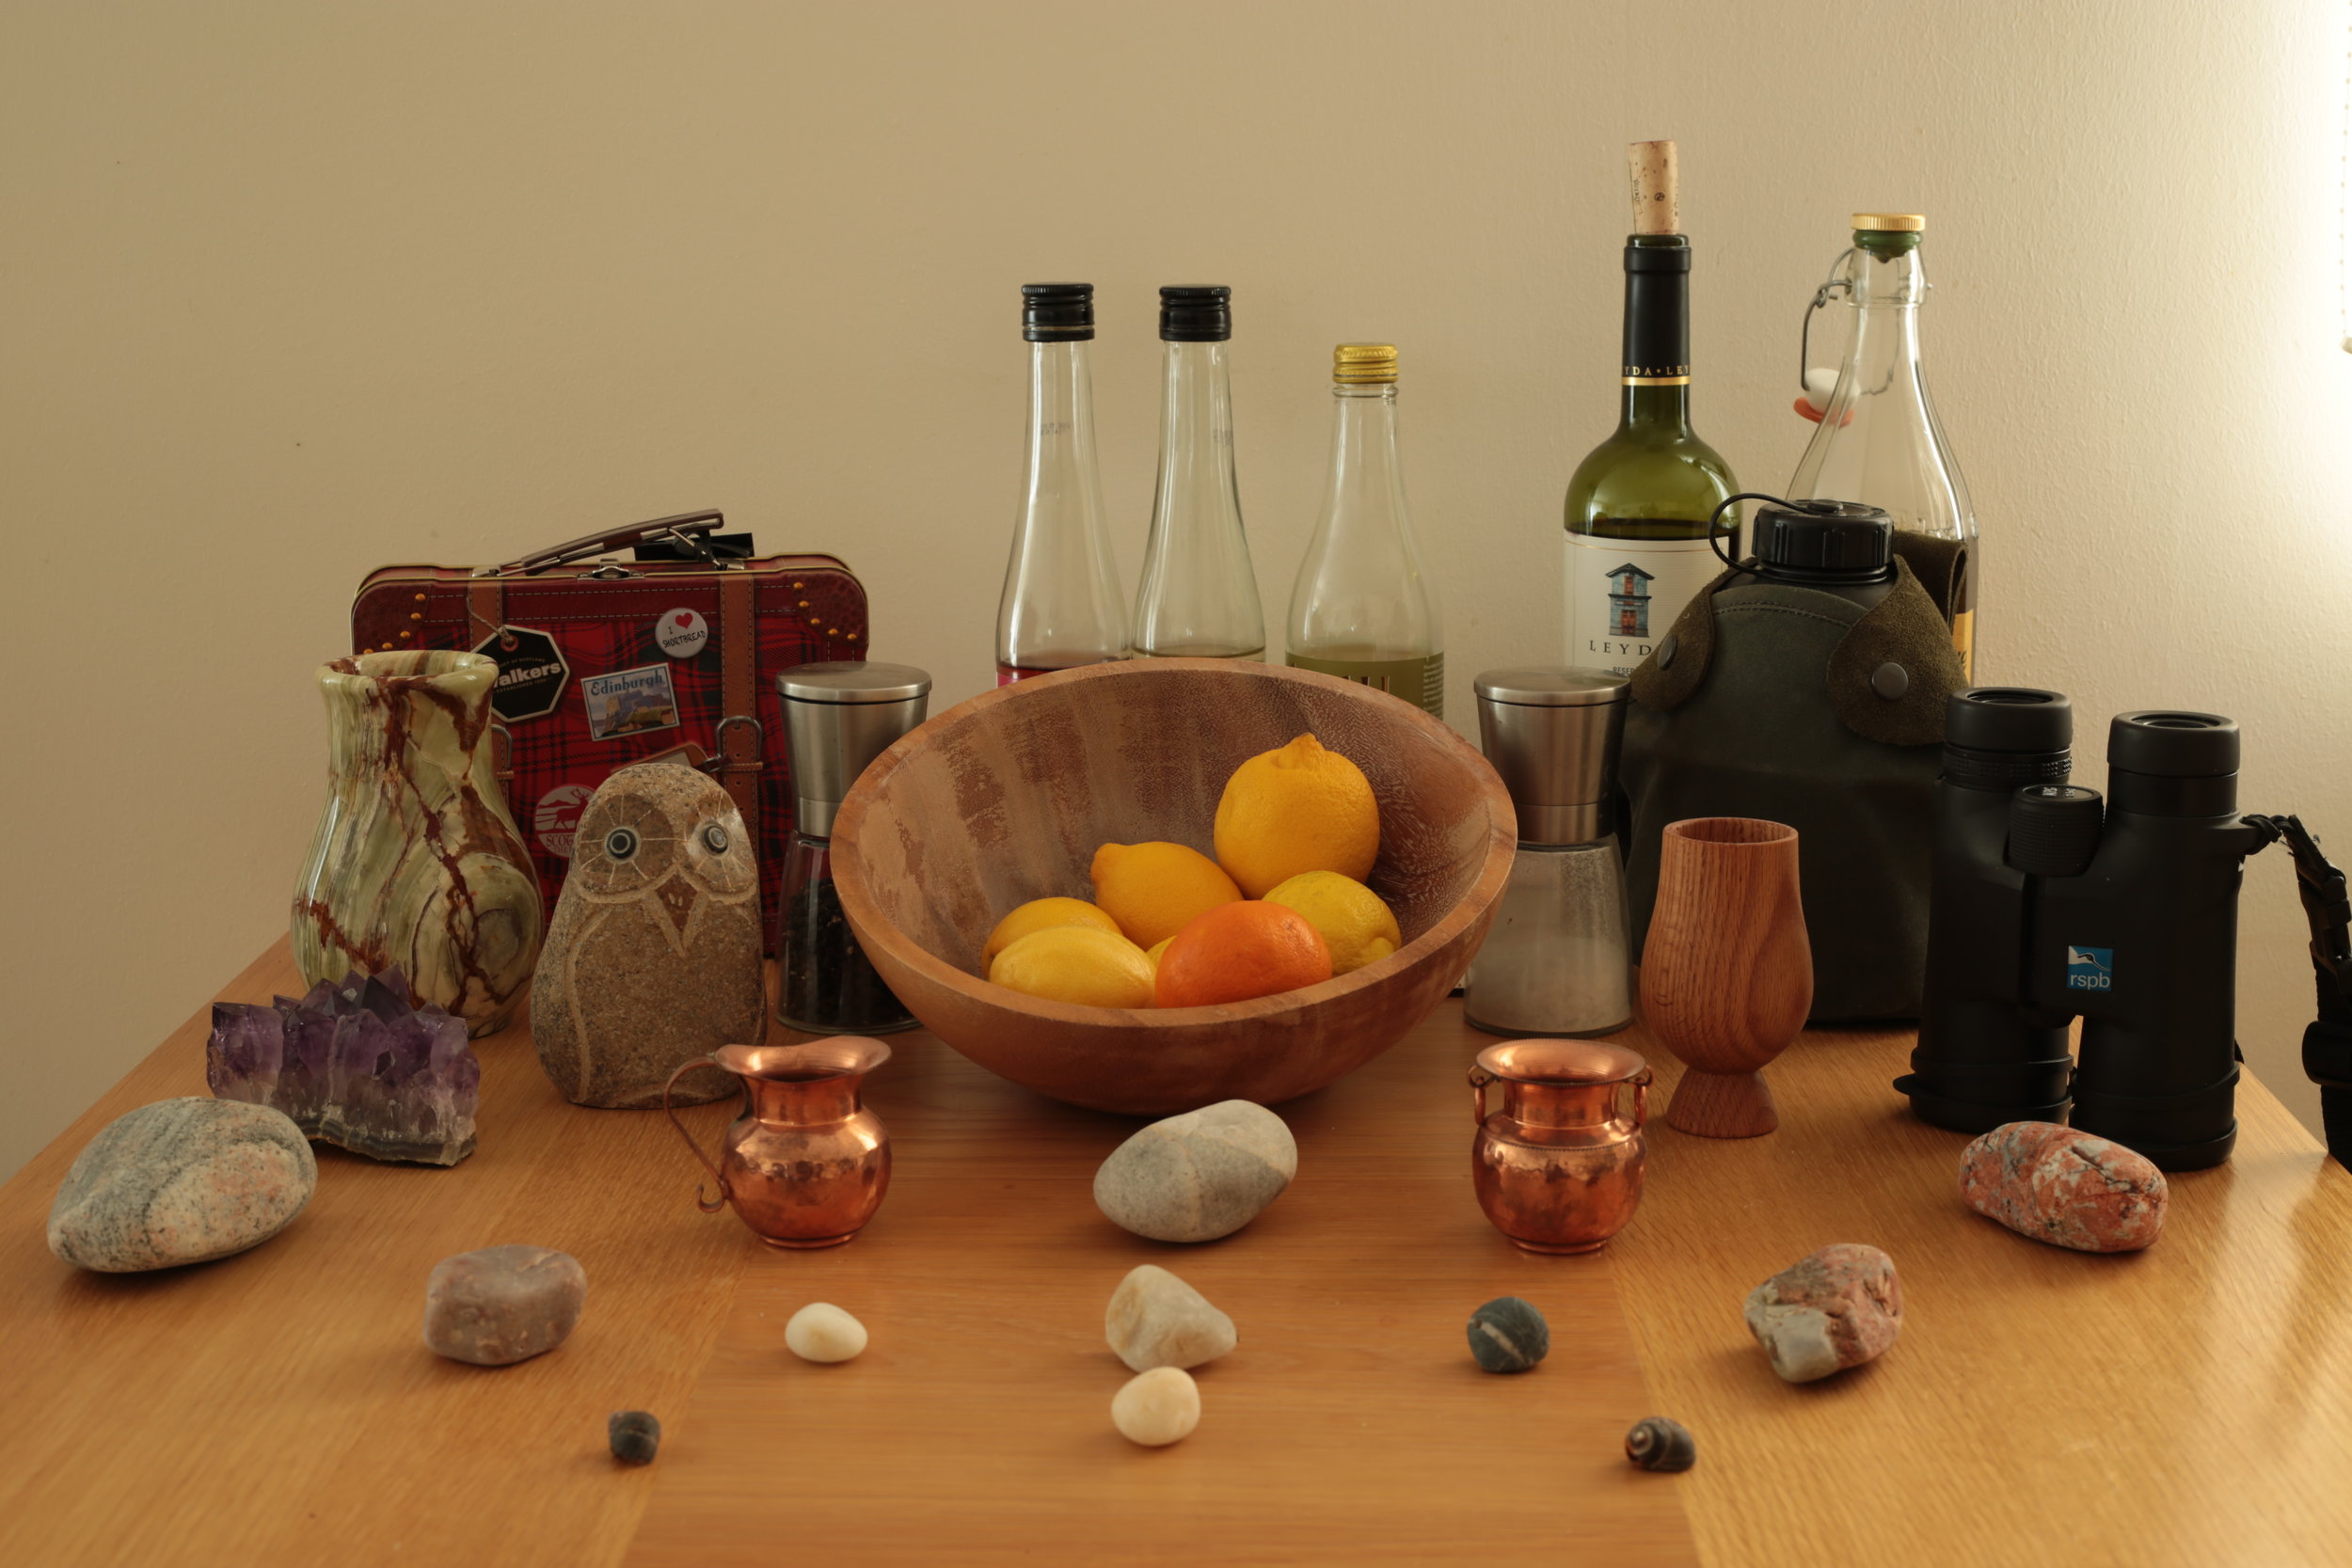
The Portrait picture style only increases the sharpening to 2, so it is a bit softer than the Standard picture style but otherwise the other settings are also set to 0 just like the Standard setting.
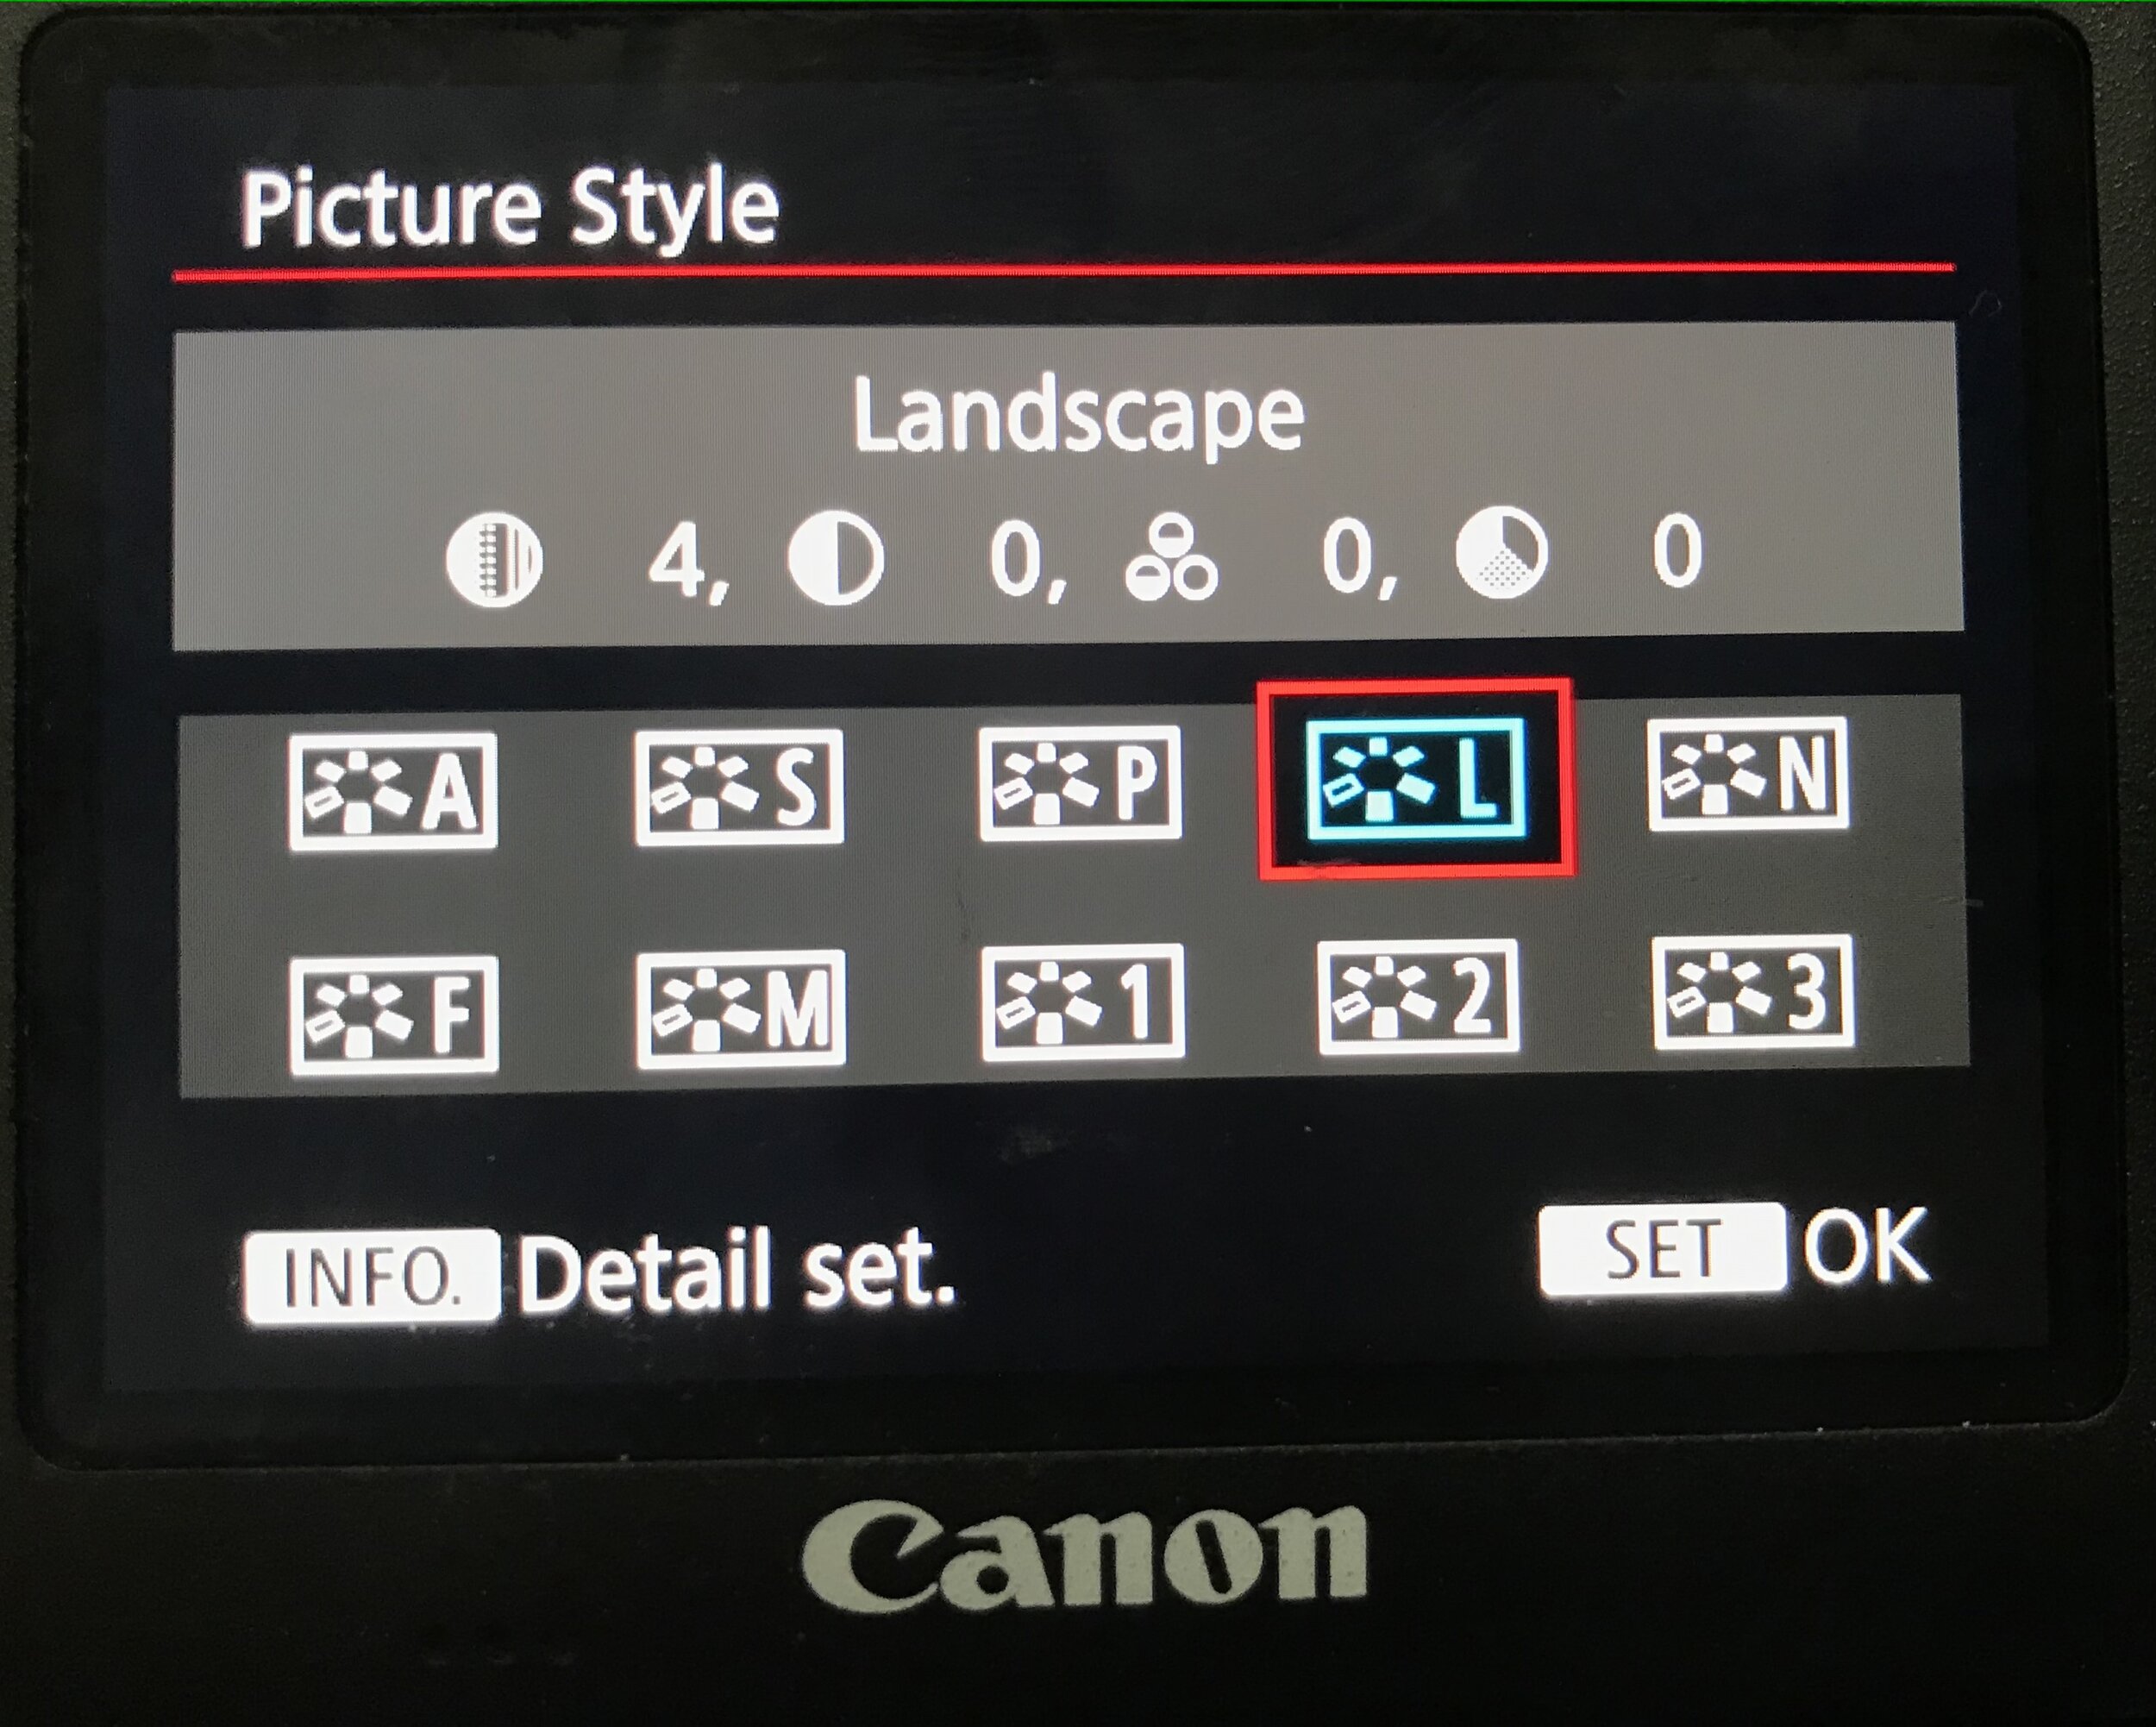
The Landscape picture style is even sharper than the Standard setting increasing the value to 4.
But on the other hand the Neutral and Faithful picture styles both have the Sharpening set to 0.
So with all of these picture styles the other settings of Contrast, Saturation and Colour Tone have not changed from 0.
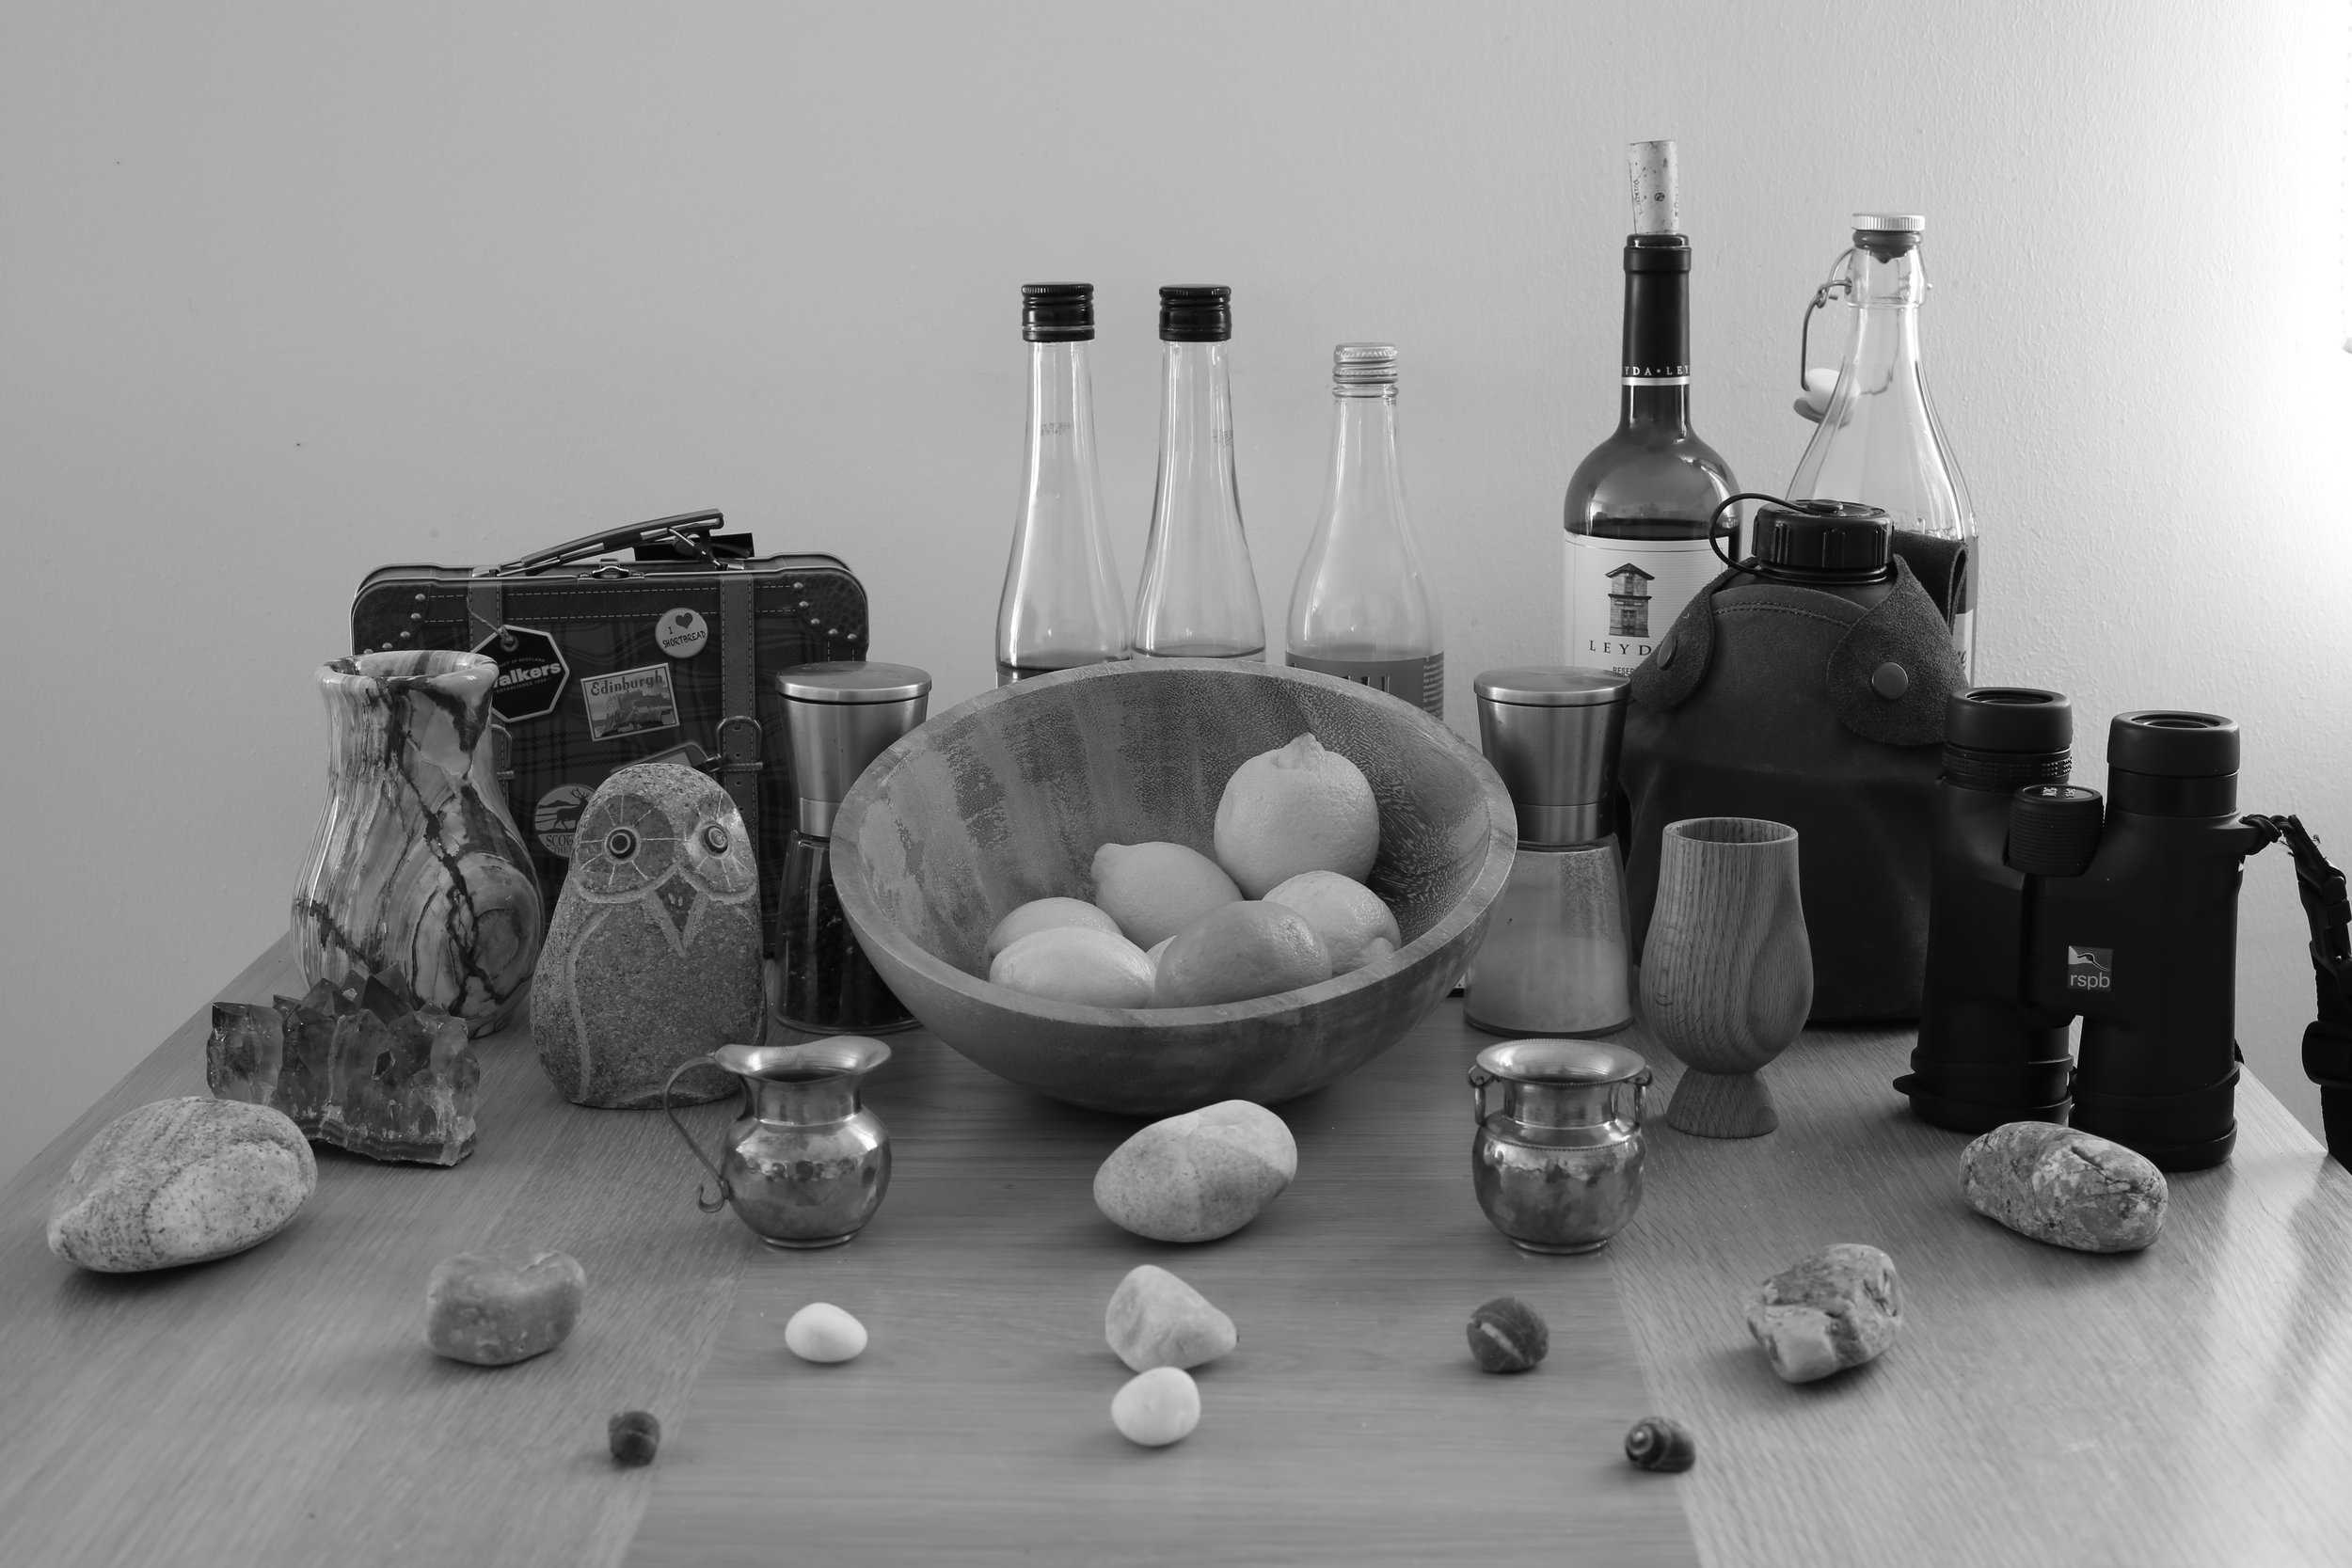
The last profile that my cameras contain is Monochrome picture style, and as you might be able to guess, this setting converts your images to Black and White.
Now remember what I said at the beginning, if you are shooting in RAW then although your pictures on the back of the camera will look black and white, when you actually import them to the computer they will in fact revert to colour!
You then will have to convert your colour images to black and white and adjust the image as you see fit! As well as converting your JPEG preview black and white, this setting also increases the Sharpening to 3 like the Standard setting.

The New Set Profiles
Beyond these profiles, newer cameras come with even more picture style options that will impact your images a lot more than these few. I have no first hand experience of these profiles, but the descriptions sound interesting. For example:
Nostalgia - changes the colour tone to have an overall sepia or amber tone and desaturated blues and greens
Clear - increases the contrast to provide more depth
Twilight - “gives a magical finish to the image” (I have no idea what that means!)
Emerald - produces bright and vivid aerial images (I imagine that it increases the saturation of greens, given the name, but otherwise I don’t know how it could apply only to aerial photos)
Autumn Hues - emphasises reds and browns (probably by increasing the red saturation)
Studio Portrait - expresses translucent skin in smooth tones (I have no idea what that means or what it could possibly be doing to your images)
Snapshot Portrait - reproduces translucent skin with good contrast indoors or out (again another one I’m not sure what this means or does)
These new settings are a bit of a mystery to me, as I have no hands on experience to understand what these descriptions actually do to your images and I can’t see what values have been changed.
If you have them on your camera, take some test shots and see what they do and then if you like you can let me know!

User Defined
Although you may not have access to these new picture styles (like me,) you may be able to recreate the idea behind them by using the User Defined profiles.
My cameras have 3 programmable profiles for which I can adjust the Sharpening, Contrast, Saturation and Colour Tone as I see fit.
As well as these 3 you can adjust the values on the set profiles to see how they look by increasing Contrast or Saturation.
The ability to adjust these settings on scene can be useful to inform your editing later. You will know whether you will want to adjust the contrast or saturation or even convert it to black and white.
So don’t dismiss picture styles as completely useless just because they are not applicable to RAW files! They can be valuable tool to assess a scene before walking away and editing.
If you are going to adjust these settings for yourself then it might be useful to know a little bit more about them:
Sharpening - is made of 2 points: resolution and acutance, resolution is the quantity of pixels and acutance is the contrast of an edge that is more easily defined by heavy contrast like black lines on a white background, or the edge between red and green. That’s more easy to determine than an edge between to black objects as red and green has a big contrast. So sharpening affects these 2 points to increase definition in an image.
Contrast - refers to opposites in colour or tone, increasing the value makes these differences more prominent and decreasing it makes the difference less prominent (obviously!)
Saturation - refers to the ‘purity of colour’ and makes colours more vibrant when increased but dulls colours when decreased
Picture Tone - tries to match the colour of human skin, if you increase the value it will become yellower (think Simpsons) and if you decrease the value it will become redder (think martian)
Adjusting these values can be good fun! So experiment and see what works for you!
Conclusion
Picture style is another setting in manual mode that you can adjust to produce different images.
The good news is that these adjustments are non-destructive and are only applied to JPEGs or the back of camera preview of a RAW file, this means that you can always adjust them when editing to produce the effect that you want.
The preloaded profiles only really affect the sharpness of an image, which is very important to know if you accidentally missed your focus, so this is an invaluable asset to use when in the field.
In general I leave my camera on the Landscape profile, increasing the Sharpening to the 4 value. This way I can really see how soft the edges of elements are.
When I import my RAW files I will then adjust the sharpening based on how much I feel the image should be sharpened. Everything else I adjust based on the image as I see it not based on how the image looked on my camera.
That being said this is a useful preview nevertheless.
Related Articles


Written by Daniel Long
Daniel Long created DRL Photography as a place to showcase his work as a photographer. Daniel has learnt a lot about photography and wishes to impart this knowledge with you, although the world is an ever changing place and he always says “you can never learn everything.” So as he makes his way, he continues to learn knew techniques, skills and information about photography. He focuses on Landscape and Wildlife photography and Daniel has a special focus on Scotland, his home away from home. As well as writing about photography and taking pictures out in the field, Daniel offers guided photography days so he can share his knowledge and locations in an effort to give his clients the best opportunities possible. Have a browse around this website to see his images, guided experiences and articles about photography. If you have any questions don’t hesitate to get in contact.


