
Photography Challenge: Manual Mastery
My last article: ‘What’s the Difference: Aperture Priority, Shutter Priority and Manual’ introduced the Manual Mode of you camera and I tried to impress the importance of knowing how to use it.
A lot of photographers will tell you that you must use Manual all of the time.
I don’t agree with that, the other settings can be really useful, but I do think that you need to understand all of the different settings that you can change in Manual and why you would want to, so this Challenge is meant to get you experimenting with your Manual Mode on you camera.
Adjusting the settings to learn what each one does. So, I have broken it down into some sub-challenges for each major setting for you to experiment with.
This is a challenge so after reading through my examples and ideas, I want you to have a go and get some great images to learn the differences between the settings. The best examples I will include in a future article, with links to the creator’s social media/website. Show me what you can do by sending your photos to me at:
E-mail: info@drlphotography.co.uk
Disclaimer
All images shared with me will remain the property of the creator and will only be displayed with their permission. If you wish to use your own watermark to protect your images and show your brand, then please do. Anyone that has a go at the challenge and communicates with me, shall get a personal response and I hope we can discuss photography more. Your images will never be sold by me or anyone associated with this site. They are your images.
These photography challenges are about creating a community and inspiring creativity for you (my readers) and for myself. It is meant as a way of inspiring each other, critiquing each other and discussing new techniques and ideas.

Introduction to Manual Mode
Manual Mode allows you to change all of the settings of your camera yourself, instead of allowing the camera to decide for you. There are 5 major settings that your camera uses to capture your images.
There are 3 that are responsible for the actual image and 2 that determine how the image looks.
The first 3 that are important are Aperture, Shutter speed, and ISO.
The ISO and Aperture will determine the Shutter Speed, because the Shutter speed is only related to how long the sensor is exposed to light you should find that when adjusting the other settings you will need to adjust this and you will notice how that can affect your images when shooting handheld.
The other 2 that determine style are White Balance and Picture Style.
If you are shooting in RAW format then White Balance and Picture Style will only be applied to the JPEG preview on the back of the camera, thus when you import the images you will need to make some adjustments in your editing software.
So for these challenges please shoot in JPEG it will make noticing the differences between settings much easier.


Aperture Challenge
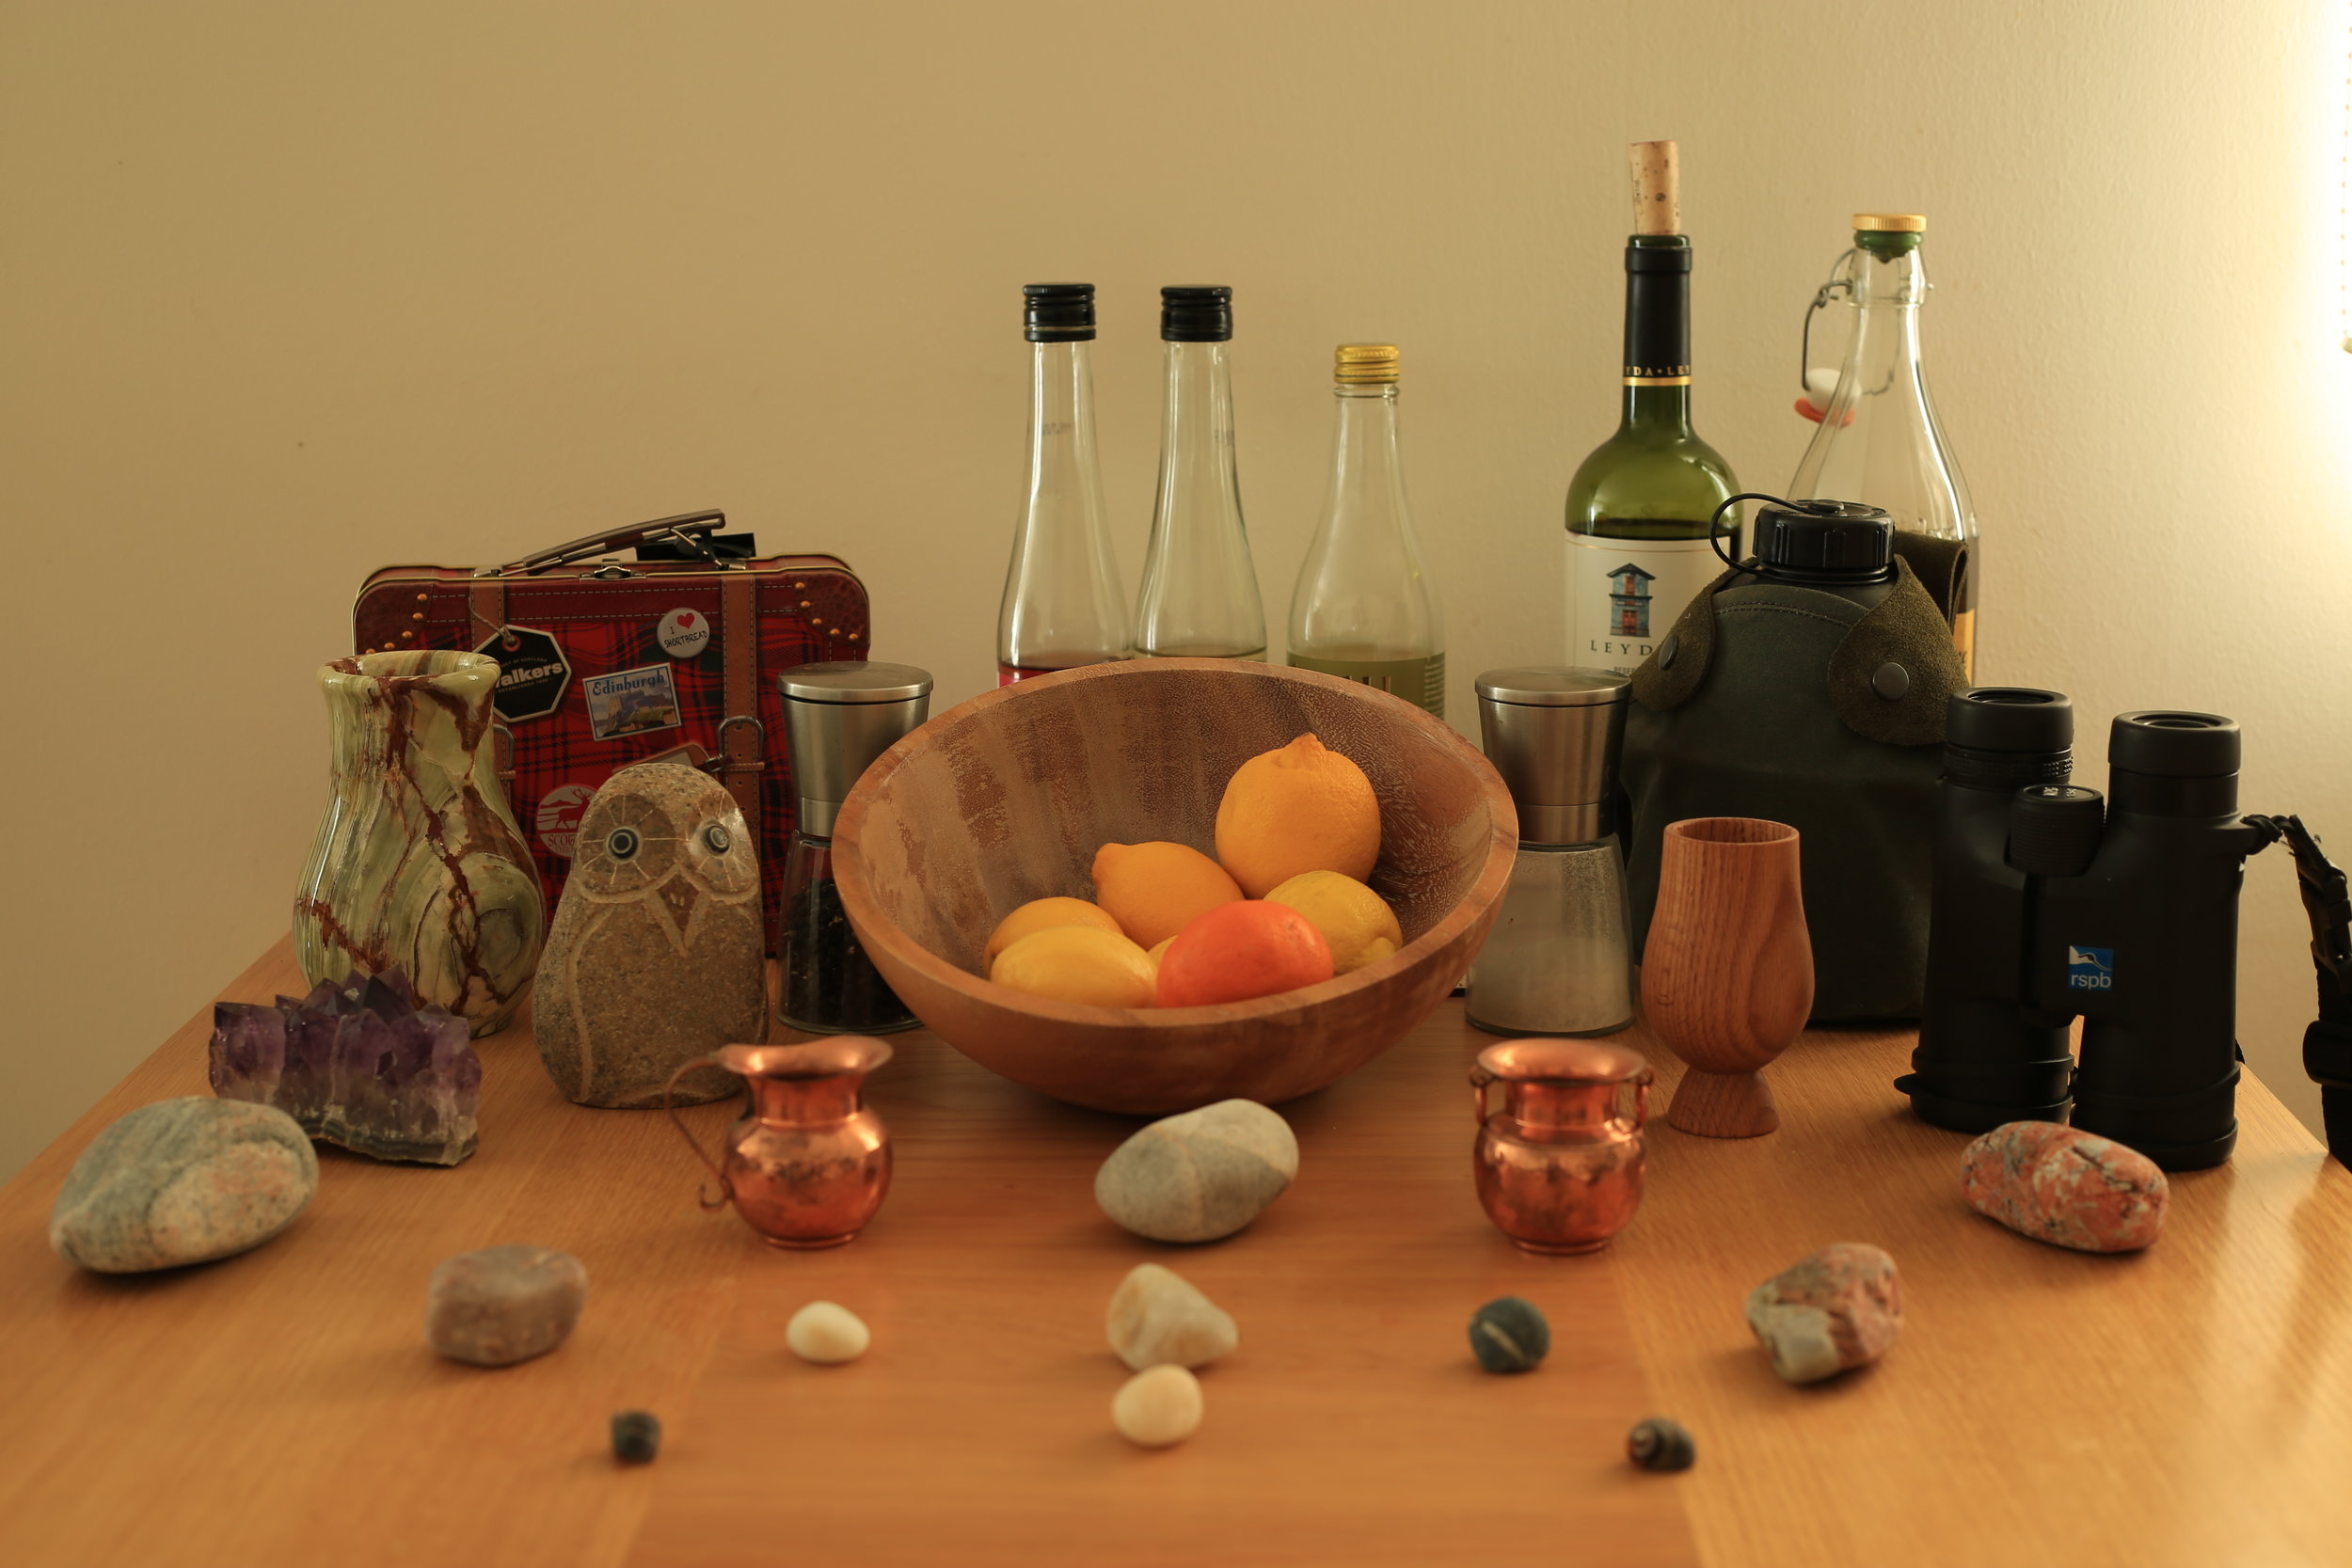
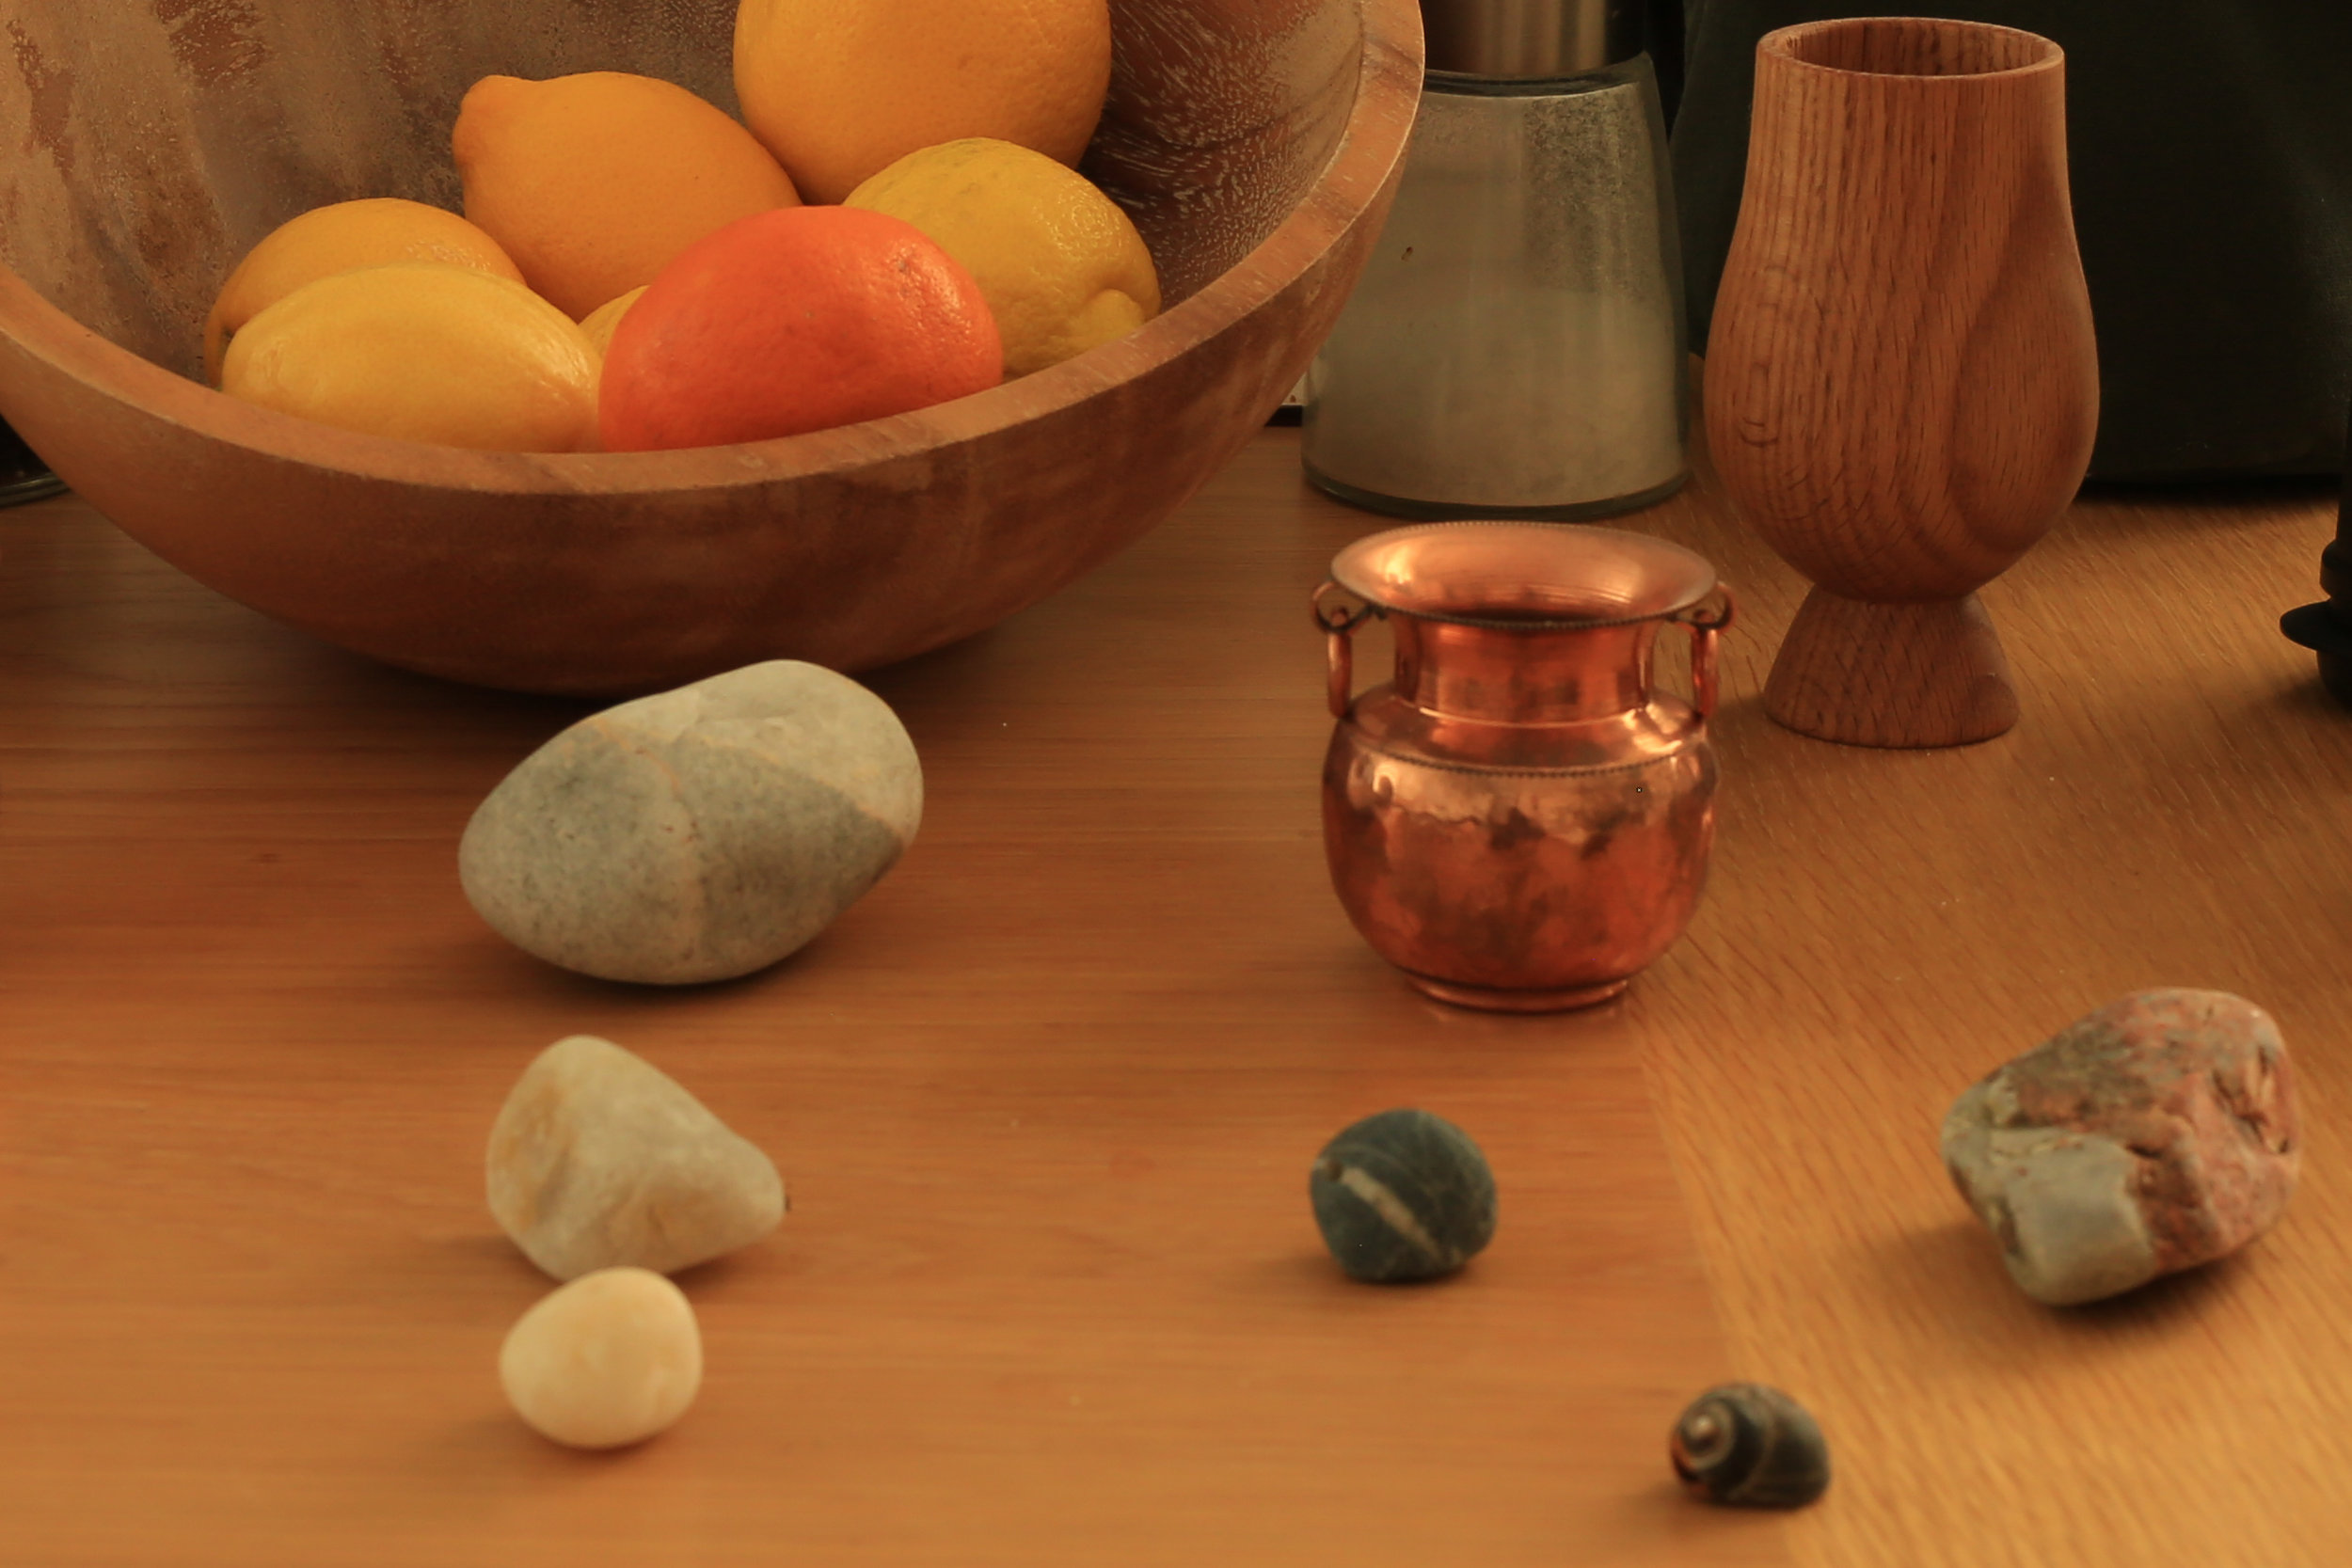
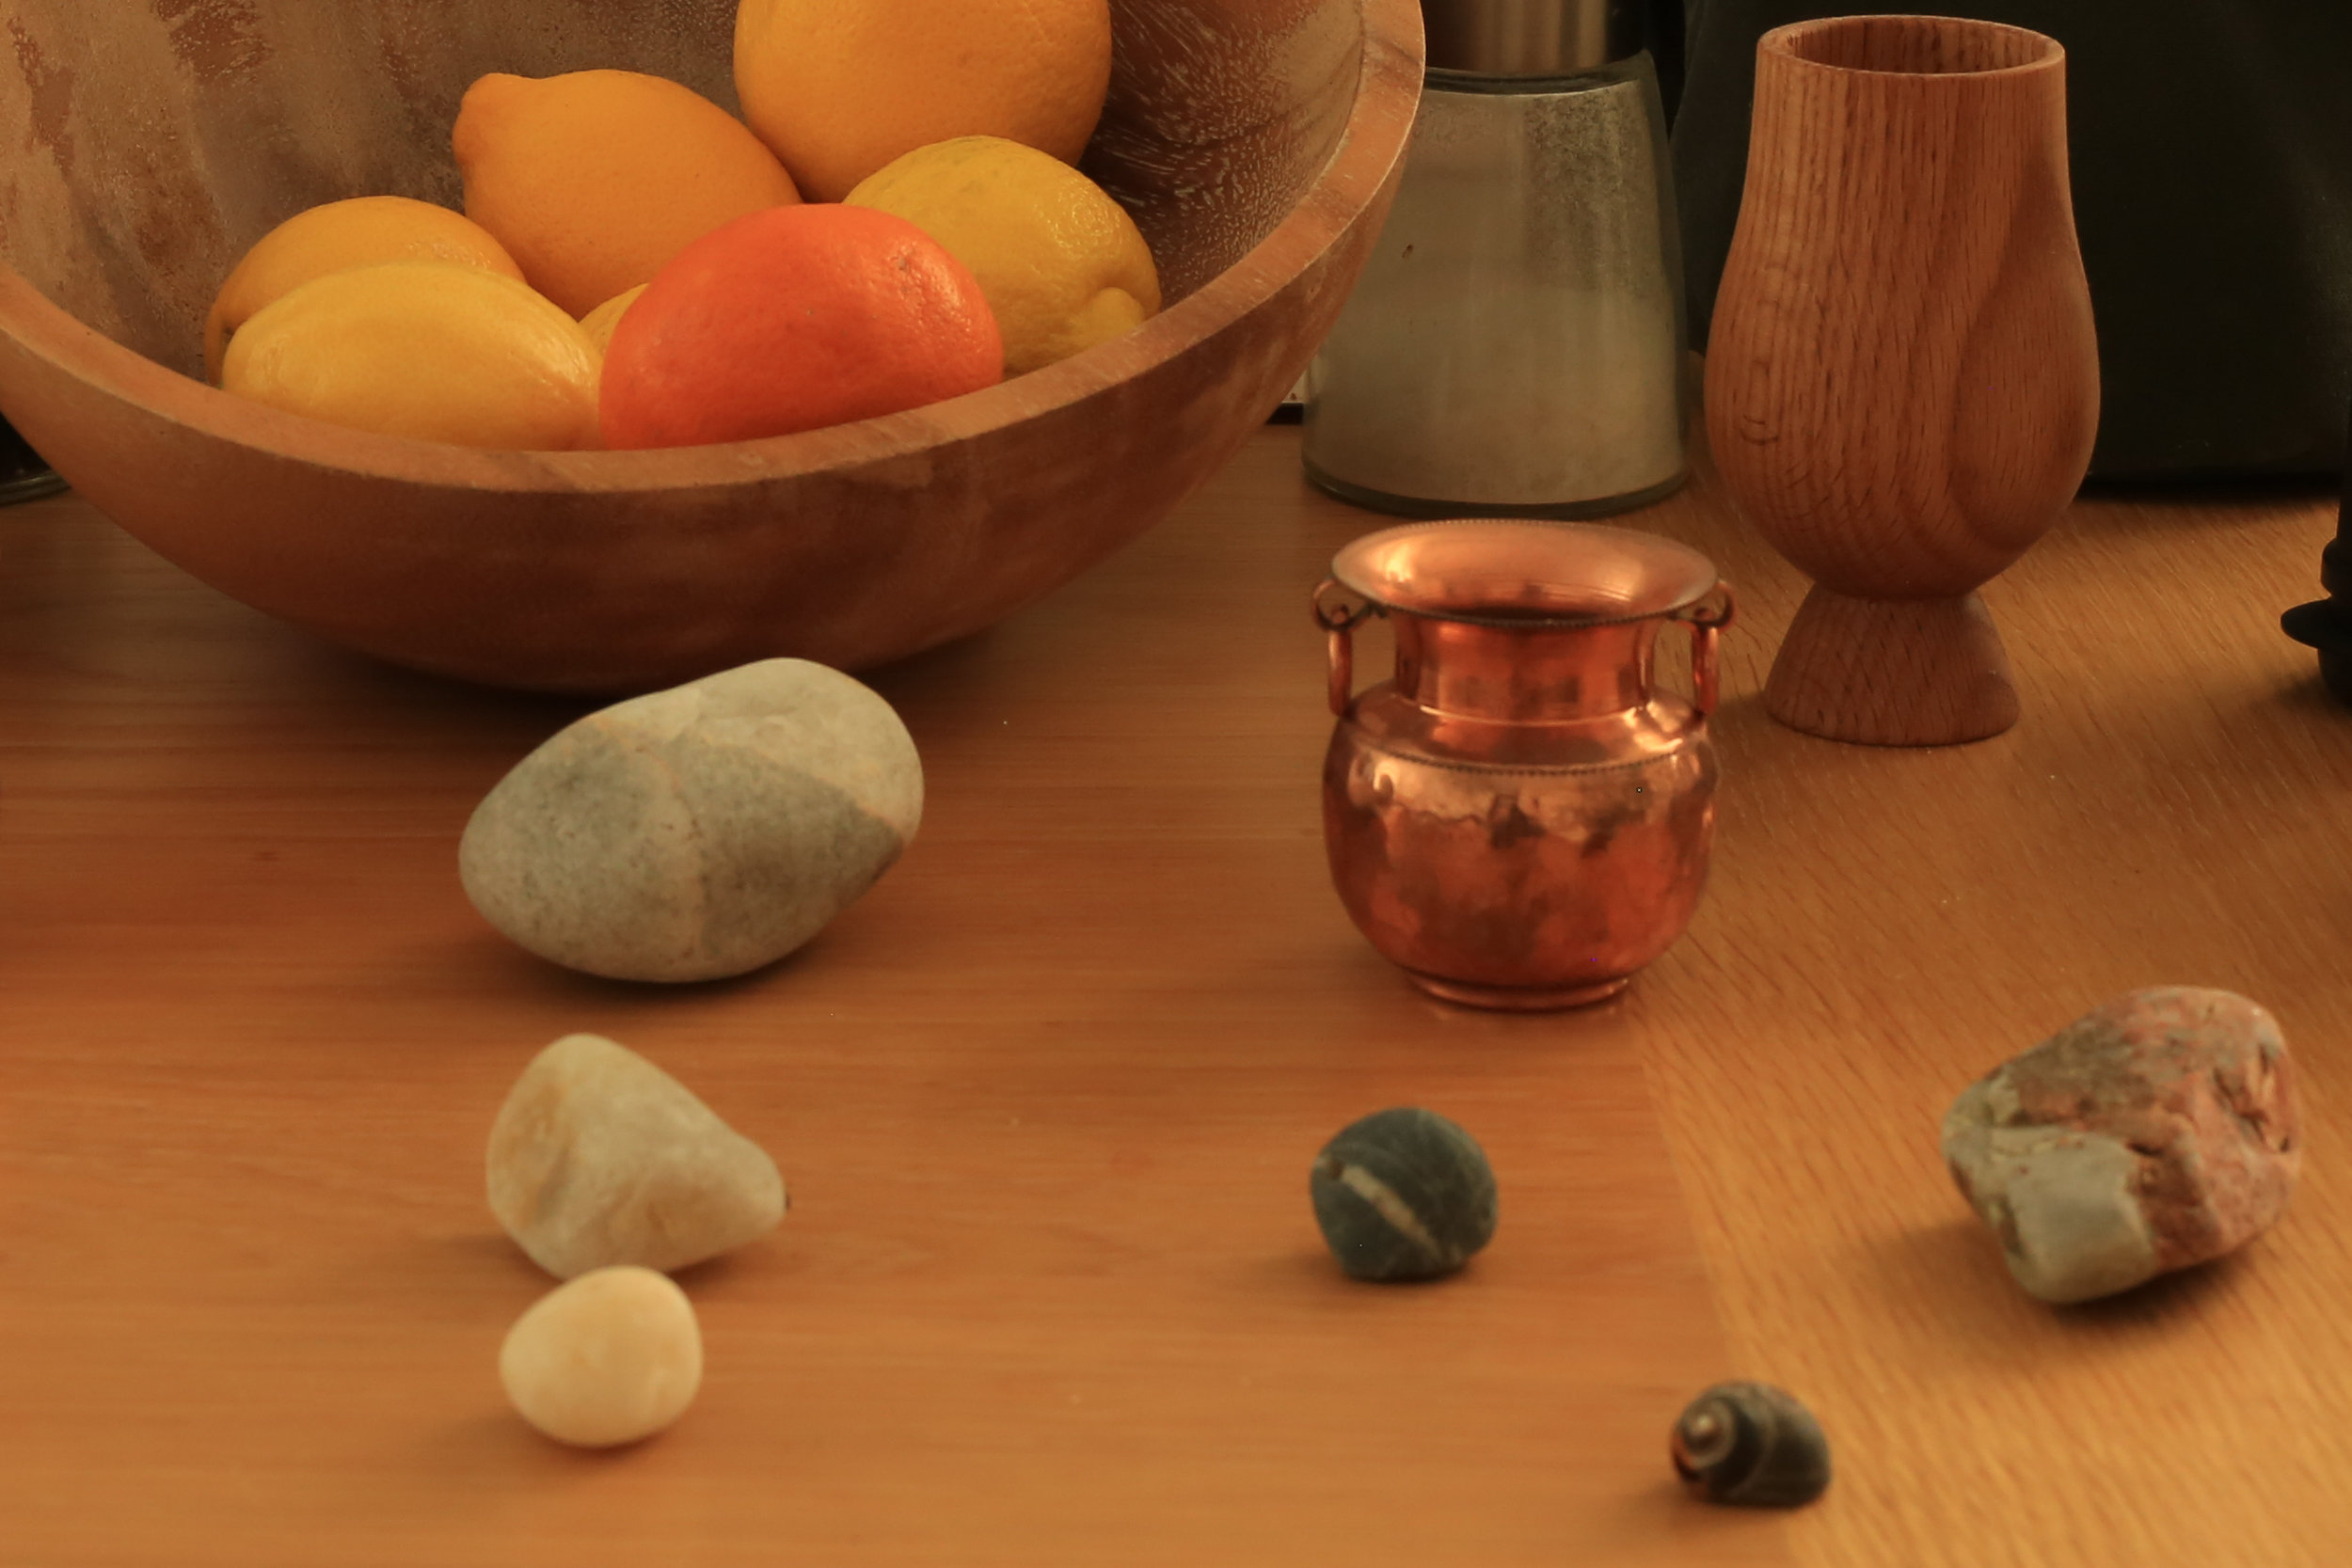
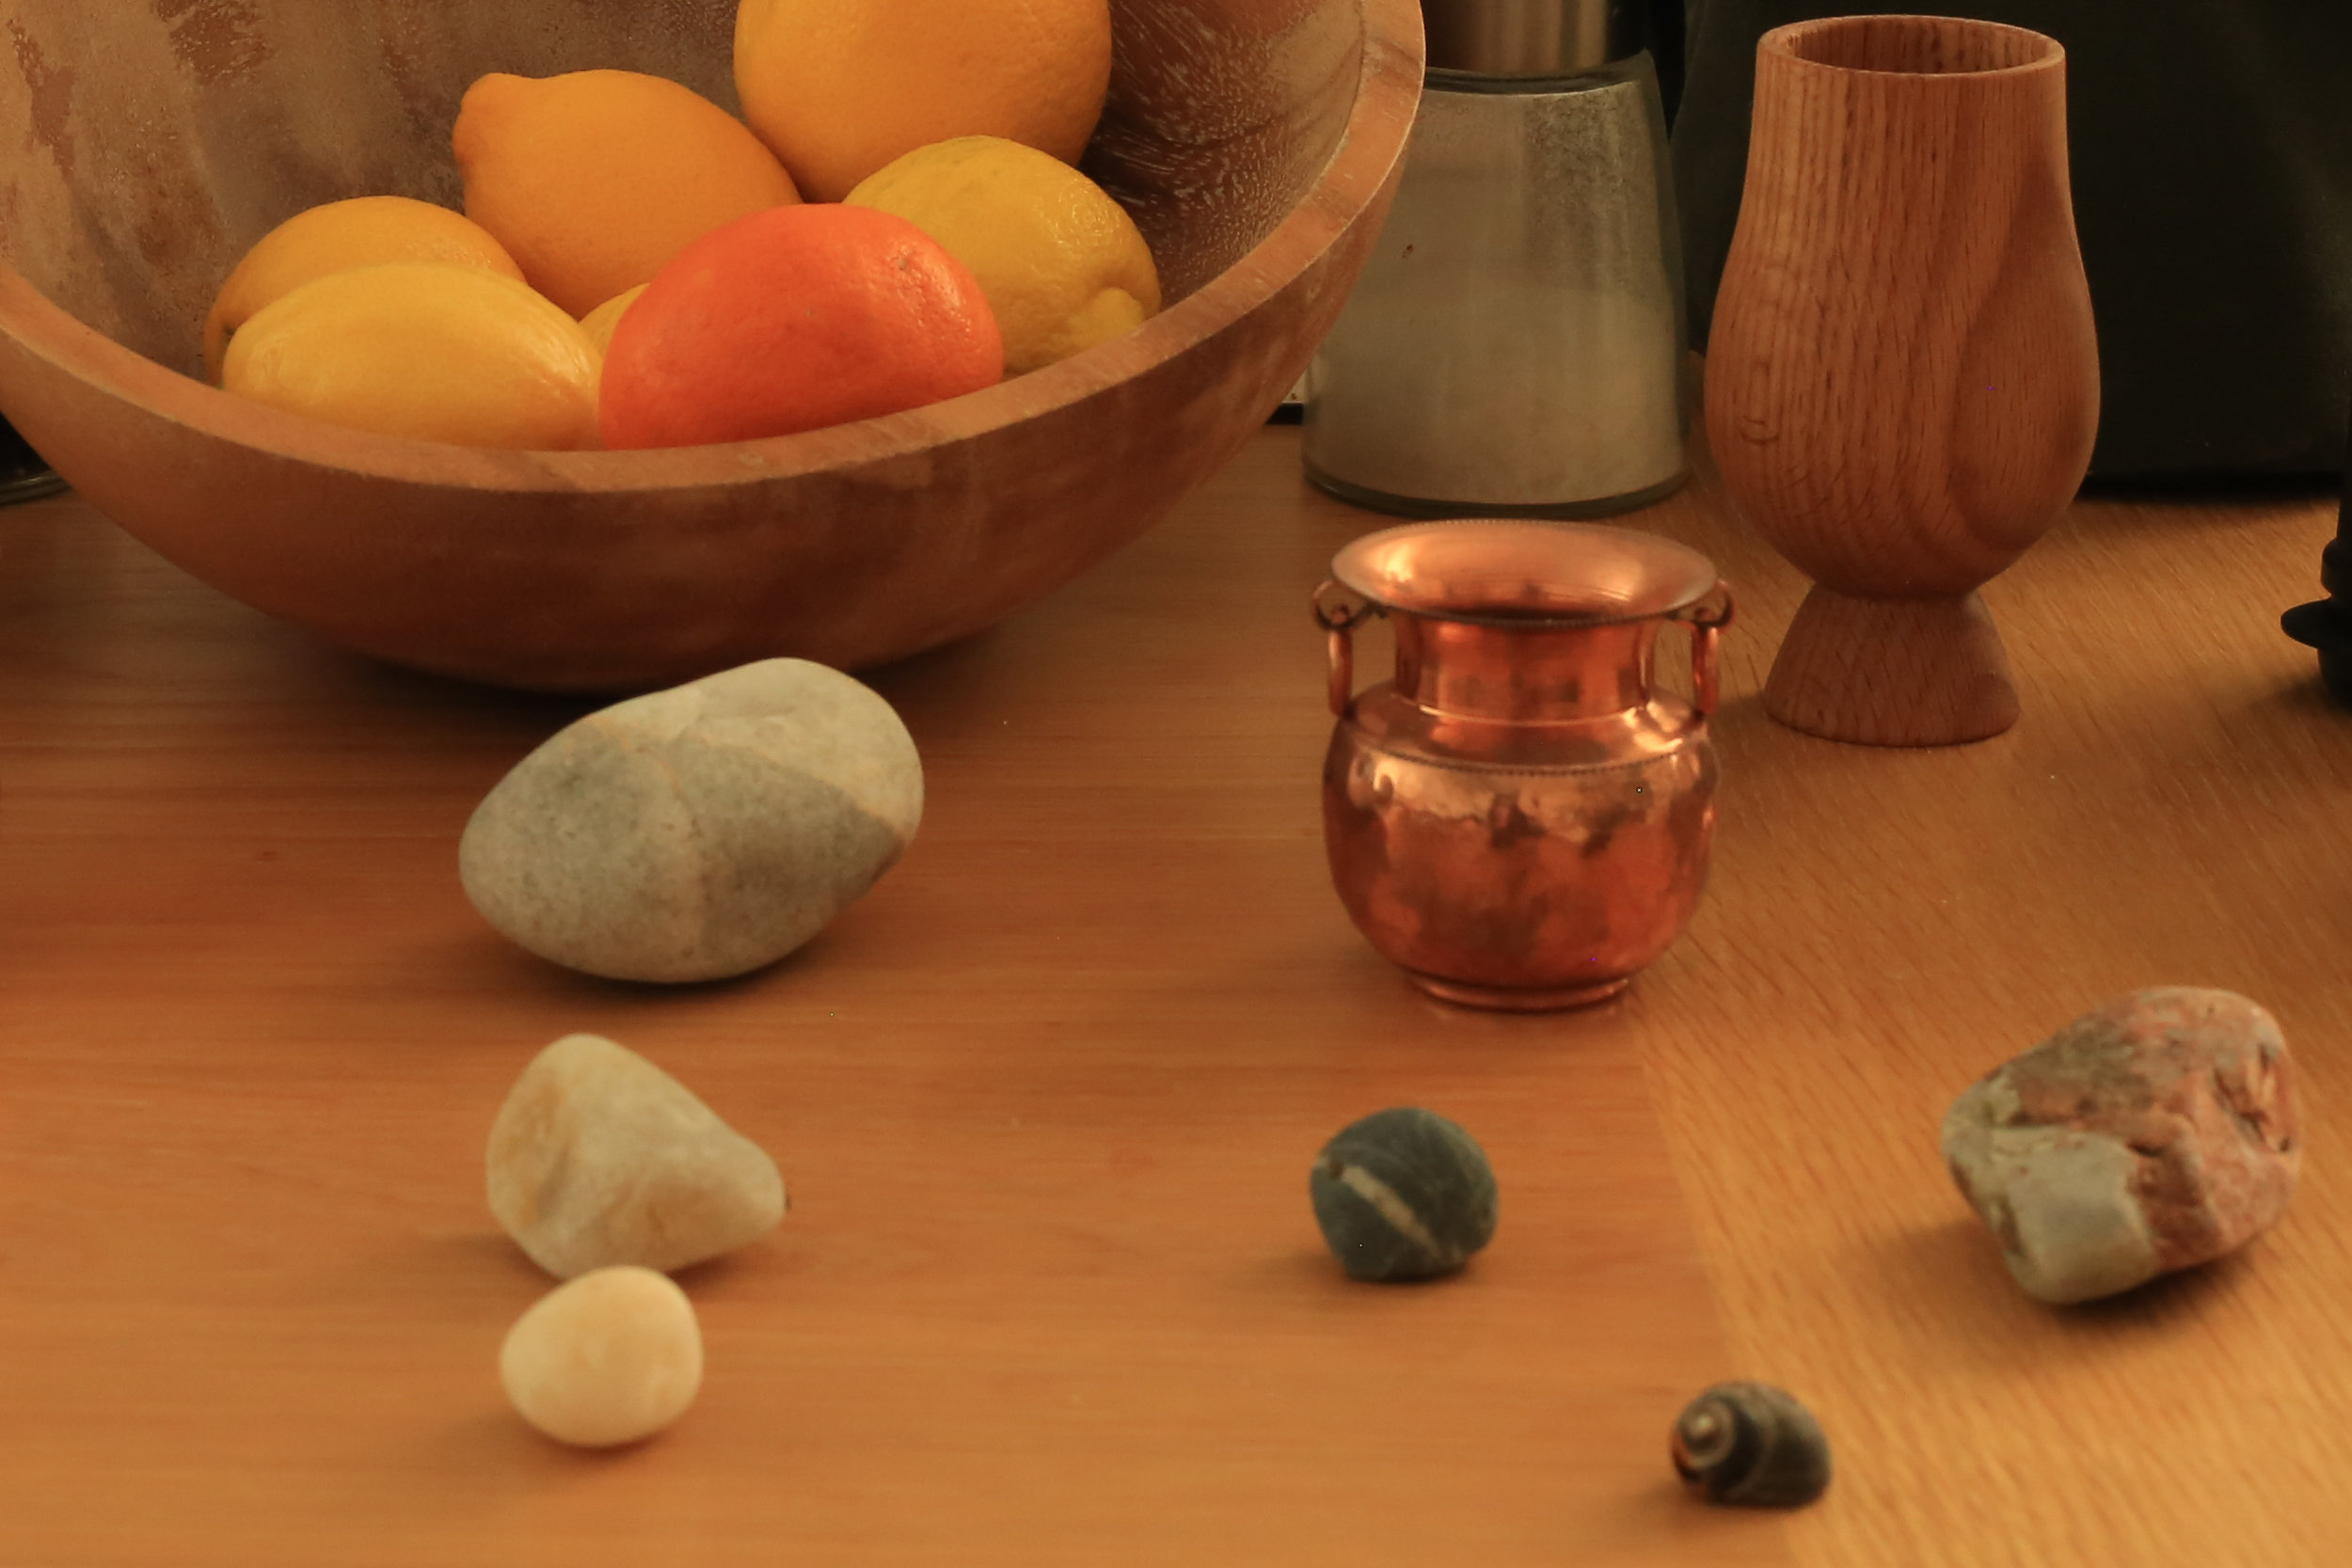
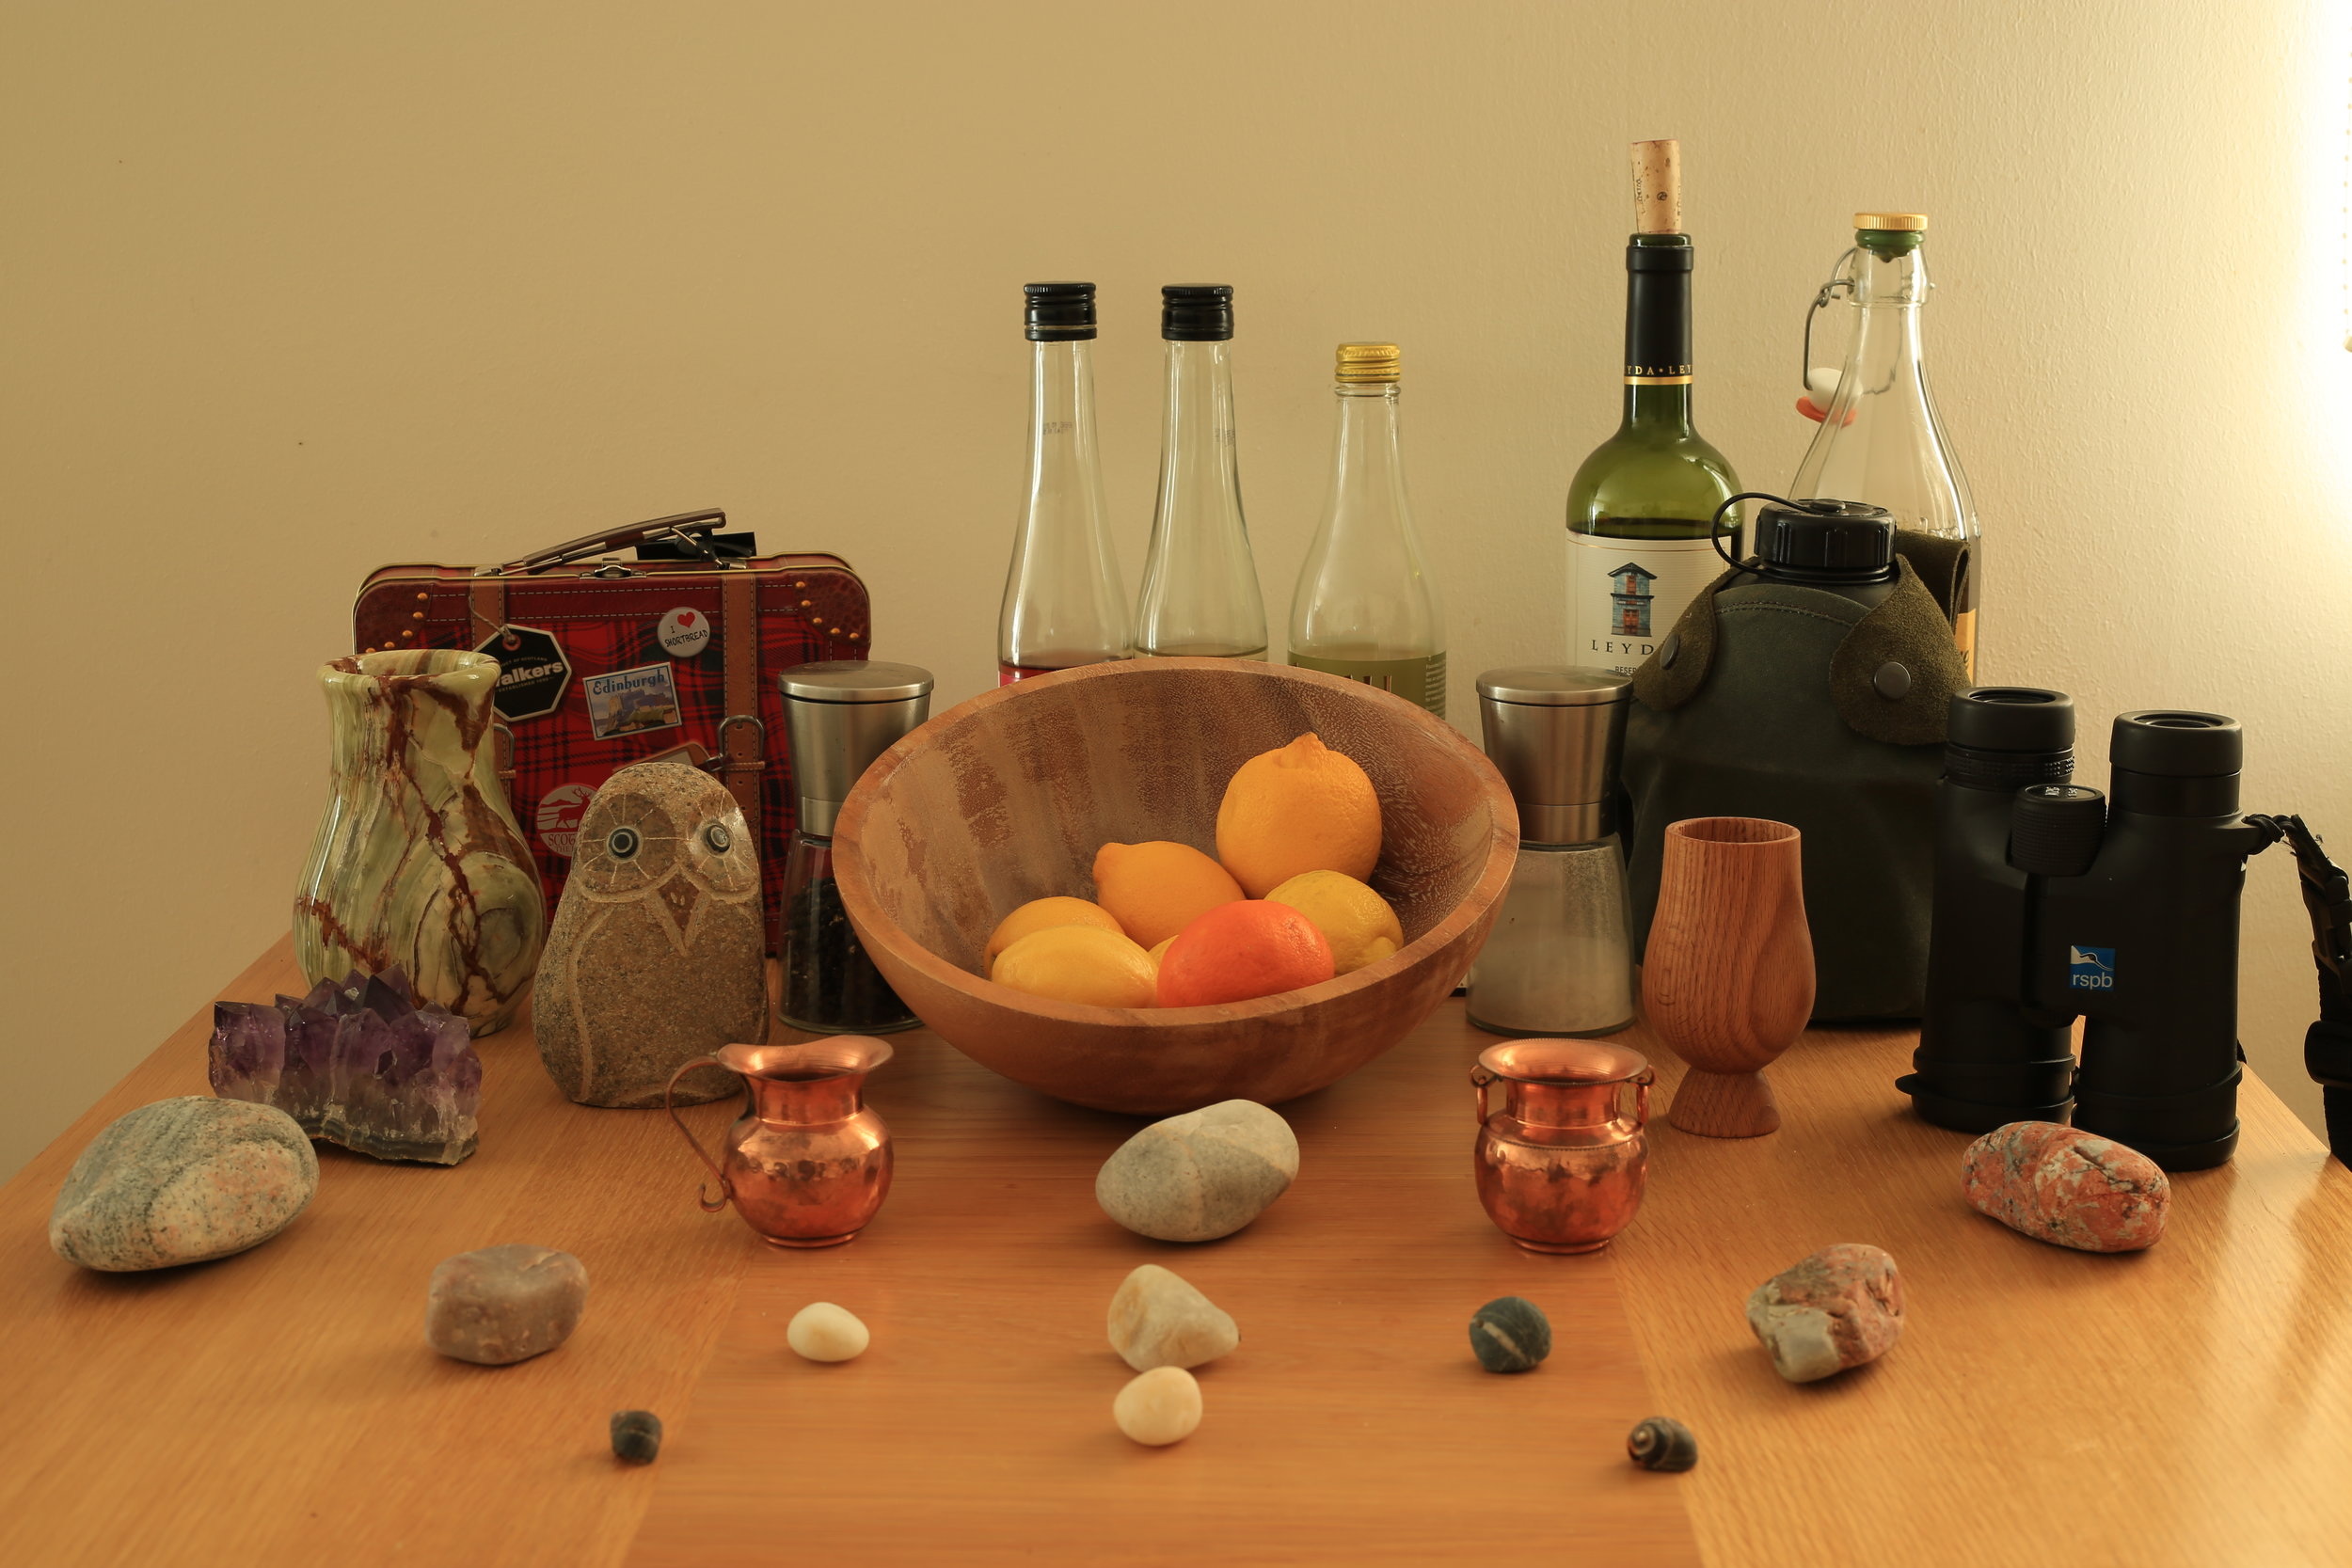
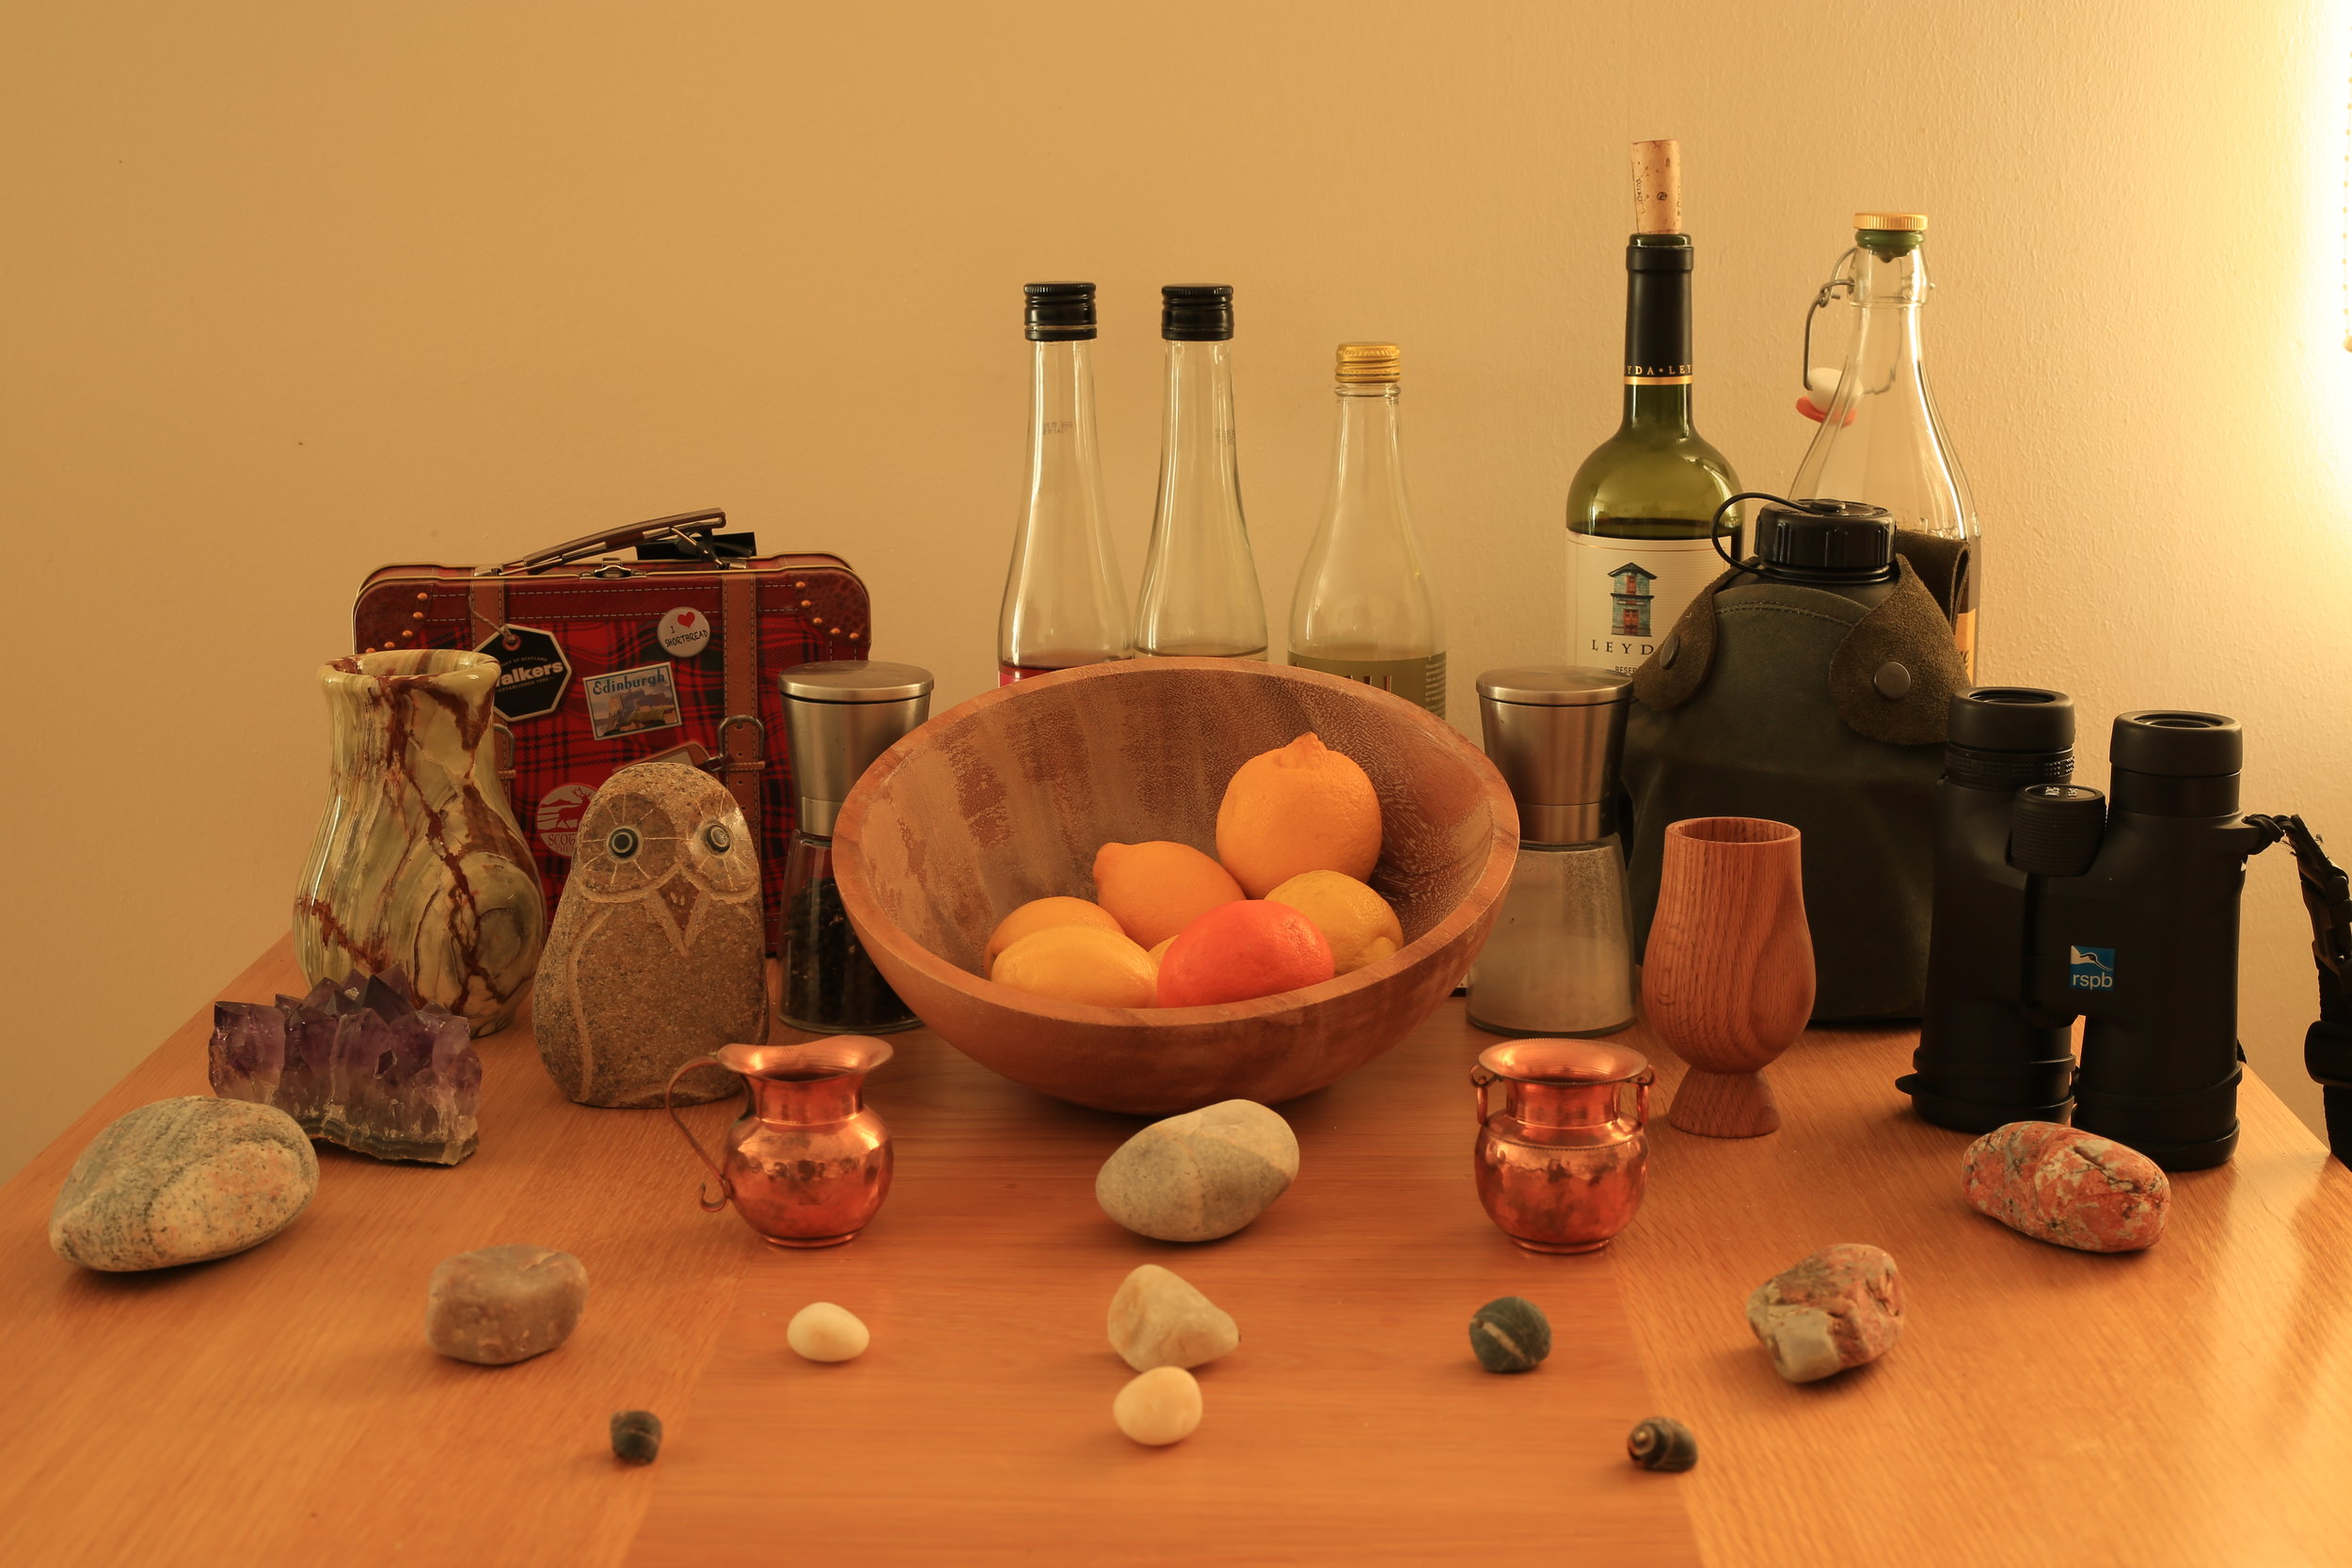
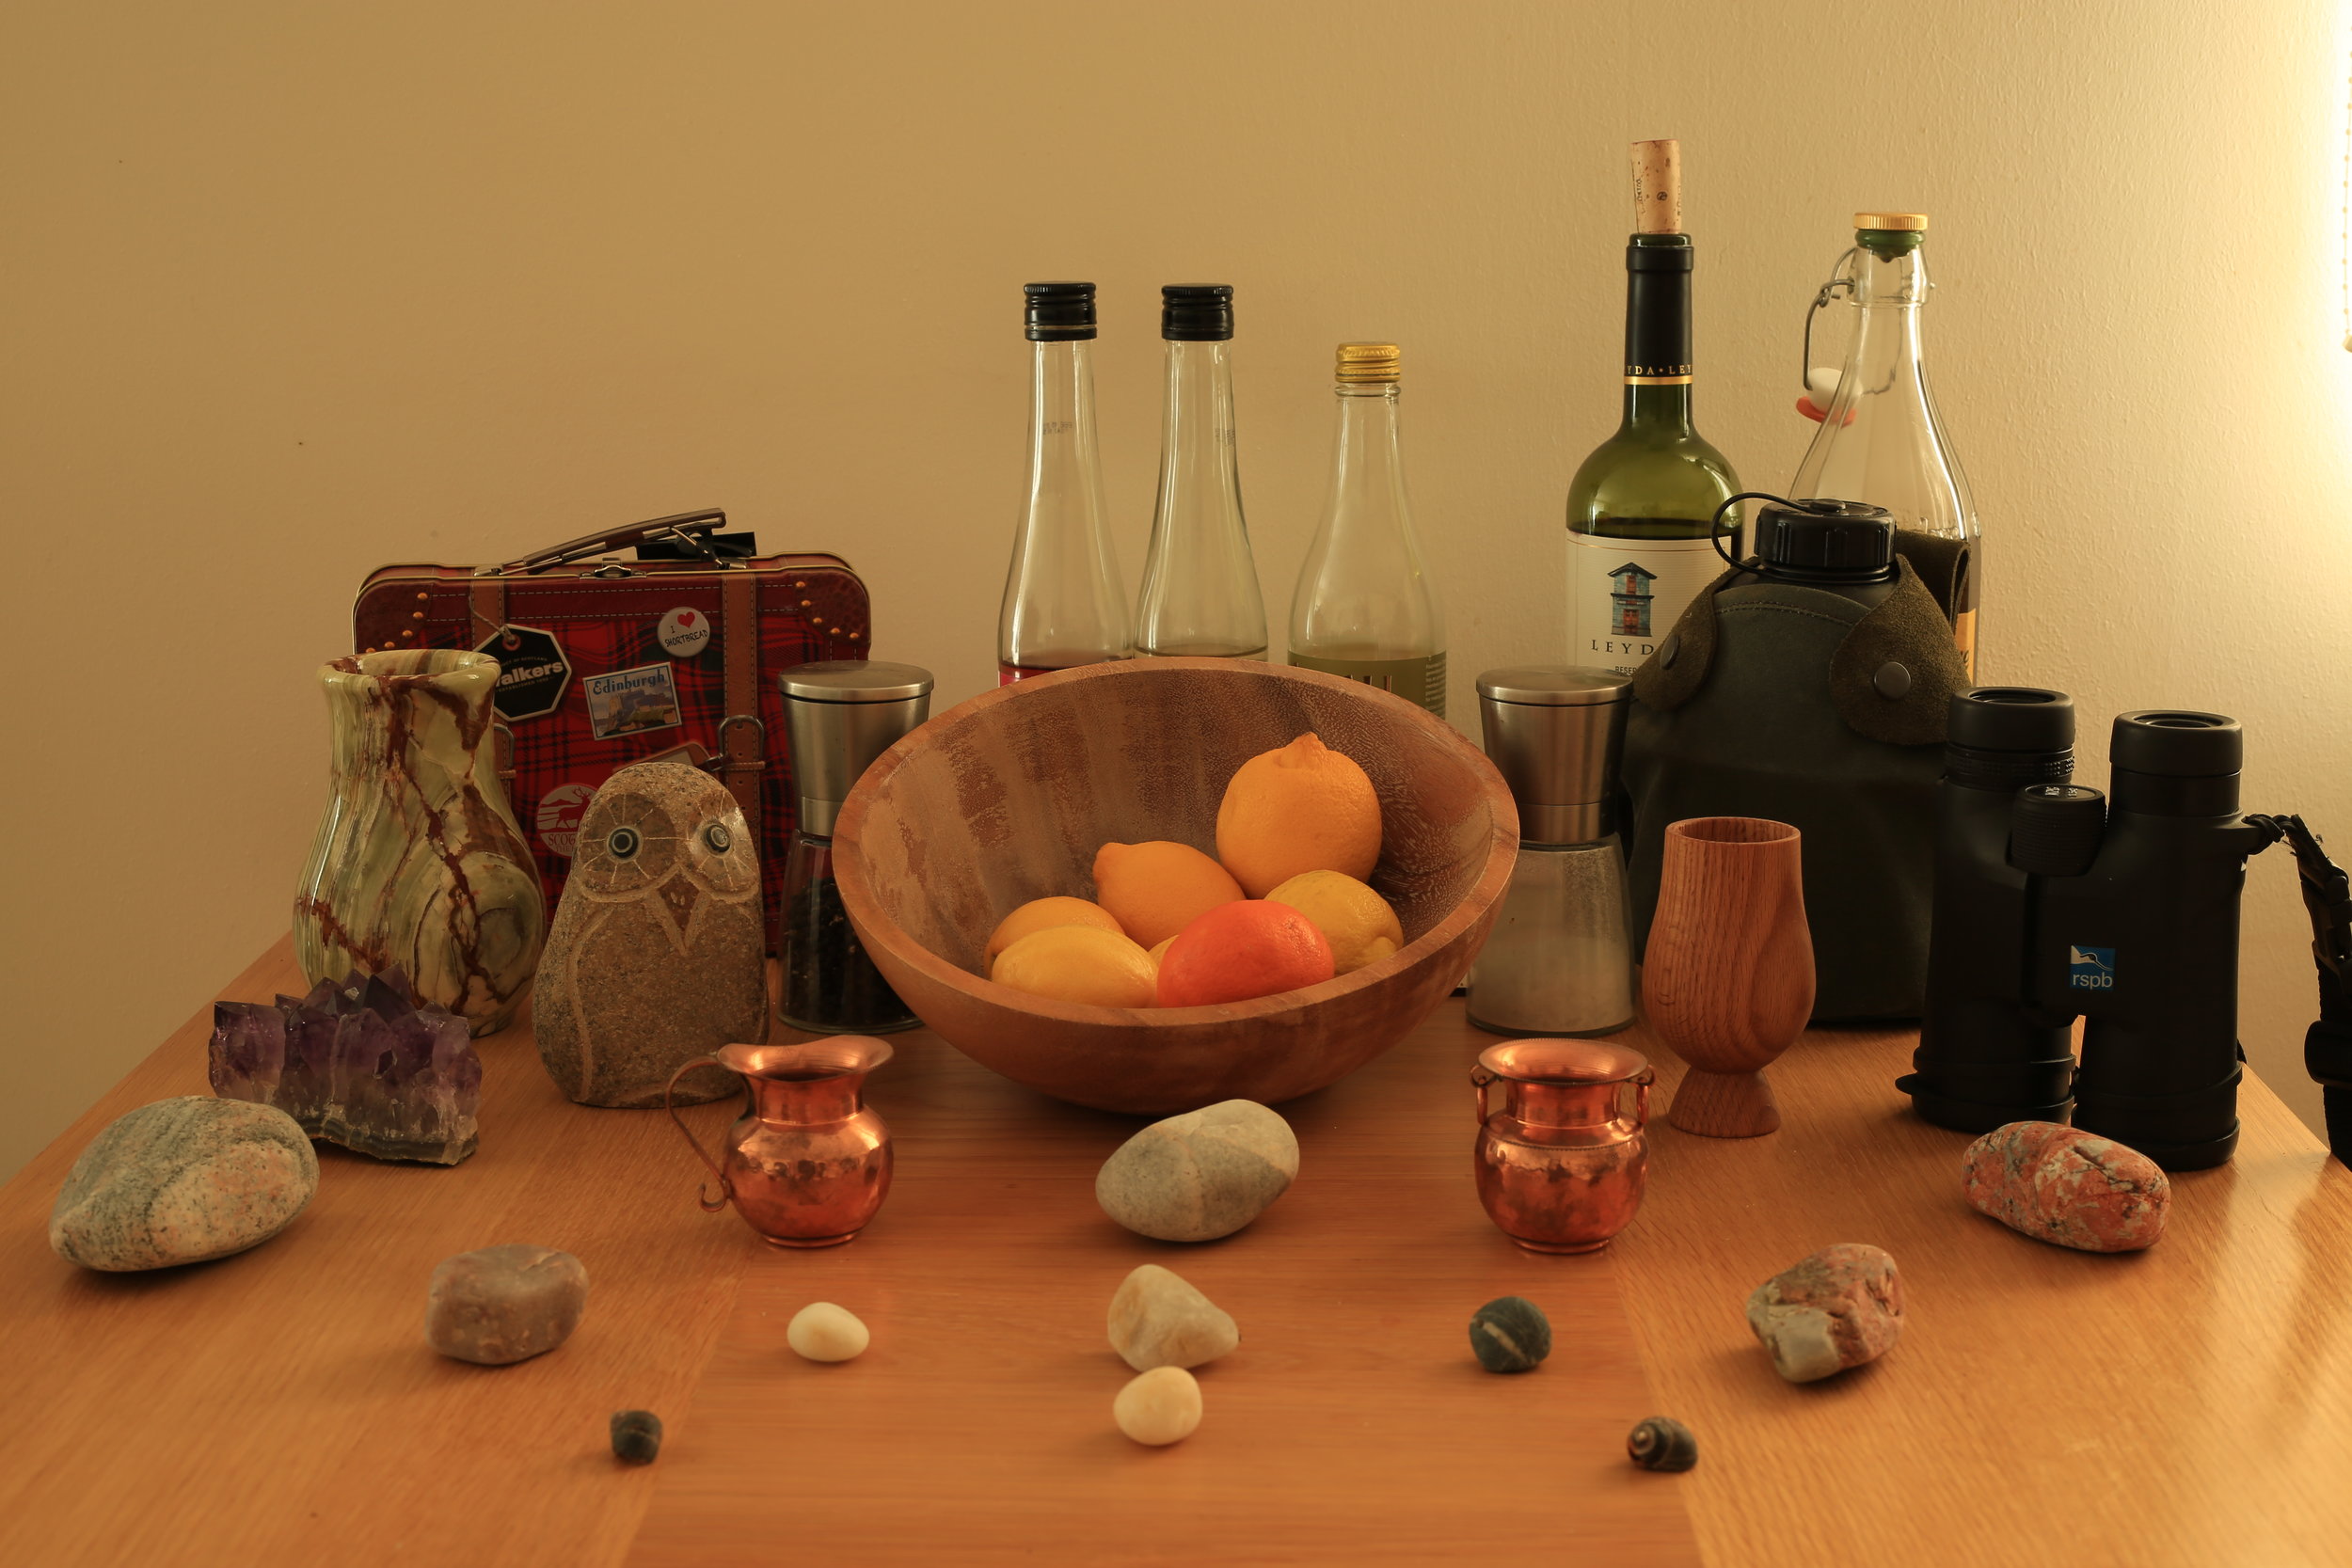
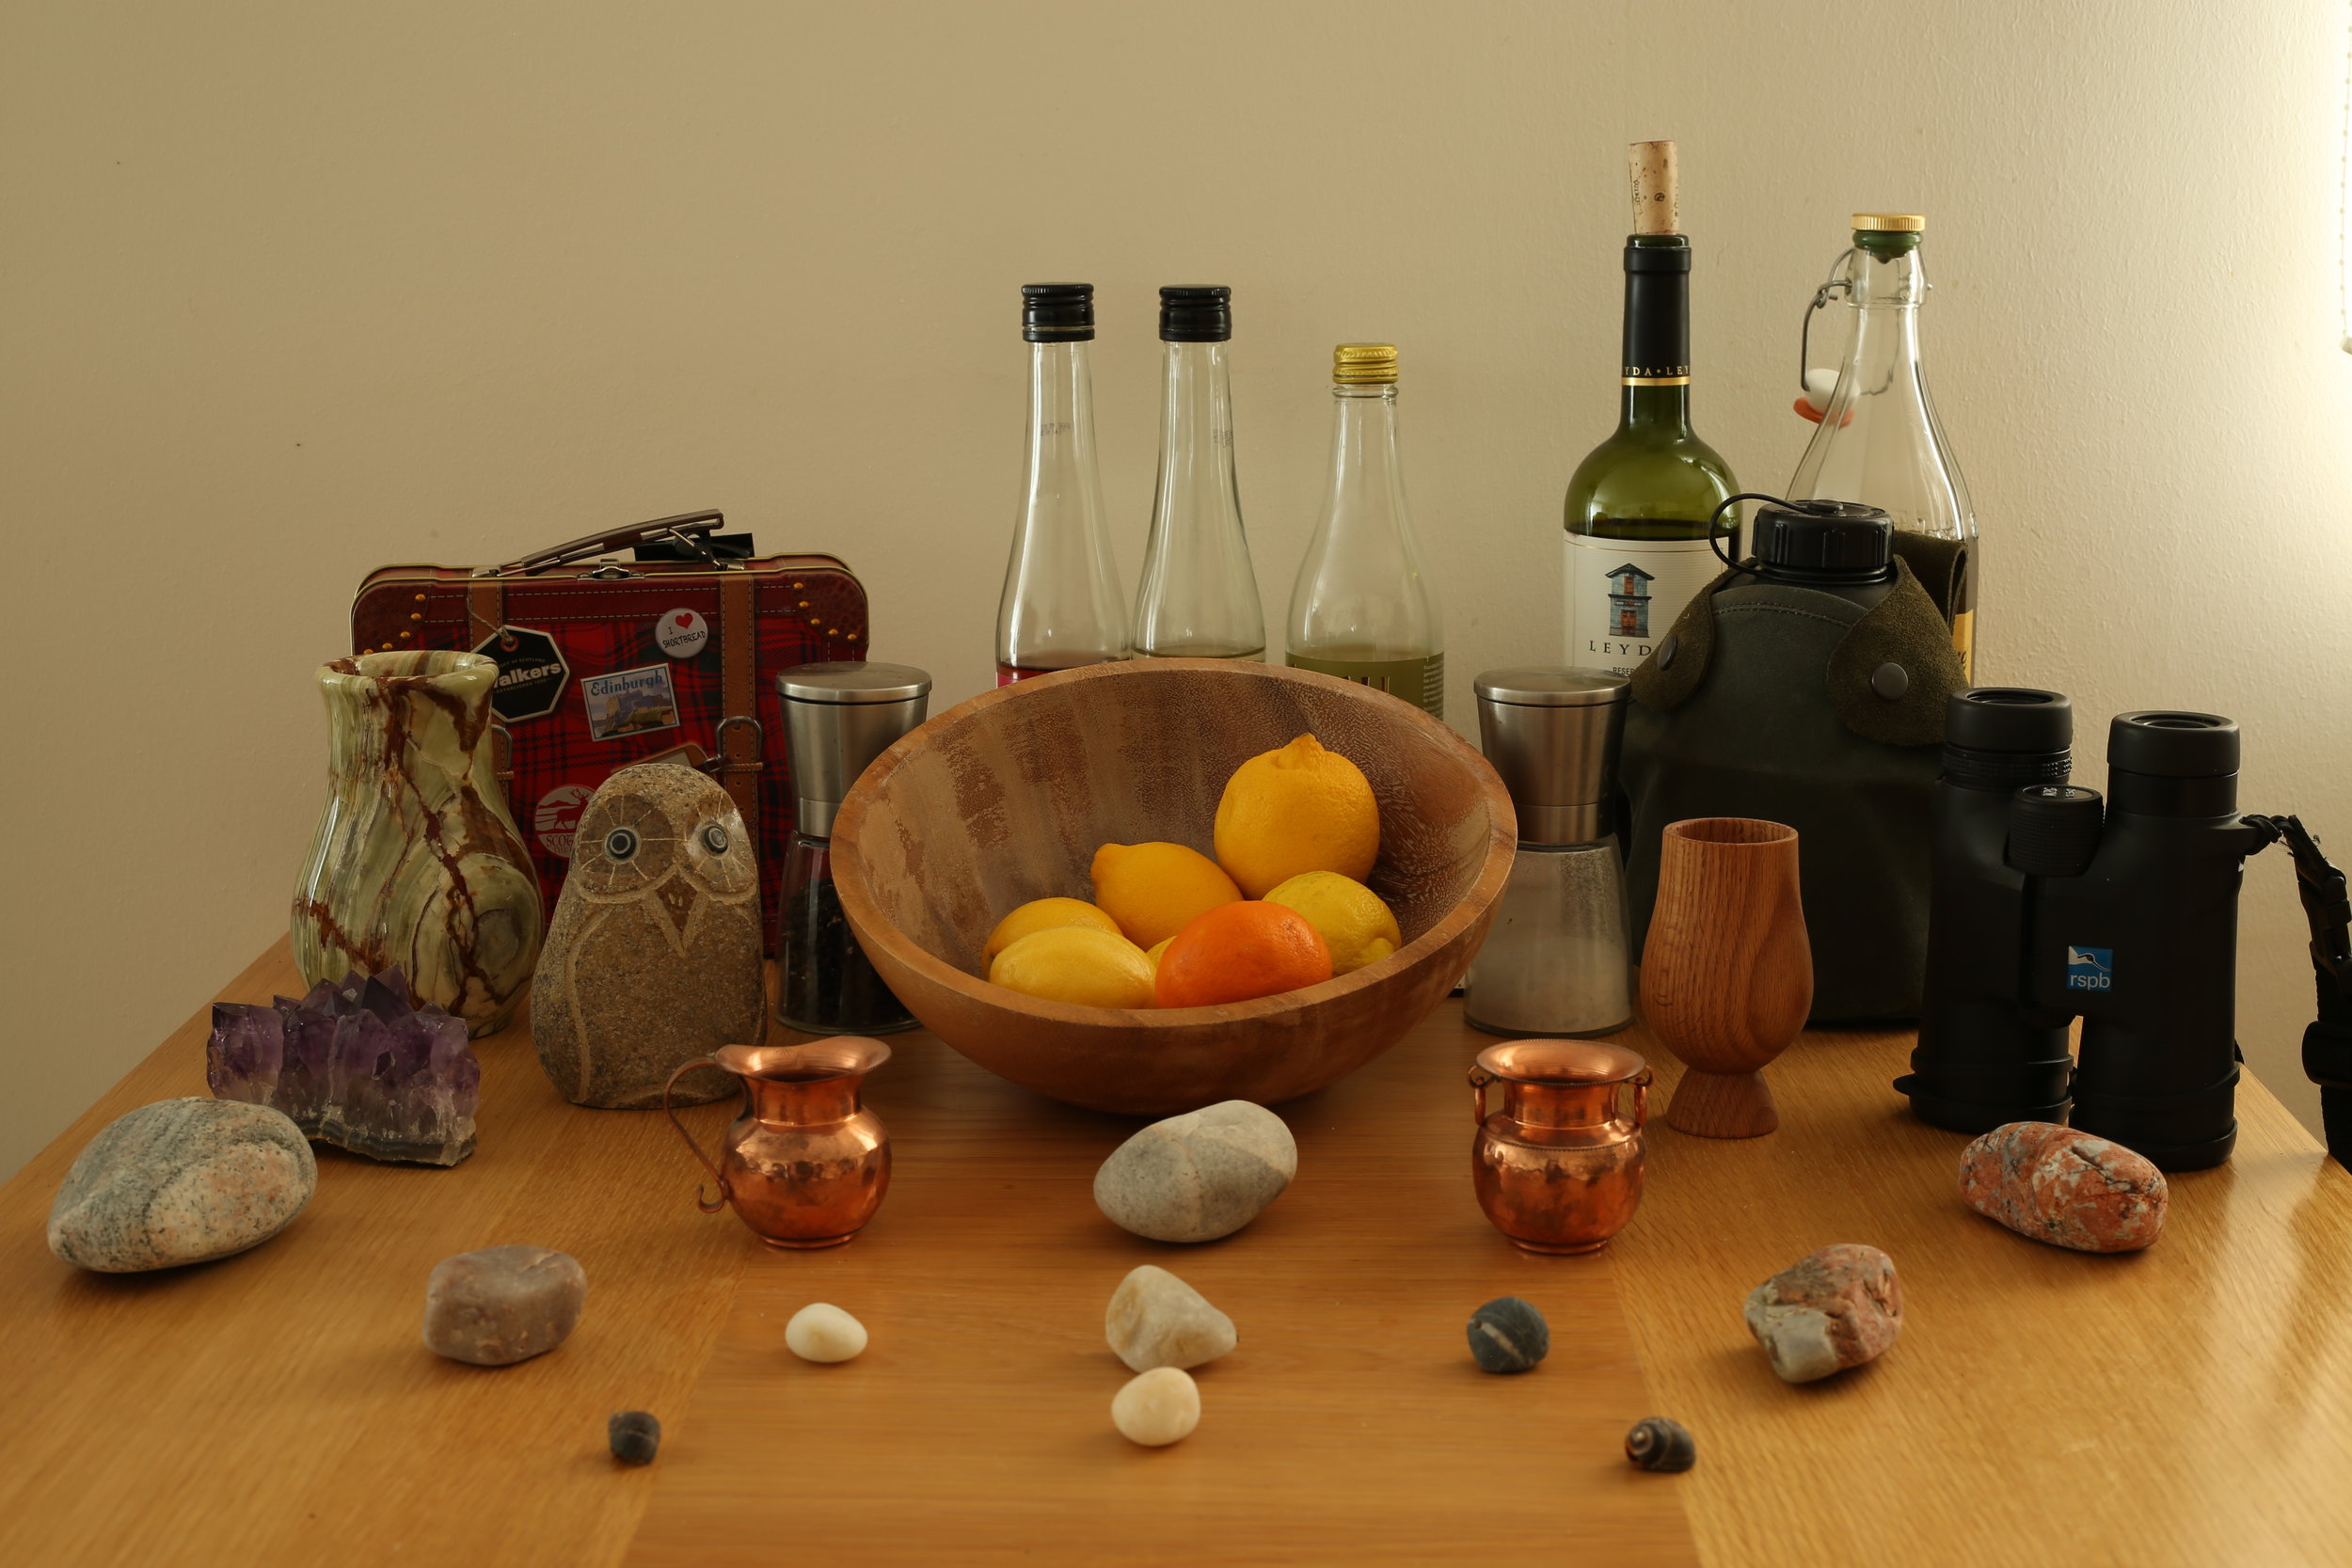
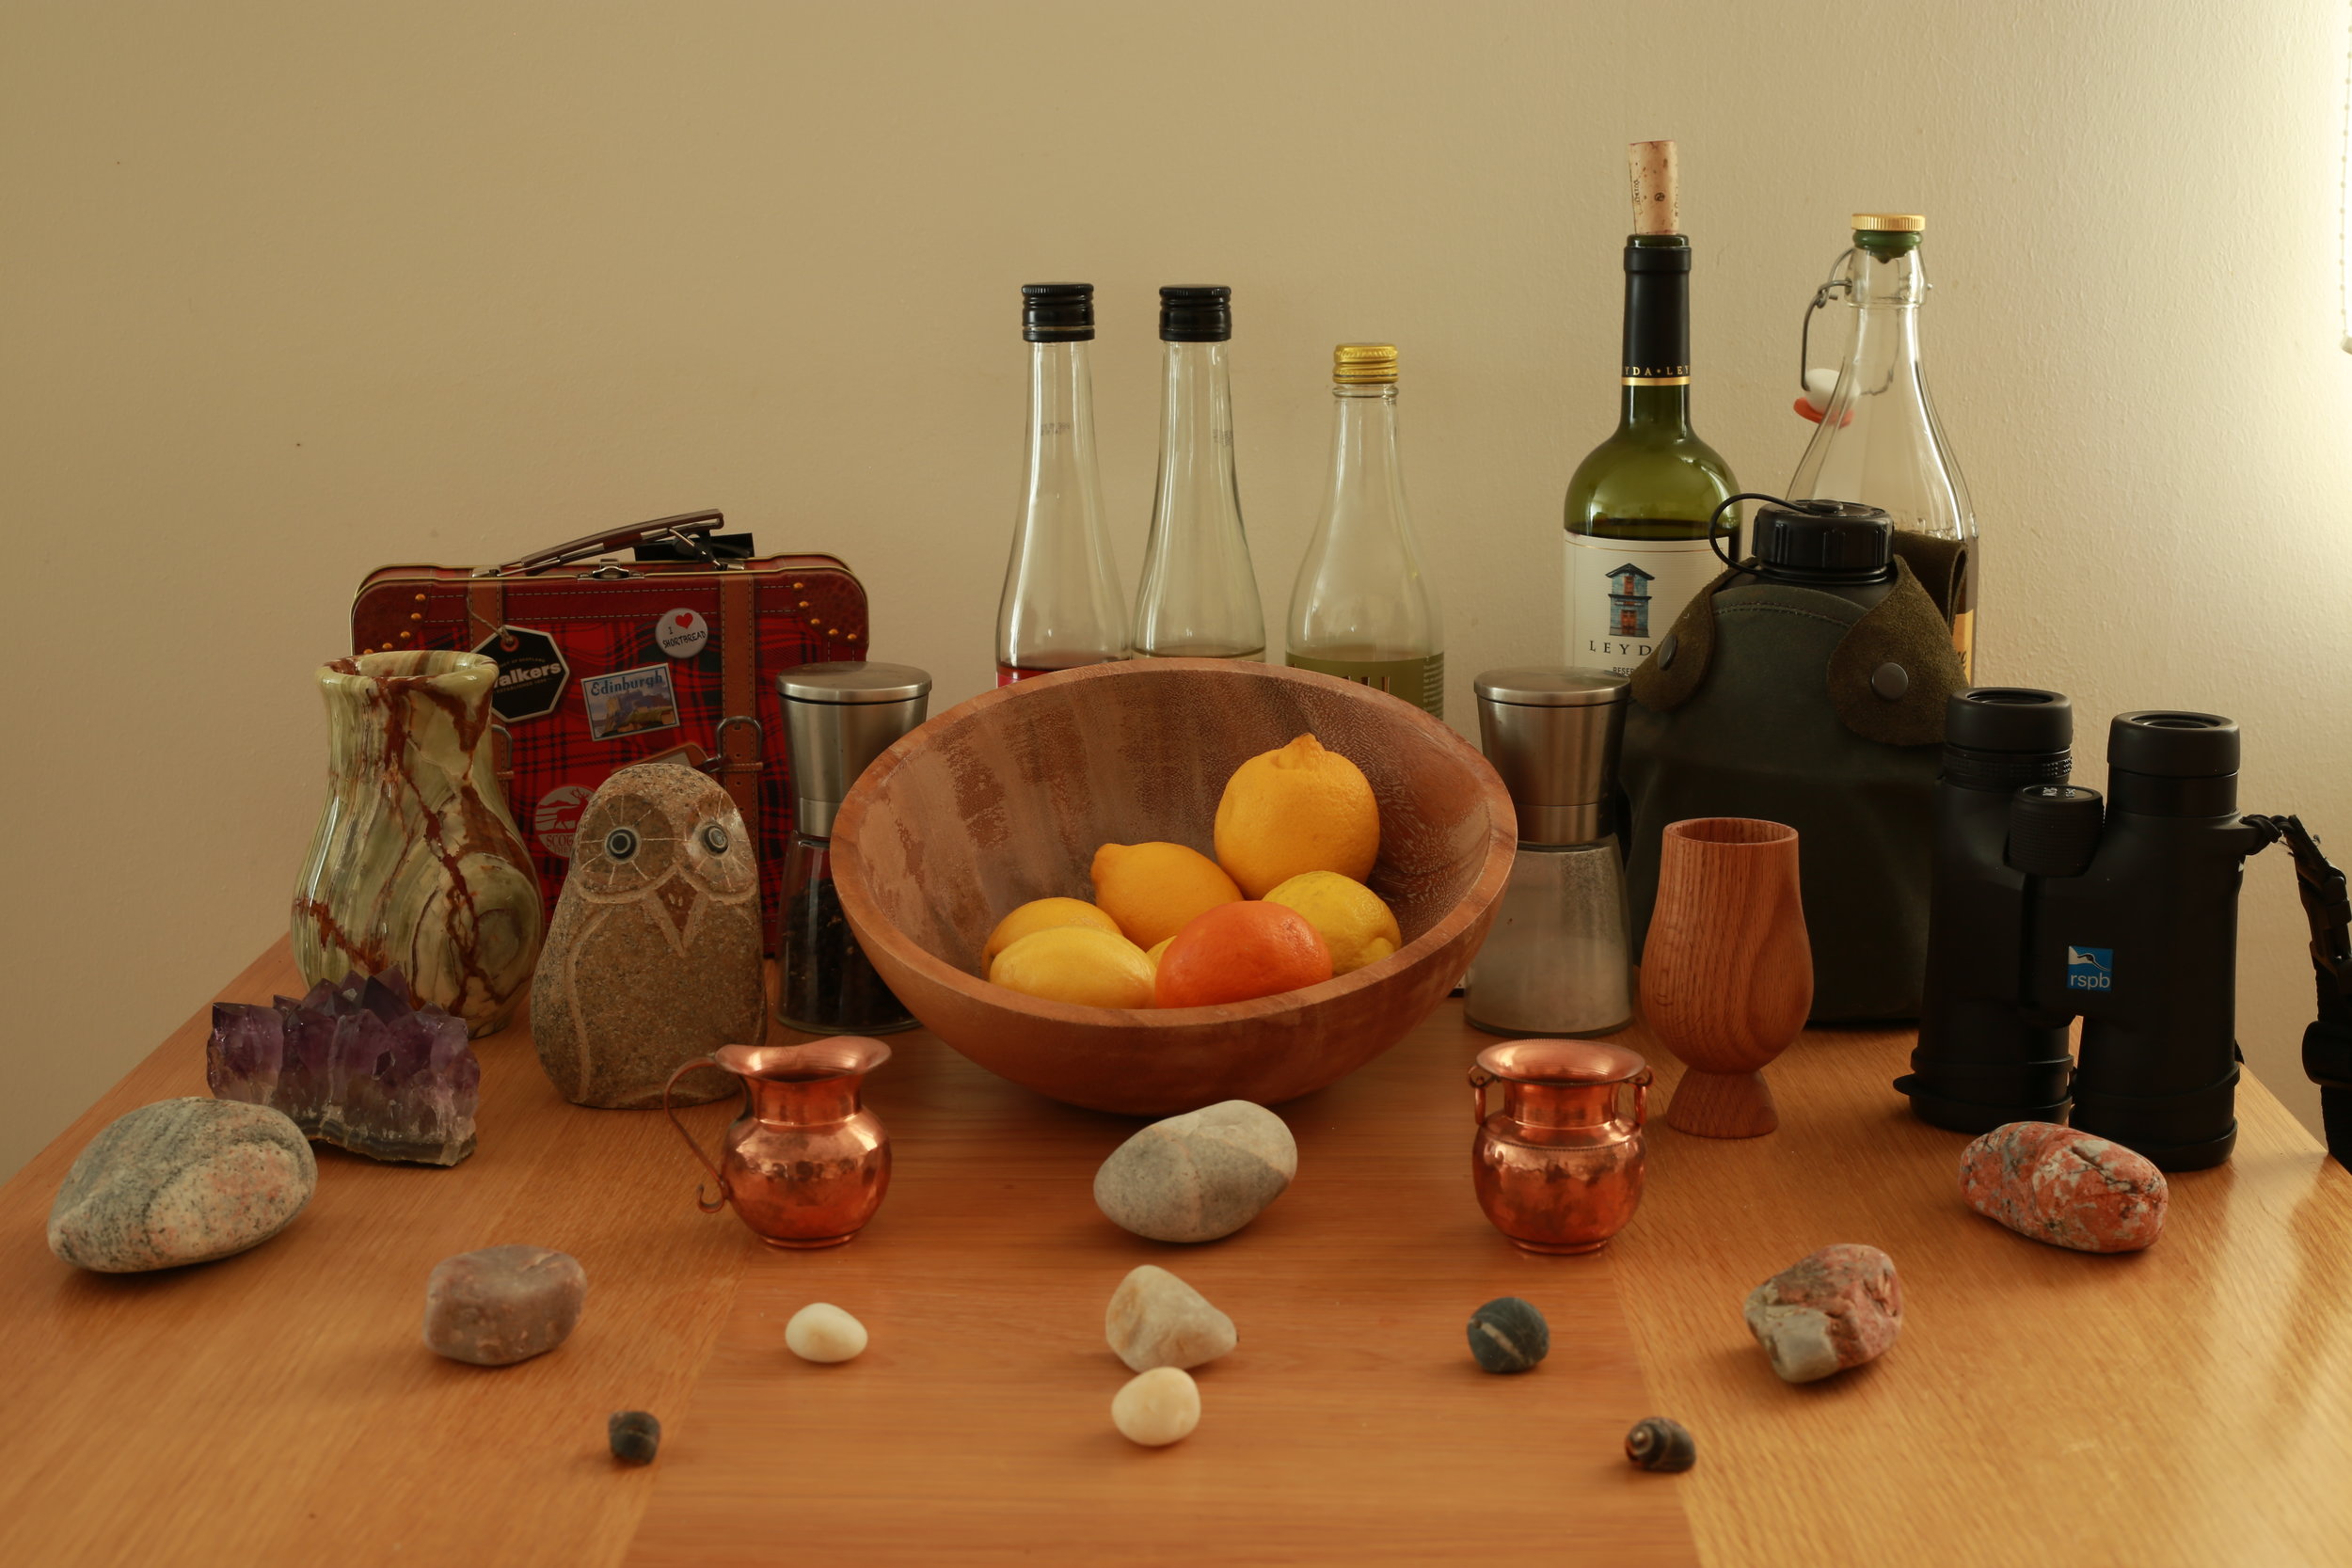
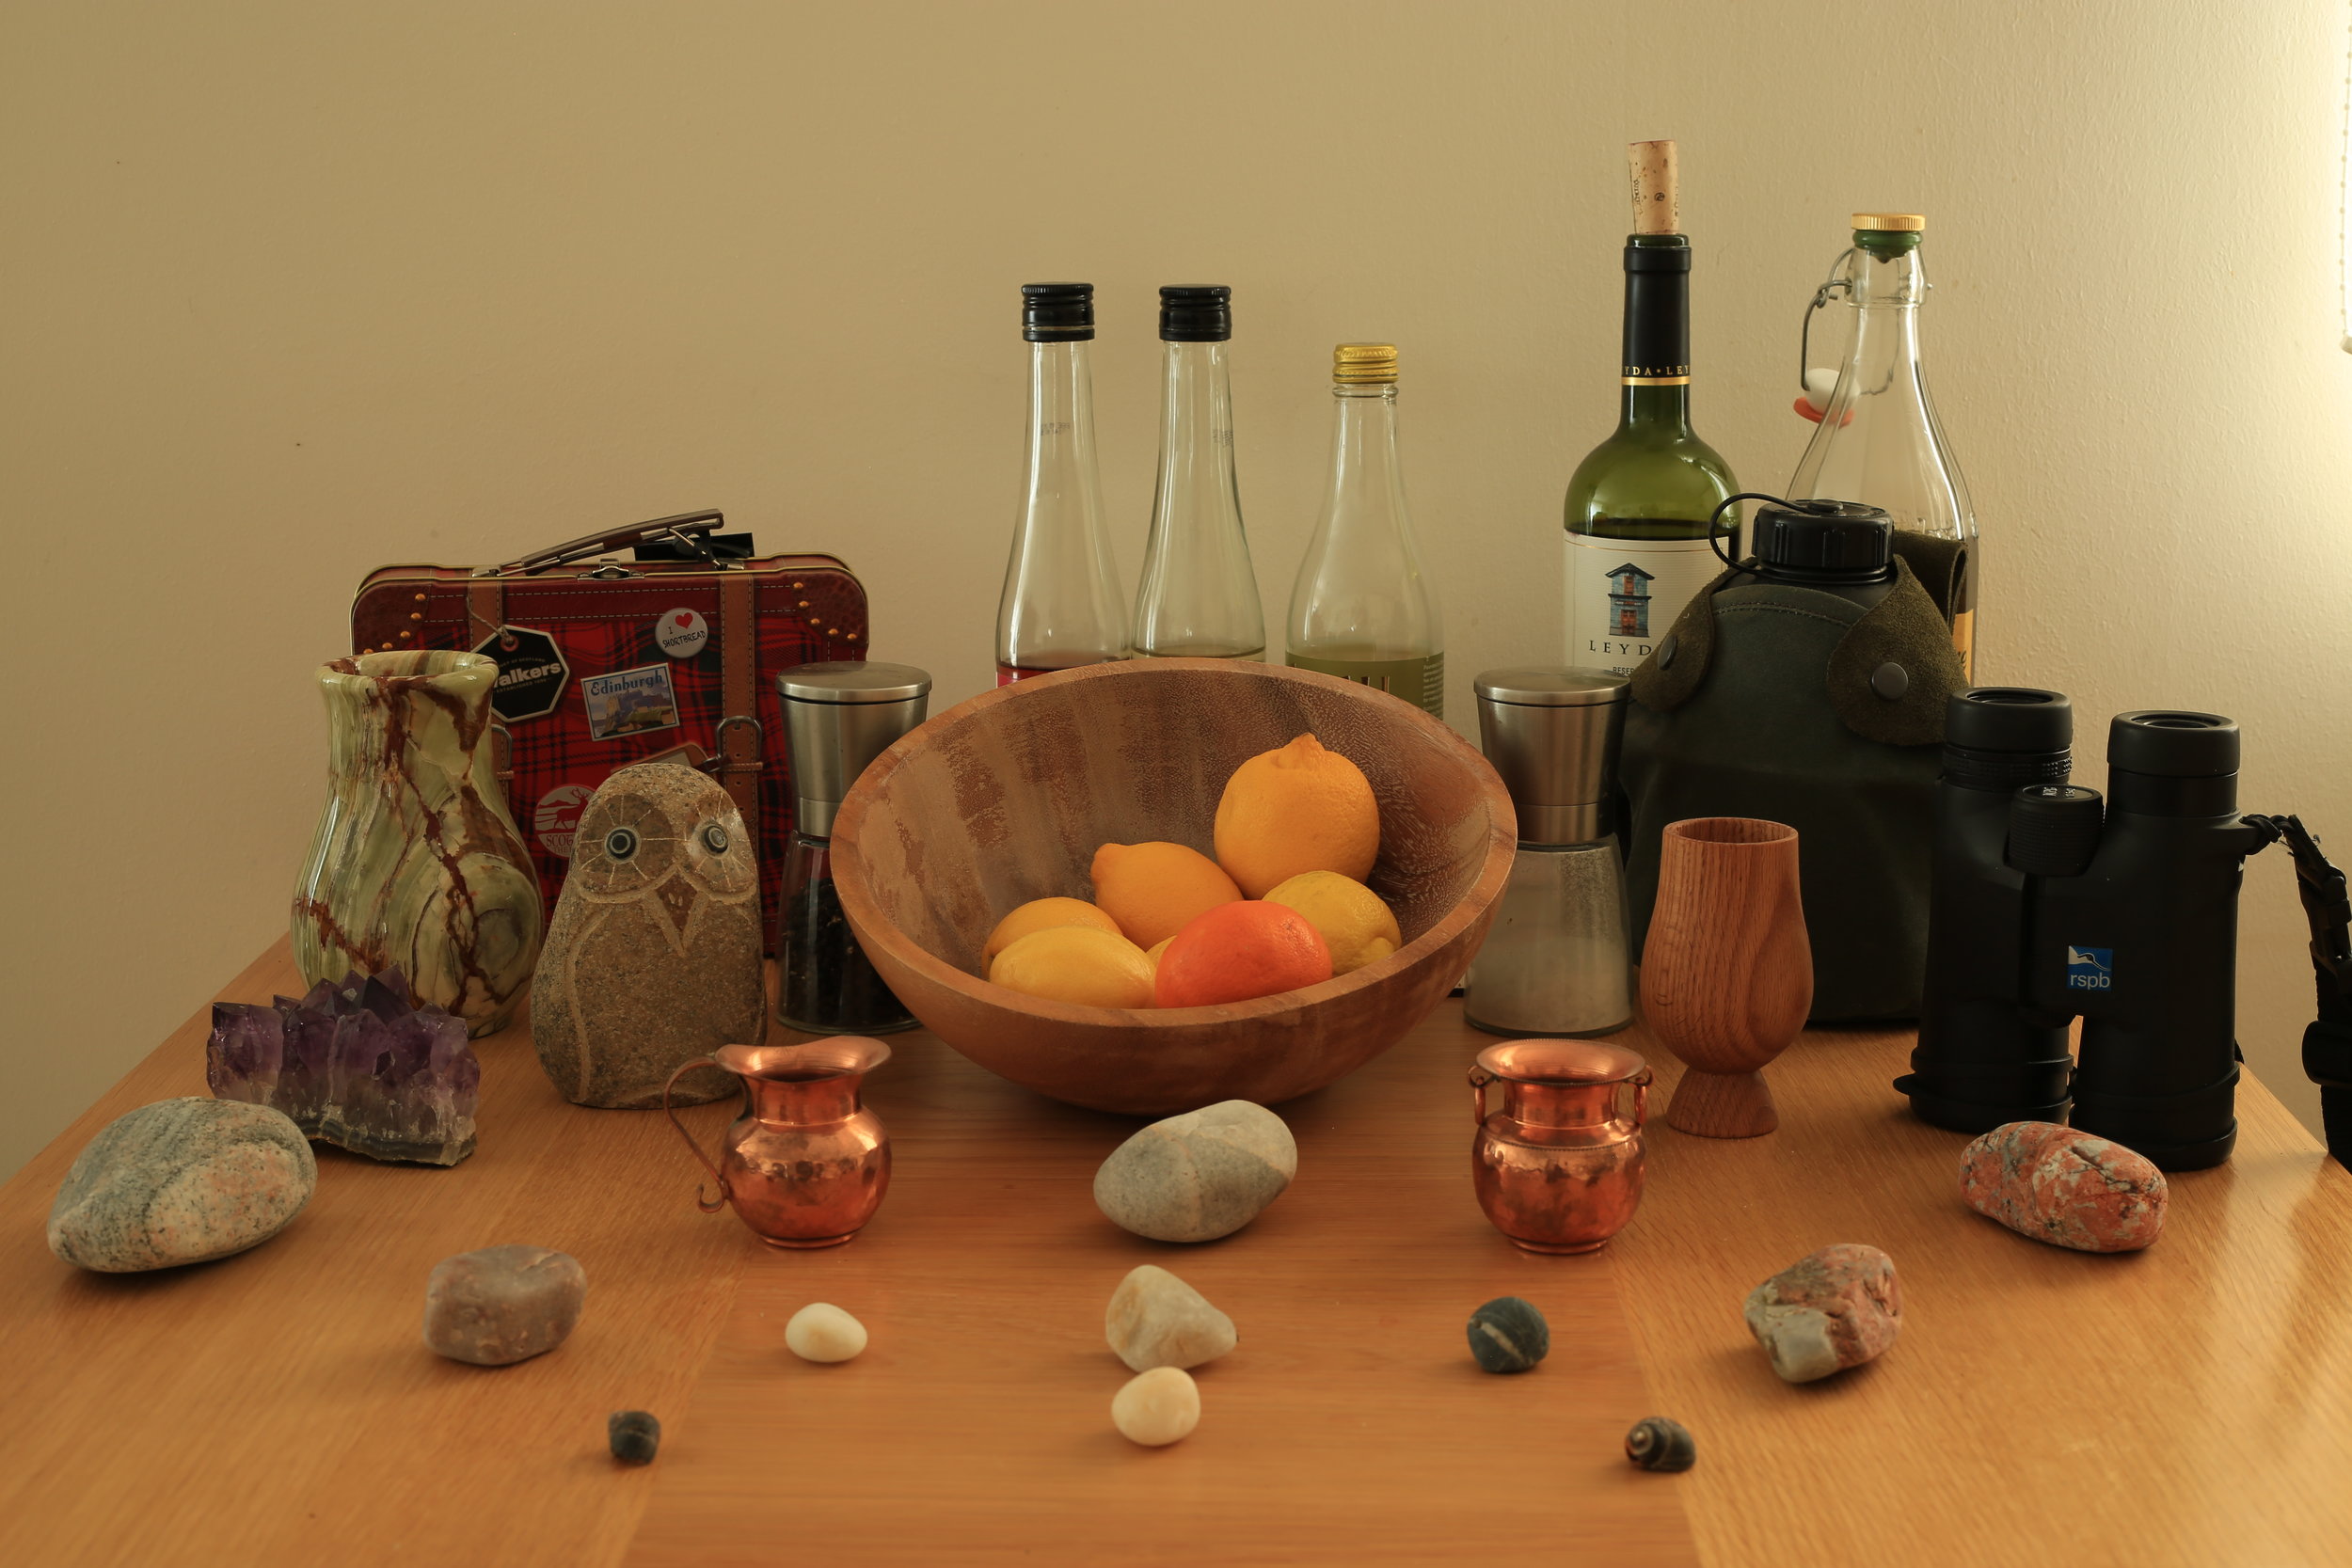
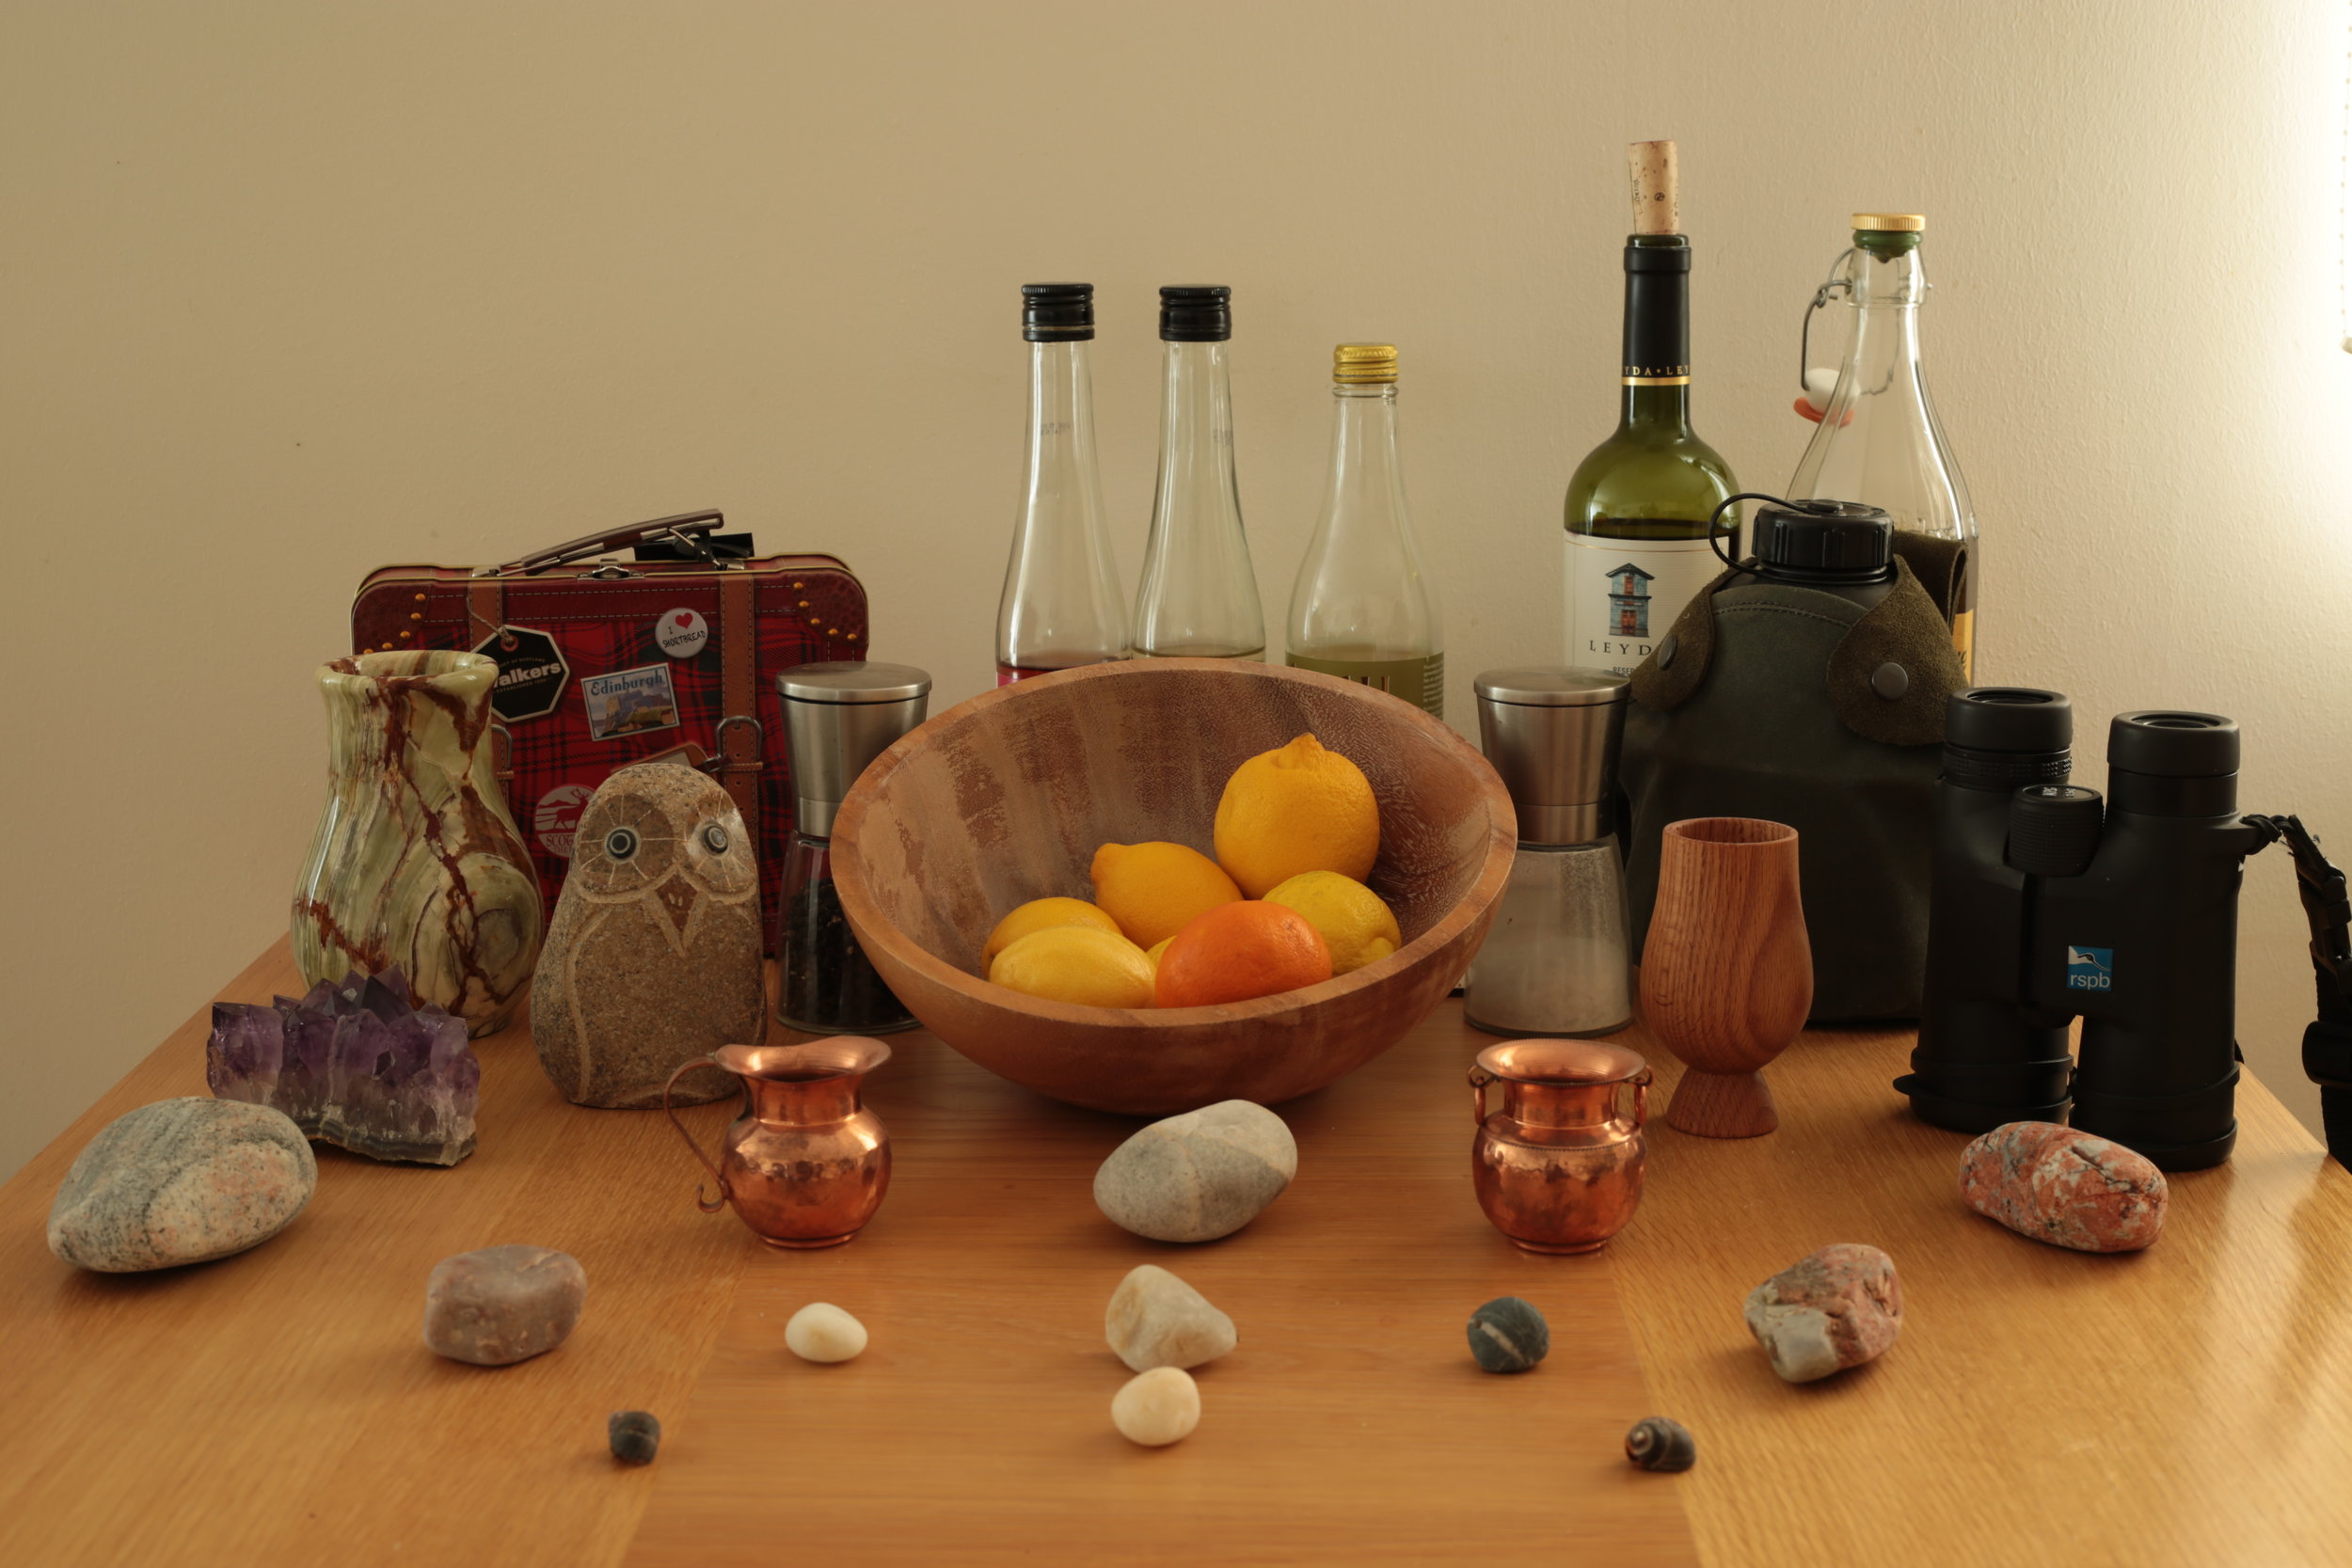
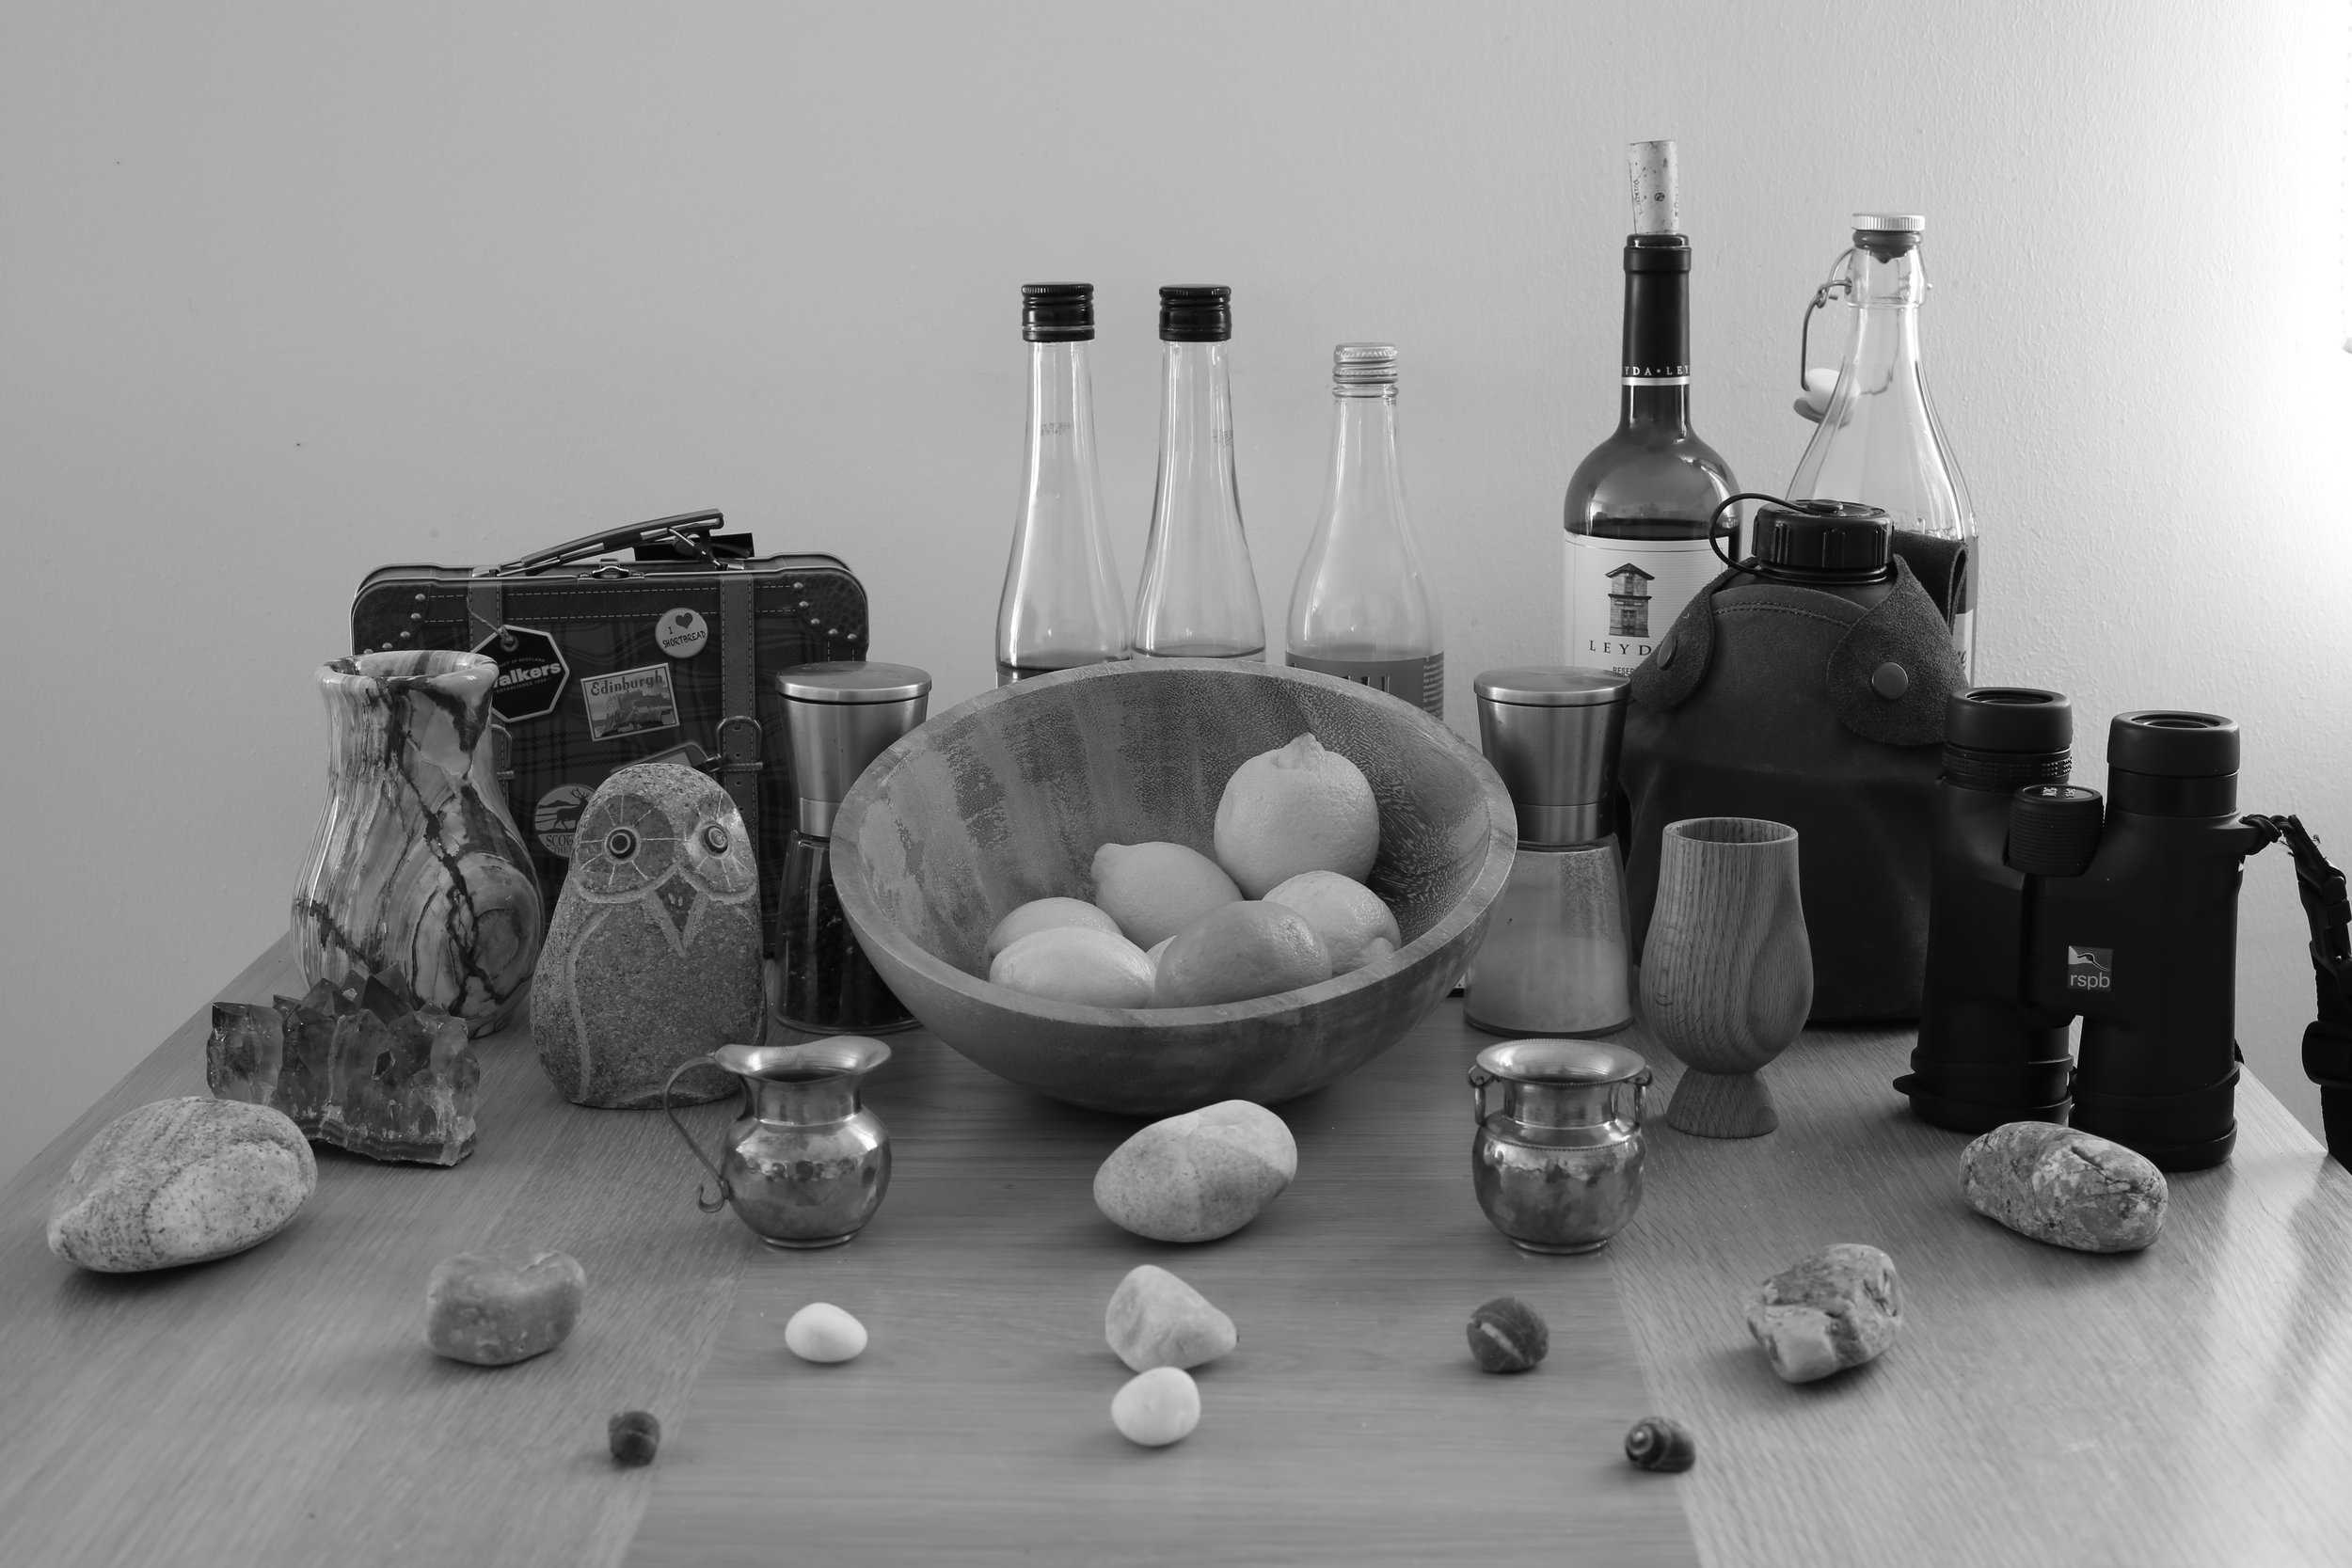
There are 2 ways to go about this challenge: 1 - find a landscape near by that has a strong foreground, middle ground, and background; or 2 - on a table set up a range of objects spread out creating the same idea of foreground, middle ground, and background.
You might have noticed in the example images above I went for option 2, it’s rather simple and you can do it easily with stuff you have around your home.
So, once you have your location or have assembled your table you will need to put your camera on a tripod and focus on the centre of your composition.
Now that you are all set up, you need to set up your camera.
To make it easy we are going to change the White Balance to a single setting such as Daylight or Cloudy, set the ISO to 100 or 200, and the picture style to Landscape.
Open up your Aperture to the widest setting for the lens you are using, typically f/4, press your autofocus which also meters your image and adjust the shutter speed until you have a correct exposure, then take the image.
Then increase the Aperture by one setting and adjust the Shutter Speed, take an image. Repeat that process until you can’t adjust the aperture any more.
Import and compare all of the images and you should notice the difference.
This is Depth of Field, which I looked at in ‘What the Hell is Depth of Field?’ Depth of field is an important concept to grasp and can impact your images greatly.
You should also make note that when you increase the aperture by a setting you also need to decrease the shutter, meaning that the sensor is exposed to light for longer. That’s because there is less light coming into the camera and so it takes longer for the sensor to be activated by the light and record an image.


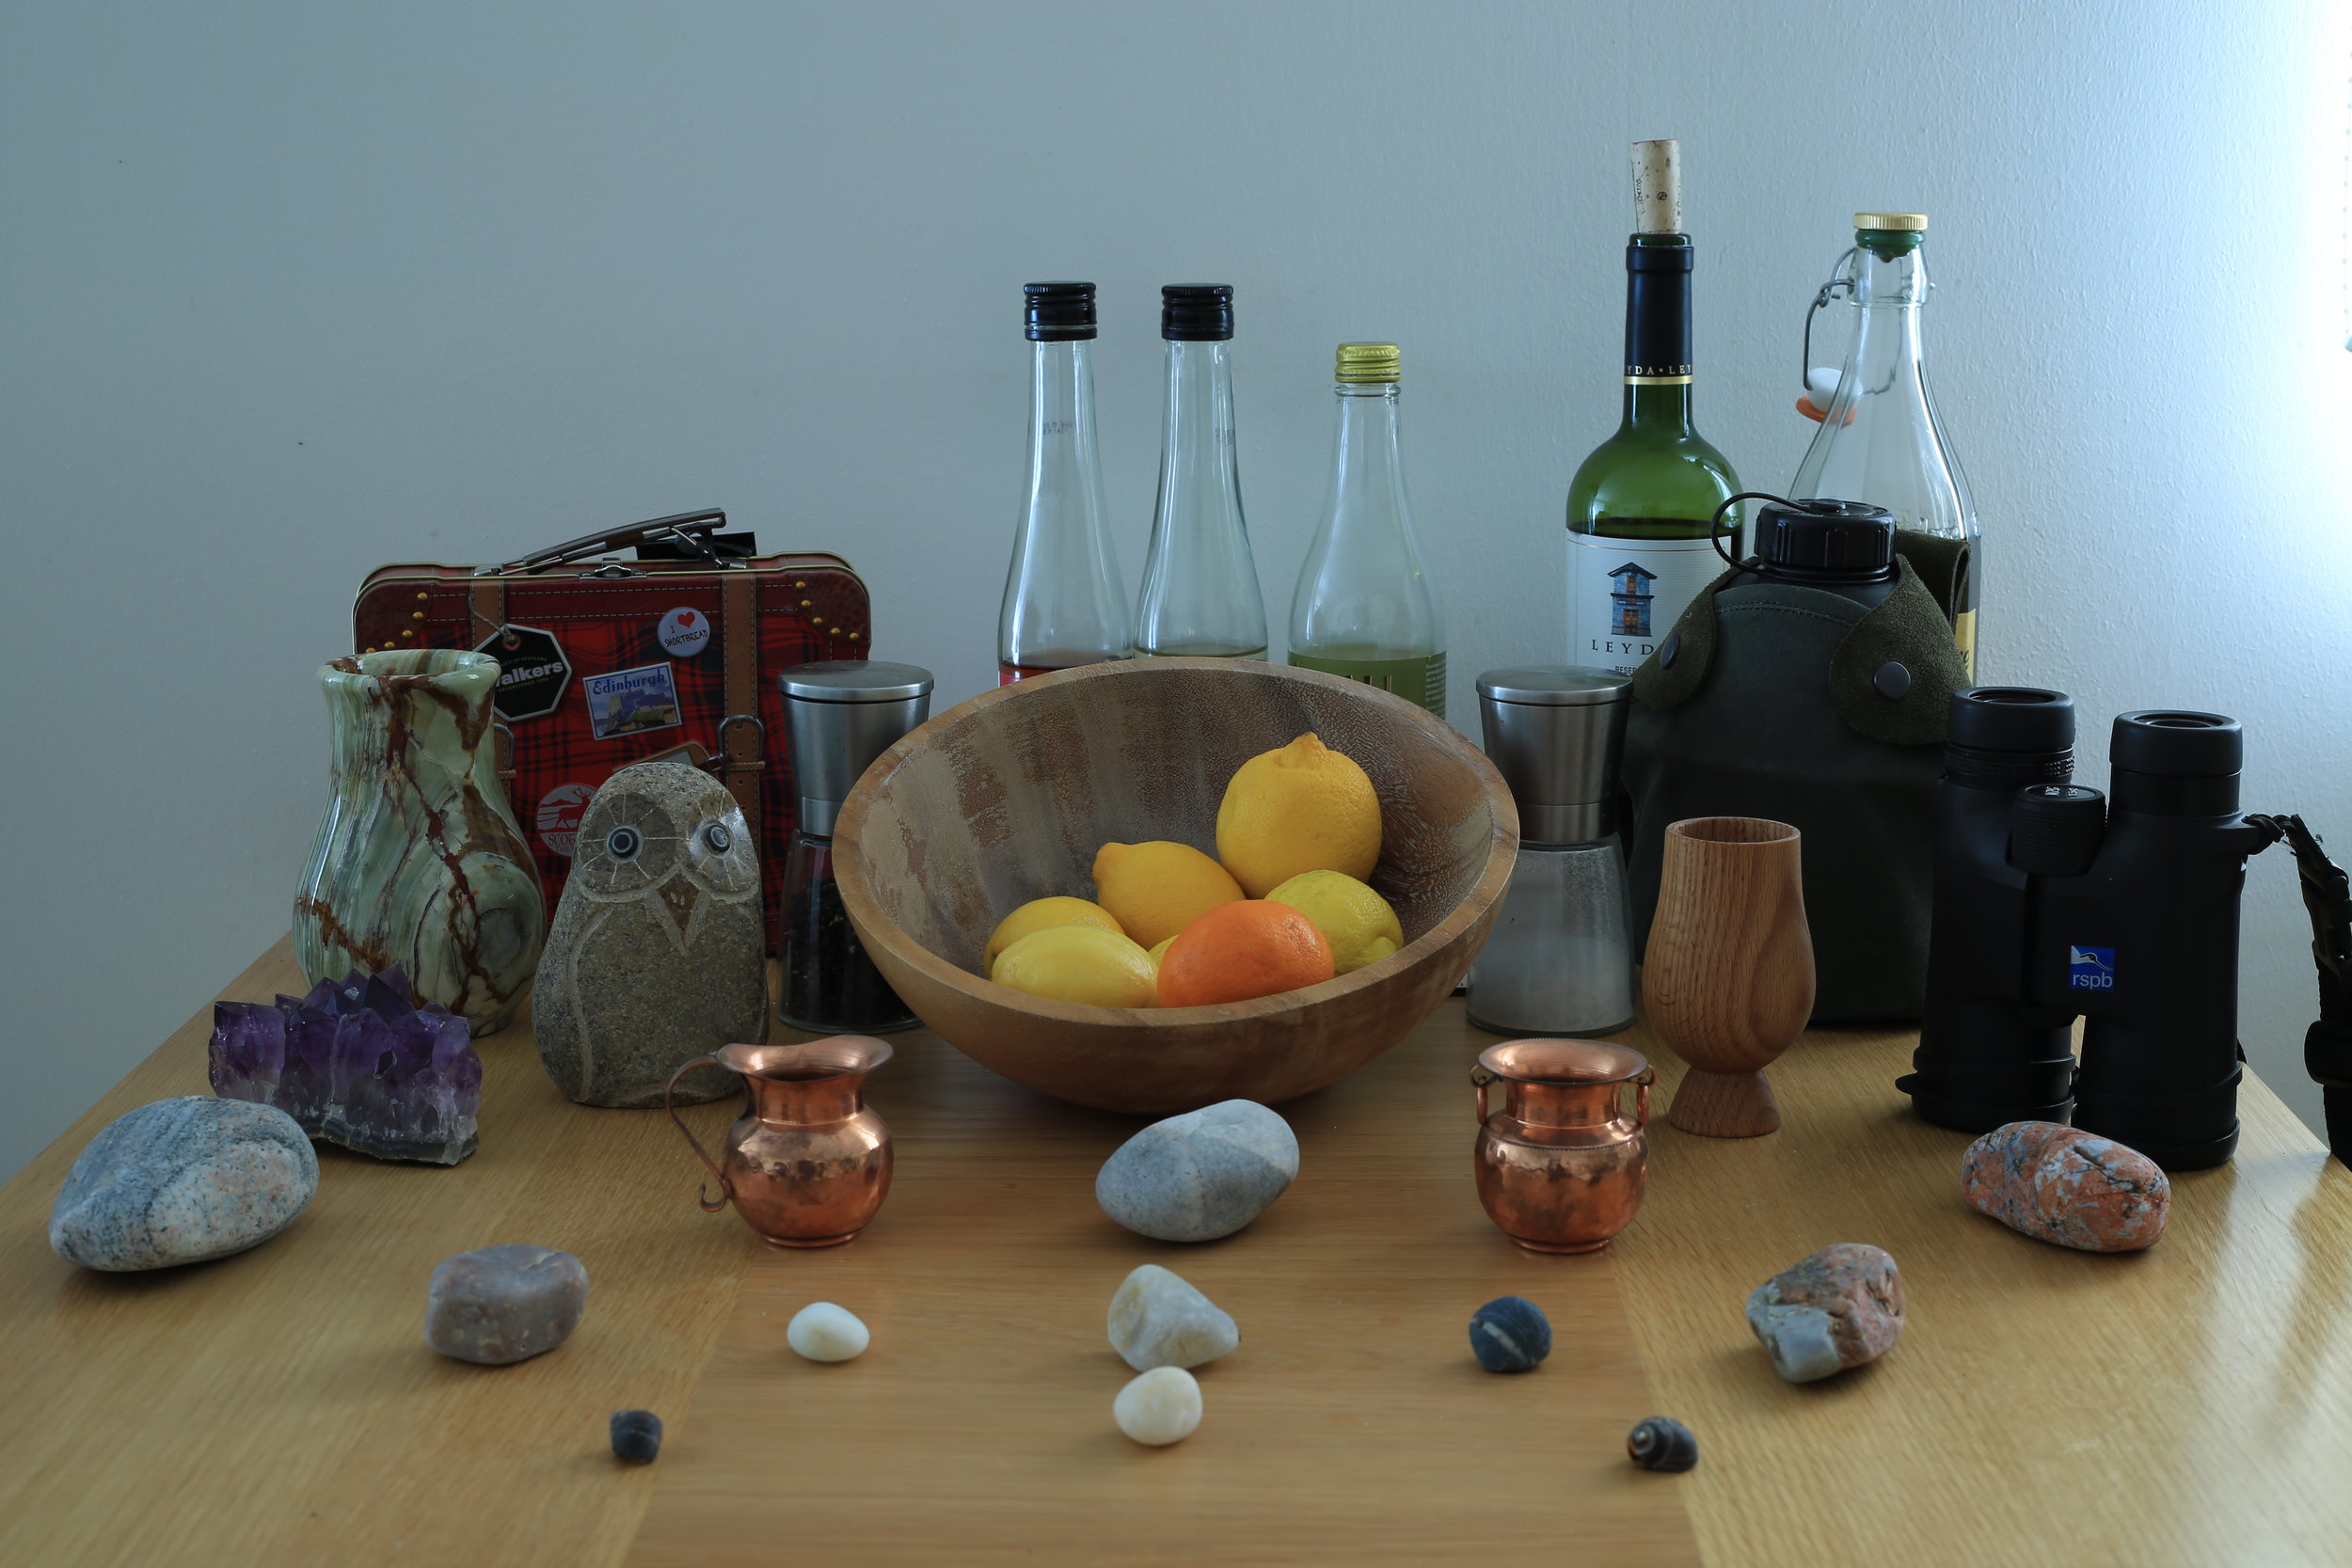
ISO Challenge
Using the same set up above either the landscape or table of objects, with your camera on the tripod set all of the settings to White Balance - Daylight, Picture Style - Landscape, and Aperture - f/10.
This time instead of adjusting the aperture you are going to adjust the ISO with each image. Start at ISO 100 and set the Shutter to get a correct exposure and take the image.
Change the ISO by one setting, adjust the shutter and take the image.
Repeat this process until you can’t adjust the ISO any more. Import and compare all of the images.
In this set of images the Depth of Field will not changed but instead you should notice that as the ISO number increases, the image gets “grainier”. It looks more and more like there is a filter of sand over the image.
I’m not going to explain why here and now, but I’ll write a future article on what is ISO. The important thing to take notice of is the grainy look of the image and the fact that as the ISO gets higher, the shutter speed gets faster.
A higher ISO means that in darker conditions you can take a fast image but the cost is the grainy texture it gives your images.
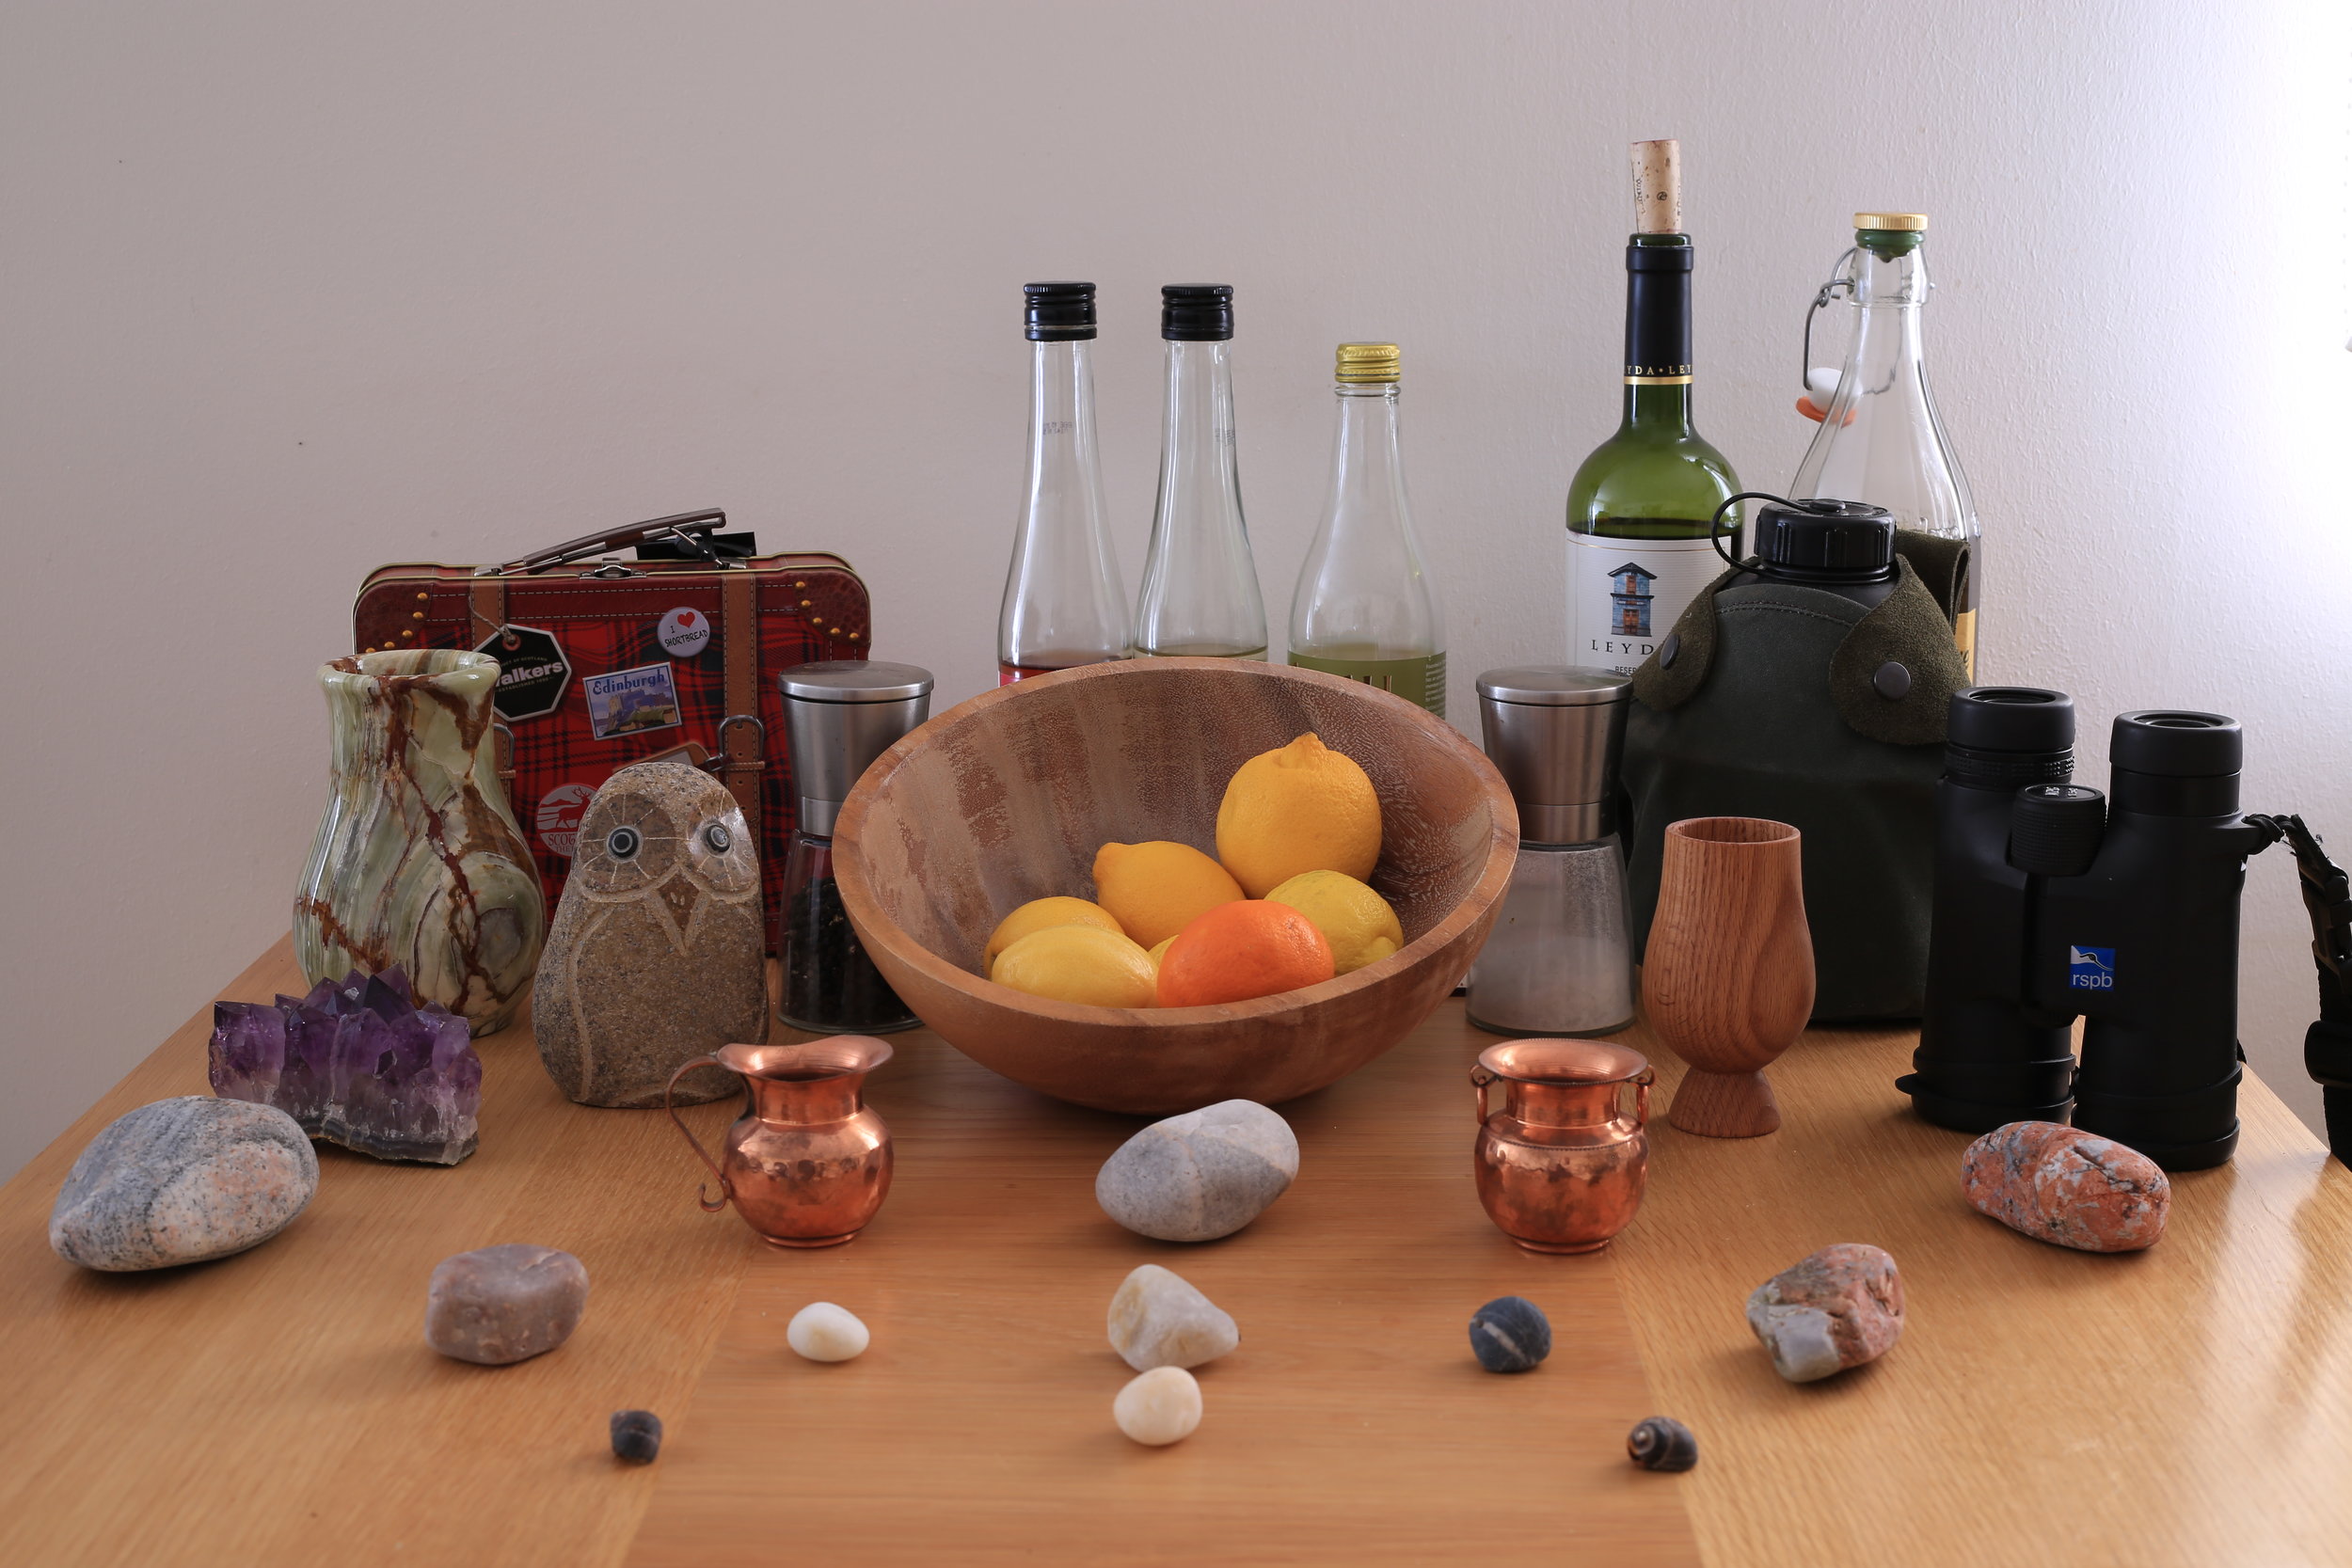
White Balance Challenge
For this challenge you can keep using the table set up, but it may be better to use a landscape scene as the landscape should have a more dynamic colour range.
With the camera on your tripod set the ISO to 100 or 200, the Aperture to f/10 and Picture Style to Landscape, use your meter to find the correct Shutter Speed and set it.
Now adjust your white balance, pick a setting take an image, and then repeat.
All the other settings should stay the same and it shouldn’t take you long to get all of your images.
The White Balance will not affect how fast the shutter closes or the depth of field. But what is does is adjust the temperature/colour of the image from cold/blue to warm/orange.
Each of the White Balance choices changes the temperature in a different way.
Remember, if you shoot in RAW, when you import the image the white balance will be changed to neutral and you can adjust it in your processing software.

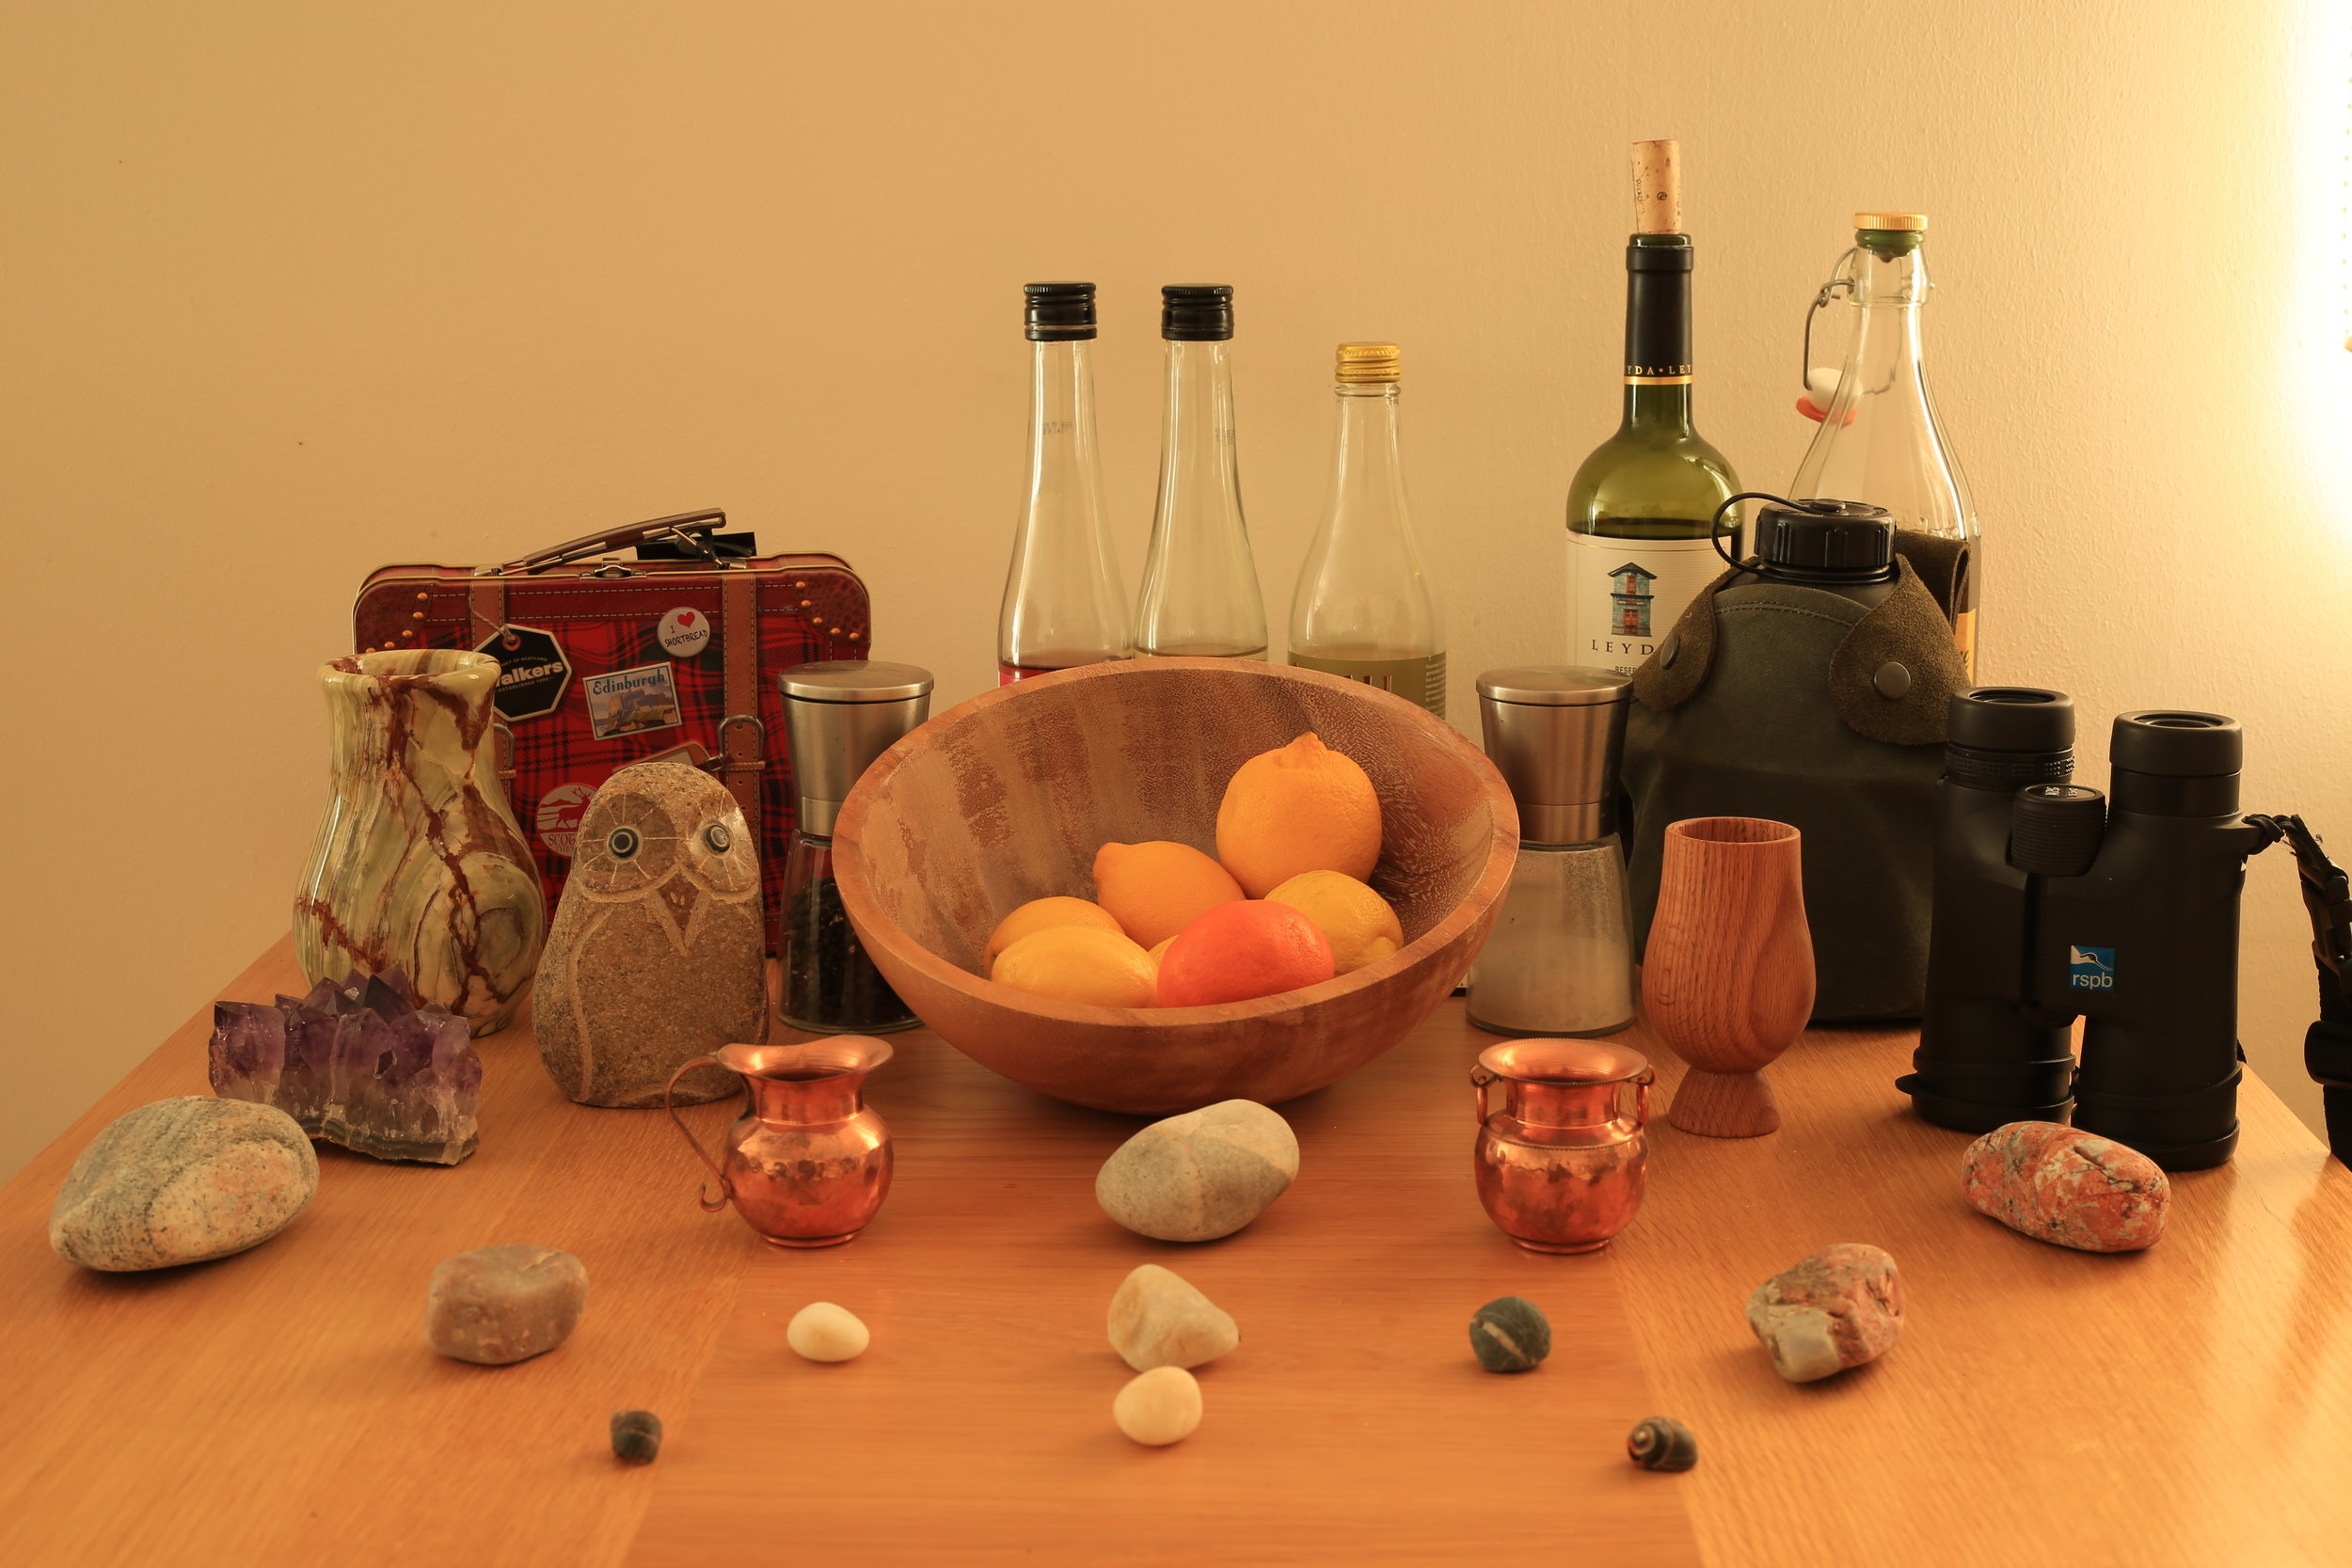
Picture Style Challenge
Same as the White Balance challenge, you can use your table set up, but it might be better to use a landscape scene nearby to see the changes with the dynamic colour range.
You can use the same settings of the white balance challenge, ISO - 100/200, Aperture - f/10, and White Balance - Daylight.
Meter your scene to find the correct Shutter Speed, set it and leave it alone, as this is a style difference and should not affect the shutter speed.
Then pick a Picture Style, take an image, and repeat through all the available settings. Picture Style affects 4 different things: Sharpness, Contrast, Saturation, and Colour Tone.
This means that each setting has a strong effect on your images when shooting in JPEG. Import the images and notice all of the differences that each setting imparts on the image.
Remember, like White Balance, if you shoot in RAW then the Picture Style settings will be removed and you will need to adjust the settings in your processing software.
Conclusion
This challenge is quite a large one, but it is designed to get you to understand the different settings available in Manual Mode and how each setting affects your images.
If you are using RAW then the most important settings for your creative style is Aperture and ISO, as these affect the actual image capture.
The other 2 settings will be rendered neutral when importing RAW images, but they can be useful as references for when you are editing your RAW images.
I hope that for this challenge you changed from RAW to JPEG so that you can see the differences each setting gives your JPEG preview.
Learning to adjust all of these settings is an important step in learning photography. And I hope that this challenge has helped you.
This is a challenge so after reading through my examples and ideas, I want you to have a go and get some great images to learn the differences between the settings. The best examples I will include in a future article, with links to the creator’s social media/website. Show me what you can do by sending your photos to me at:
E-mail: info@drlphotography.co.uk
Disclaimer
All images shared with me will remain the property of the creator and will only be displayed with their permission. If you wish to use your own watermark to protect your images and show your brand, then please do. Anyone that has a go at the challenge and communicates with me, shall get a personal response and I hope we can discuss photography more. Your images will never be sold by me or anyone associated with this site. They are your images.
These photography challenges are about creating a community and inspiring creativity for you (my readers) and for myself. It is meant as a way of inspiring each other, critiquing each other and discussing new techniques and ideas.
Related Articles


Written by Daniel Long
Daniel Long created DRL Photography as a place to showcase his work as a photographer. Daniel has learnt a lot about photography and wishes to impart this knowledge with you, although the world is an ever changing place and he always says “you can never learn everything.” So as he makes his way, he continues to learn knew techniques, skills and information about photography. He focuses on Landscape and Wildlife photography and Daniel has a special focus on Scotland, his home away from home. As well as writing about photography and taking pictures out in the field, Daniel offers guided photography days so he can share his knowledge and locations in an effort to give his clients the best opportunities possible. Have a browse around this website to see his images, guided experiences and articles about photography. If you have any questions don’t hesitate to get in contact.