


5 Lightroom Tools to Improve Your Photography | Lightroom Editing for Beginners
Show Notes
A simple editing guide of 5 Lightroom tools I wish I knew about sooner. Once I discovered these 5 tools my editing drastically improved and to demonstrate their usefulness, I’ve selected some images from my archive that are terrible!
I went through my old photos and specifically chose images that I didn’t edit at the time of taking them because I couldn’t get them to look the way that I wanted them to, but with these 5 tools I’ve managed to create some photos from ones that I thought were useless.
If you can learn these 5 Lightroom tools you will be able to recover a lot more of your images! I give some simple Lightroom editing tips for beginners because I wish I knew these when I first came to editing my photography.
The 5 tools I talk about in this video are:
Crop Tool - surprisingly underused as people are worried about losing pixels, but unless you are planning to print your images the size of a wall, the crop tool can be very useful to reframe and recompose after you have taken the image.
HSL Panel - selecting colours and editing them individually can really help your photography, if you are having problems with the saturation slider then you need to look at the HSL panel, you can also use this panel to give your images a certain style by emphasising certain colours in your composition
Brush tool - by far the most important tool in this tutorial because you are moving away from global edits to targeted local adjustments and that can really make your images stand out, by using this masking tool you can target specific areas to make your subjects stand out or darken areas that are distracting, there are endless possibilities to what this tool can accomplish
Gradient filter - just like the brush tool infinitely useful, but where the brush tool requires you to paint it into a specific area, the gradient tool applies the settings to a block of the image depending on where you position it
Luminance masking - this is an advanced technique in photoshop that requires extra software but in Lightroom it is really easy to use and it helps you target areas of your image based on their brightness, or even their colour, and allows you to apply a brush or filter to that area only
With these 5 tools my editing has greatly improved in the last few years and if you are struggling with Lightroom editing then I hope that these 5 tools will help you to improve your editing.
For inspiration, knowledge and fun check out my YouTube channel!
Onto the Images

RAW File
1:1 Crop
TOOL 1 - Crop
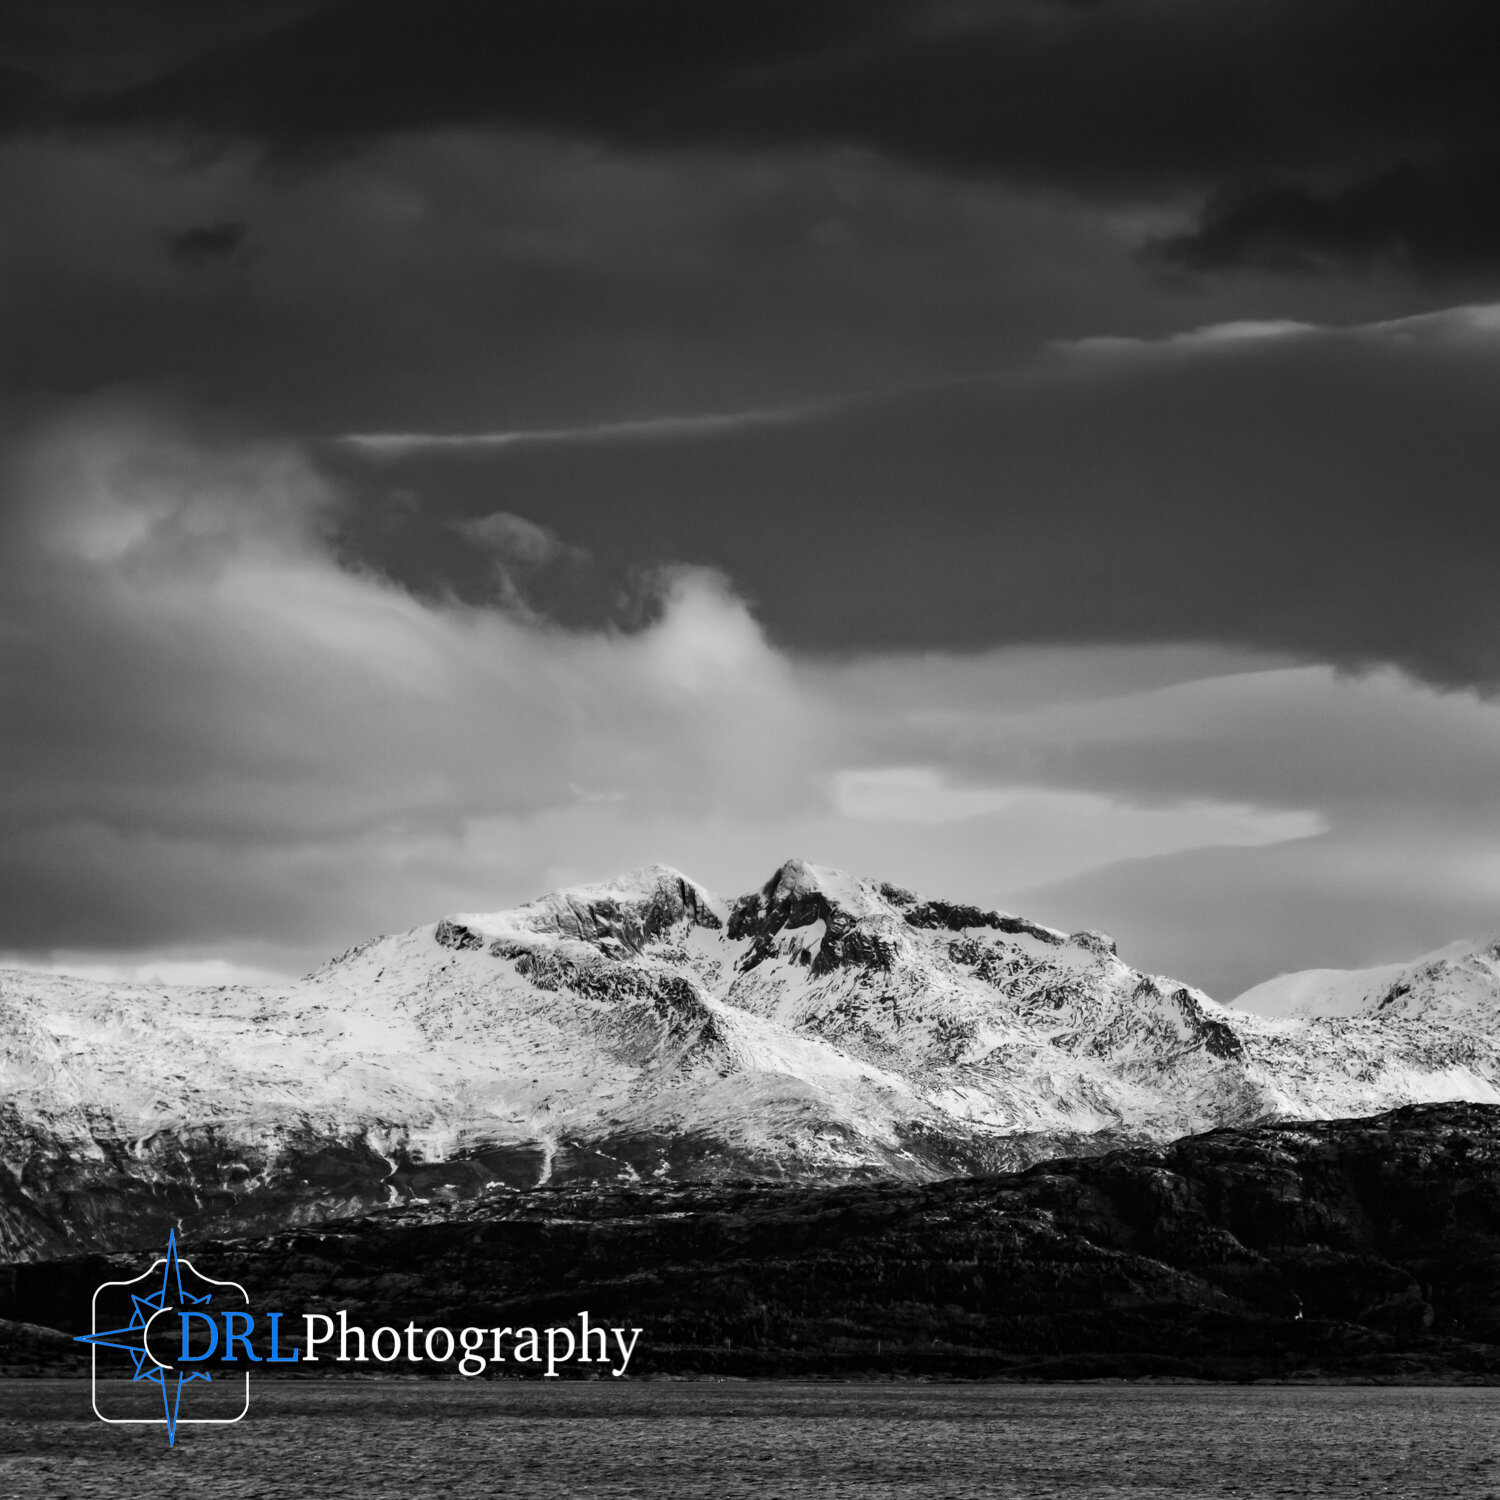
For this tool I chose 3 example images, that’s because it can be a very powerful tool to use to improve your compositions. The above image was taken in 2014 in Norway, obviously from the RAW File you can see that I screwed up the exposure but with some careful editing I managed to recover a decent image.
The biggest impact on the image was reframing the composition by using the crop tool to remove the bland, flat and boring foreground and bringing you as the viewer into the image more. By cropping the image I made the subject of the mountain more prominent and I managed to keep the drama of the sky as well. Let’s look at another example…

RAW File

16:9 Crop
This image from Athens had a good exposure but because it was taken in the middle of the day there wasn’t a lot going on in the sky and the blue expanse above the clouds was actually distracting from the expanse of the city. By applying a 16:9 aspect ratio crop to the image, I removed that blue negative space, brought the clouds to the top of the composition and brought you into the action of the city more. One last example of the Crop tool…

RAW File

Cropping Closer
This last image I didn’t change the aspect ratio of the image instead I used the crop tool to get closer to the subject of the image, the red grouse. The crop tool is by far the most useful tool to use with wildlife photography. Often we are a bit further away from our subject than we like but if we are not afraid to lose megapixels, we can use the crop tool to create a more dynamic composition and bring the subject to the viewer. This image was also used for the next tool…
Tool 2 - HSL Panel
HSL refers to Hue, Saturation and Luminance Panel and it targets the individual colours of an image rather than adjusting every colour in the image. In the image above of the red grouse, I found the greens a little distracting, drawing the attention away from the bird. So I used the HSL Panel to adjust those values reducing the Hue so it is more yellow, reducing the saturation so there is less colour and increasing the Luminance to make the green brighter matching the surroundings of the bird. If you’re curious about the HSL Panel then watch the video!

RAW File

Using the brush tool
Tool 3 - Brush
The Brush Tool is by far the most important tool to learn in Lightroom, and if you are only going to take one of these tips then learn this one! My editing drastically improved when I stopped working on my images in a global way, I moved from focusing on the Basics panel in Lightroom and started to adjust individual areas of the image. And that is where the brush tool excels.
The brush tool applies a mask to the area of the image that you paint it and then you can adjust the mask to produce the effect that you want. For example the above image has 3 brushes applied to bring out the details in the sky, landscape and water. Definitely the most useful in Lightroom.
RAW File

Finished Edit
TOOL 4 - Gradient Filter
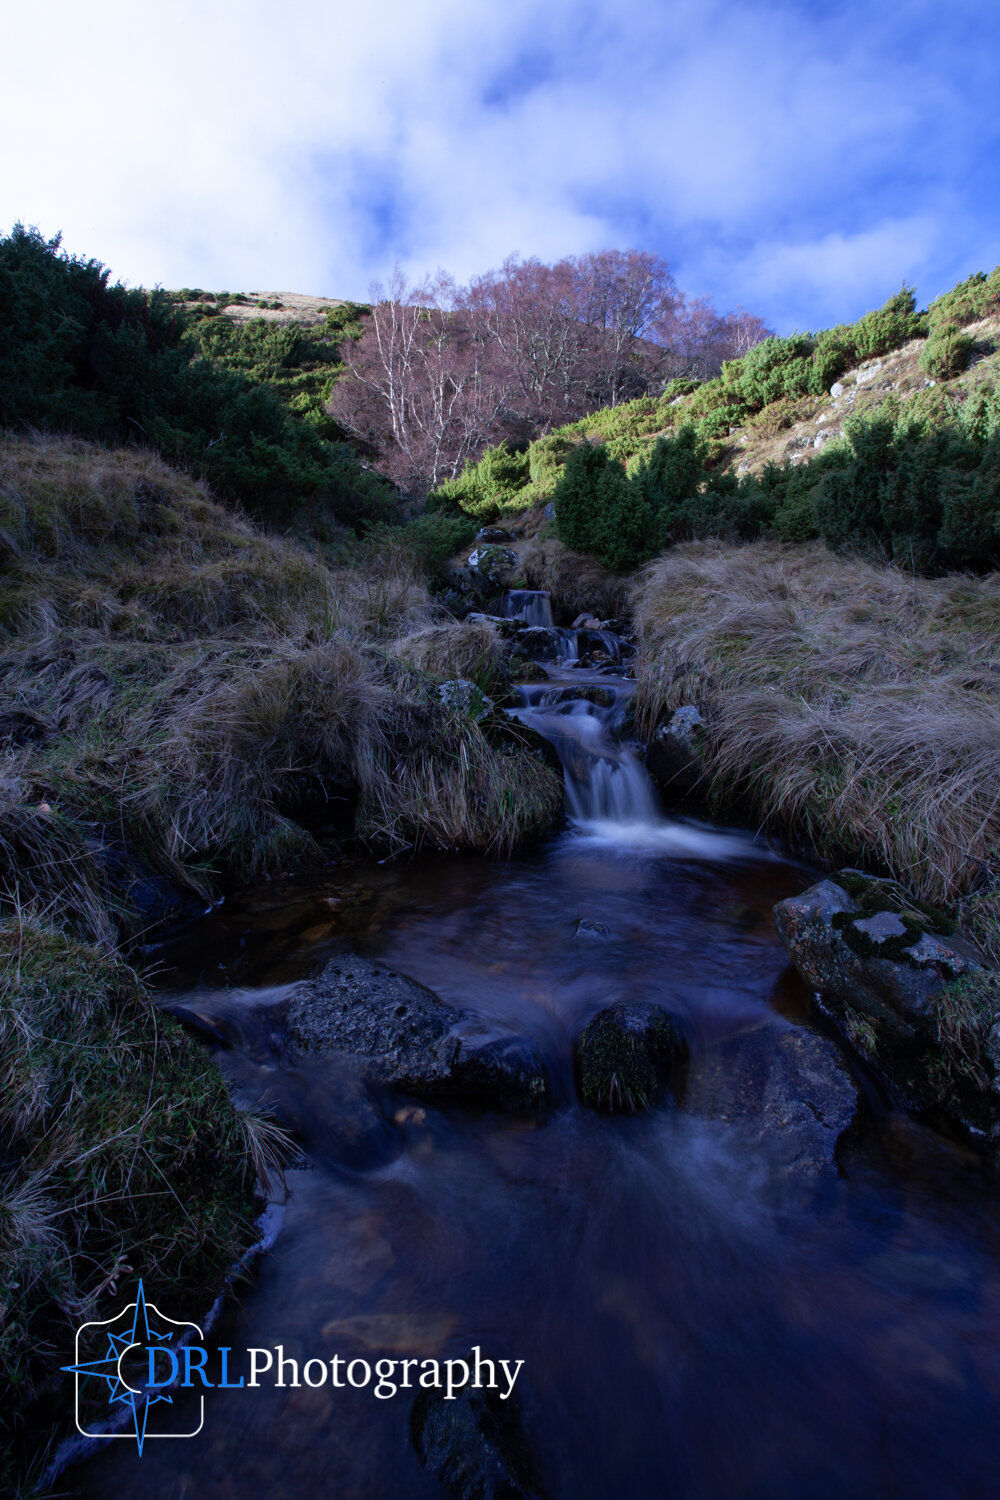
The Gradient Filter Tool is very similar to the brush tool above but the brush tool requires you to paint it on to the image areas that you want to affect, whereas the gradient filter tool affects a block of the image depending on where you draw it. In this image I used 2 gradient filters, one coming up from the bottom to brighten the land and subject of the river, and one coming from the top to darken the sky. I find the gradient tool to be particularly useful in these high contrast situations, and much easier to apply than the brush.
When you have applied a gradient filter tool you can also use a brush to adjust the layer mask of the gradient tool, adding the effect to other areas of the image or even erasing the filter from areas that do not need the filter. Very useful!
TOOL 5 - Luminance Masking
The last tool is not a tool in and of itself instead it is a tool to adjust your layer masks, in particular your brush adjustments and gradient filter adjustments. This tool helps your local adjustment layers to target specific parts of the image more than other parts. Imagine that all of the pixels in the image are bright or dark, and you want to affect the dark pixels more than the light, you can use the luminance mask to target the dark areas of the image more and it will apply the most affect to the dark areas and the lighter areas will be adjusted less. So the above image of the river with which I used gradient filters, I also used luminance masking to better refine which areas are affected. You should watch the video to see how this works!
Conclusion
When I took these images in 2013-14 I couldn’t edit them in a way that the images looked good but through learning these 5 tools and then applying them to these old images I’ve actually breathed a new life into the images. I hope that from these 5 tools you learn something new and will improve your photography editing!
Don’t forget to subscribe to YouTube channel!
About the Film
Just a little information about the film and how I made it, as well as some links to equipment.
I edited the film using the Free Version of DaVinci Resolve. It’s an incredibly powerful piece of software that I am still trying to understand and will possibly write an article about in the future.
All the tracks featured in today’s film were licensed via a subscription with Epidemic Sound, check out their website here: https://www.epidemicsound.com/referral/ba2dau/ (If you follow the link and decide to purchase a subscription with Epidemic Sound then I will receive 2 months free for referring you to their services)
Be Nice by Spring Gang
Now I’m All Yours by Spring Gang
We Fade Away by Deanz
Go All In by Deanz
Hypnotized by Deanz
Doors Unlocked by Deanz
Sidney by Luwaks
A Gentle Invitation by Dawn, Dawn, Dawn
A short Kit List
These are affiliate links, which means if you follow them and make a purchase I will earn a small commission for referring you to Amazon UK. You can find out more about affiliate links here.
Main Vlog Camera is a simple Panasonic G80 with the kit lens, its a great little mirrorless camera that I got for the sole purpose of creating YouTube videos. It’s capable of filming in 4k and seems to do everything that I want it to.
Rode Mic, I got this little microphone to boost the audio quality from the inbuilt microphone.
Action Camera, I use this to film myself when walking. It’s a simple DJI Pocket Osmo camera that has a motorised 3 axis gimbal head, which means that I stay in focus and static while the landscape around me moves. It’s also capable of filming in 4k and the audio quality is quite good.
Voice Recorder, to boost the audio quality when it’s windy or I’m using the action camera I use this handy little voice recorder with a lapellier microphone to record audio.
For a complete Kit List you can read through what equipment I take with me when I go out here.
Related Episodes


Written by Daniel Long
Daniel Long created DRL Photography as a place to showcase his work as a photographer. Daniel has learnt a lot about photography and wishes to impart this knowledge with you, although the world is an ever changing place and he always says “you can never learn everything.” So as he makes his way, he continues to learn knew techniques, skills and information about photography. He focuses on Landscape and Wildlife photography and Daniel has a special focus on Scotland, his home away from home. As well as writing about photography and taking pictures out in the field, Daniel offers guided photography days so he can share his knowledge and locations in an effort to give his clients the best opportunities possible. Have a browse around this website to see his images, guided experiences and articles about photography. If you have any questions don’t hesitate to get in contact.